background image

17

English

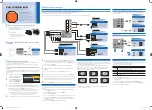
Initial setup

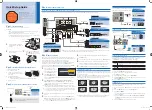
This section will guide you through the unit’s Initial setting which includes 
selecting a Language for your On-screen Menu and Autoprogram, which 
automatically scans and memorizes viewable channels.

Before you begin:

Make sure the unit is connected to an Antenna  or Cable.

1

After making all the necessary connections, press   to Turn On the 
unit.
• It may take a few moments to Turn On the unit for the first time.

Initial setup

 menu appears automatically after the unit is Turned 

On.

2

Use 

ɼɾ

 to select the On-screen language from the choices 

(English / Español / Français) on the right side of the TV Screen, 
then press 

OK

.

3

Use 

ɼɾ

 to select 

Antenna

 for TV channels or 

Cable

 for CATV 

channels, then press 

OK

.

– When 

Antenna

 is selected, the TV detects antenna signals. It 

searches for DTV and Analog TV channels available in your area.

– When 

Cable

 is selected, the TV detects signals supplied by cable. 

It searches for DTV, Analog TV and Cable channels available in 
your area.

Autoprogram

 will begin.

4

Use 

ɼɾ

 to select the desired Location setting, then press 

OK

Home

 is the ENERGY STAR

®

 qualified setting.

• Select 

Retail

, the unit will be set up with predefined setting for 

retail displays. In this setting, the power consumption may 
possibly exceed the limited requirement limit of the ENERGY 
STAR

®

 qualification.

• Select 

Home

, the unit is set to maximize the energy efficiency for 

home setting and it can be adjusted through a choice of Picture 
and Sound quality according to your preference. Use this setting 
to remove the E-sticker if visible from the display. 

 p.30

• When the Initial setup is completed, the lowest memorized 

channel with the confirmation message of the Location setting 
will be displayed on the TV Screen.

• You must set 

Home

 in step 

4

. Otherwise, 

Picture

 and 

Sound


settings you adjusted will not be memorized after the unit goes 
into Standby mode.

After an Initial setup is completed...

• If you want to scan the channels automatically again.

Autoprogram

 p.23

• You can add the desired Cable and Analog channels not 

memorized by Autoprogram.

Add channels

 p.24

• If you want to change to another Language.

Language

 p.30

• If you want to change the Location setting.

Location

 p.30

These operations are accessible by Remote Control.

Some may also be accessible by control panel on the main unit.


Initial setup

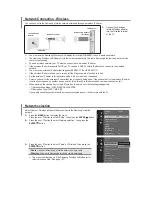
Make sure the antenna is connected to “ANTENNA IN’’ jack.
Select your signal source.

Antenna

Cable

Skip

ANTENNA IN

Antenna

Cable

Or

Back

Skip

OK

Select

Initial setup

Please wait while the system is scanning for channels.
Auto programming may take more than 20 minutes to
complete.

Digital channels

Analog channels

0 ch

0 ch

Skip

Note(s)

• If you are not receiving a signal from your cable service, contact the Cable provider.
• If you press 

 or 

TV MENU

 during Autoprogram, this setup of TV channels will be 

Cancelled.

• The Initial Autoprogram function can be executed for either 

Antenna

 or 

Cable

 only 

once. When you change the connection (Antenna / Cable), select  

Autoprogram


again. 

 p.23

• If there is no signal Input from the Antenna terminal and no operation for several 

seconds after you Turn On the unit, Helpful hints appears. Follow the instructions 

listed on the TV Screen.


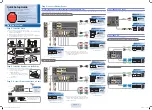
Retail

Home

Initial setup

Location Home is recommended for normal home use
and is ENERGY STAR qualified.
In the Retail Store mode, all settings are fixed.

OK

Select

Initial setup

Retry

Later

Skip

OK

Select

No channel is registered.
Try Autoprogram again?
Verify that you have a cable connected to the “ANTENNA IN” jack
on the back of the TV, the channel installation process
searches this connection. If you are using a cable or satellite
box, please confirm the input which you have connected to
the box and press “SOURCE” key on the remote control to
select the appropriate source input.

Summary of Contents for 28MD403V

Page 1: ...Manual Manual del Propietario Manuel du Propri taire 1 866 341 3738 www magnavox com support Necesita ayuda inmediata 1 866 341 3738 www magnavox com support 1 866 341 3738 www magnavox com support 2...
Page 2: ...ion 15 Composite Analog Video Connection 16 Digital Audio Output Connection 16 PC connection 16 Initial setup 17 4 Use your TV 18 Switching on your TV or putting it in Standby mode 18 Adjusting volume...

Page 3: ...35 Playback 36 Disc Menu 36 Resume Playback 36 Paused and Step by Step Playback 36 Fast Forward Fast Reverse 36 Slow Forward Slow Reverse 36 Zoom 37 Search Functions 37 Repeat Playback 37 Repeat A B P...

Page 4: ...king home entertainment safe and enjoyable As you enjoy your television please note that all televisions new and old must be supported on proper stands or installed according to the manufacturer s rec...

Page 5: ...ll the CATV system installer s attention to Article 820 40 of the NEC that provides guidelines for proper grounding and in particular speci es that the cable ground shall be connected to the grounding...

Page 6: ...o guarantee that interference will not occur in a particular installation If this equipment does cause harmful interference to radio or television reception which can be determined by turning the equi...

Page 7: ...are heavy 2 people are required to carry and handle a large screenTV Make sure to hold the upper and bottom frames of the unit firmly as illustrated Install the unit in a horizontal and stable positio...

Page 8: ...the like WARNING To prevent injury this apparatus must be securely attached to the furniture wall in accordance with the instructions Tipping shaking or rocking the unit may cause injury death The pa...

Page 9: ...other Digital Audio systems Headphone Audio Output Headphone 3 5mm stereo jack for personal listening Dolby Digital Sound Enjoy Dolby Digital multi channel surround sound when you connect the unit to...

Page 10: ...line found on the cover of this Owner s Manual When using a Universal Remote Control to operate this unit Make sure the component code on your Universal Remote Control is set to our brand Refer to th...

Page 11: ...s 1 Slide the battery cover off the back of the Remote Control 2 Insert the 2 supplied batteries AAA 1 5V Be sure the and ends of the batteries line up with the markings inside the case 3 Slide the co...

Page 12: ...reen Menu items l TV MENU Opens the Main On screen Menu m EJECT Ejects a Disc from the Disc Slot n SAP AUDIO Selects Audio mode MONO STEREO SAP Audio language o CLEAR Clears the numbers entered incorr...

Page 13: ...onnection Analog Audio L R jacks signal with Stereo mini 3 5mm plug Audio Cable on PC n HDMI Input jack Digital audio and video Input from high definition Digital devices such as DVD Blu ray disc play...

Page 14: ...t www antennaweb org for further information Depending on your antenna system you may need different types of combiners mixers or separators splitters for HDTV signal The minimum RF bandpass on these...

Page 15: ...ssary cables at your local store Note s MAGNAVOX HDMI supports HDCP High bandwidth Digital Contents Protection HDCP is a form of Digital Rights Management that protects high definition content in Blu...

Page 16: ...ormats or non standard signals will not be displayed correctly Note s Only the left loudspeaker reproduces sound for mono equipment Use a mono to stereo adapter not supplied for sound reproduction via...

Page 17: ...d settings you adjusted will not be memorized after the unit goes into Standby mode After an Initial setup is completed If you want to scan the channels automatically again Autoprogram p 23 You can ad...

Page 18: ...by a dot and the corresponding sub channel number When selecting Digital channel 11 1 Be sure to press before entering the subchannel number When selecting cable or Analog channel 11 Press PREV CH to...

Page 19: ...the currently selected Language and the number of available Languages 2 Press SAP AUDIO repeatedly to cycle through the available Audio Languages 1 Press SAP AUDIO to display the currently selected A...

Page 20: ...l and vertical ratio Wide Horizontally stretched picture This crops out the left and right sides of the picture Normal Original size Sidebars appear on both edges of the screen 16 9 Stretched horizont...

Page 21: ...re Sound Setup Features Language Auto picture Backlight Contrast Brightness Color Tint Advanced settings Sharpness 18 Personal 50 30 30 0 2 p 22 Adjusting the Picture Mode or customize the Picture qua...

Page 22: ...Setup Features Language Auto picture Backlight Contrast Brightness Color Tint Advanced settings Sharpness 18 Personal 50 30 30 0 2 Color alignment Color temperature mode to set the picture color tempe...

Page 23: ...y off the air antenna signals It searches for ATSC Digital and NTSC Analog channels available in your area When Cable is selected the TV detects signals supplied by Cable It searches for DTV Analog TV...

Page 24: ...tact the Cable provider If you press or TV MENU during Autoprogram the setup of TV channels will be Cancelled Even if Autoprogram is completed the channel setting will be lost if the AC Power cord is...

Page 25: ...tures Language Closed Caption Caption service Digital caption service Caption style CC 1 CS 1 Off Digital TV operation Caption service CC 1 and T 1 The primary caption and text services The captioning...

Page 26: ...ther grammatical shortcuts may be used in order to keep pace with the On screen action This is not a malfunction The caption or text characters will not be displayed while the main menu or functions d...

Page 27: ...ings Description All All ratings Locked including no rating NR None No rating TV Y Appropriate for all children TV Y7 Appropriate for all children 7 and older G TV G General audience PG TV PG Parental...

Page 28: ...for ages under 16 18 18ans Adult audience only Note s The V Chip can block non rated programs as per CEA 608 E sec L 3 If the option to block NR None or E programs is used in US movie ratings lock US...

Page 29: ...om your connected fun Link device Device list This function lets you see the product model number or name of connected devices fun Link control Off Disables all fun Link On Selects if you have connect...

Page 30: ...STAR qualified The unit is set to maximize the energy efficiency for Home setting and it can be adjusted through a choice of Picture and Sound quality selections according to your preference Note s Y...

Page 31: ...ield 3 Click the desired software to be downloaded Decompress the ZIP file 4 Copy the upgrade file to the root directory of the USB Memory Stick Starting the software upgrade 1 Connect your USB Memory...

Page 32: ...n is available only on digital outputting of a disc recorded in 96 kHz DOLBY DIGITAL Set to MULTICHANNEL when this unit is connected to a Dolby Digital decoder Settings are only effective when the uni...

Page 33: ...the Data Characteristics in the Pictures AUTO POWER OFF Set to ON If there is no operation for 15 minutes the unit goes into Standby Mode Reset to the Default Setting You can Reset All the Settings e...

Page 34: ...a 6560 Finnish FIN 5255 Sindhi 6550 French FRE 5264 Singhalese 6555 Frisian 5271 Siswat 6565 Galician 5358 Slovak 6557 Georgian 5747 Slovenian 6558 German GER 5051 Somali 6561 Greek GRE 5158 Spanish S...

Page 35: ...mputers The discs with labels scratches stains blemishes etc HD DVD Blu ray Disc DVD or CD contains MP3 JPEG files KODAK Picture CD On the following disc the sound MAY NOT be heard Super Audio CD Any...

Page 36: ...ations are accessible by Remote Control Some may also be accessible by controls on the main unit Note s may appear at the top right on the TV Screen when the operation is prohibited by the disc or thi...

Page 37: ...an inner Gray box that is displayed during Zoomed Playback is a Position Guide which indicates the position of the Zoomed Image within the overall Picture image The Position Guide stays on the TV Scre...

Page 38: ...EAR at step 2 in Repeat A B Playback Stopping Playback will Cancel Repeat A B Playback Note s To Repeat the current track in the Rndom mode follow the steps 1 and 2 in Repeat Playback and select TRACK...

Page 39: ...d Time of the Current Title TT Title Current Title Number Total Titles Elapsed Time of the Current Chapter CH Chapter Current Chapter Number Total Chapters Remaining Time of the entire disc Elapsed Ti...

Page 40: ...an available Marker within 60 seconds 4 When the Playback reaches the point at which you want to set a Marker press OK Marker is now set 5 Press BACK to exit To return to the Marker later 1 Repeat st...

Page 41: ...an external antenna Digital or VHF UHF or an RF coaxial cable from your wall Cable Satellite Set top Box needs to be plugged into the unit How come there is no image from the connected external devic...

Page 42: ...if the Power is On Check whether all the cables to the unit are connected to the correct Output jack of your device like Blu ray DVD Recorder View other TV channels The problem might be limited to th...

Page 43: ...ng from center to edge Disc cannot be played Clean the disc Ensure the disc is correctly inserted Check if the disc is defective by trying another disc Cancel the Parental lock or change the control l...

Page 44: ...sed as an alternate in bilingual broadcasting SDTV Standard Definition TV Standard Digital format that is similar to the Analog TV picture quality SRS TruSurround XT Creates a truly immersive surround...

Page 45: ...3 1 3 9 etc Terrestrial Analog NTSC VHF 2 13 UHF 14 69 CATV Analog NTSC 2 13 A W W 1 W 94 Analog W 1 W 84 A 5 A 1 5A Tuning system Channel frequency synthesized tuning system Channel access Direct ac...

Page 46: ...to damage caused by service performed by anyone other than company approved Authorized Service Location c to a product or a part that has been modified without written company permission or d if any s...

Page 47: ...FUNAI CORPORATION Inc 19900 Van Ness Avenue Torrance CA 90501 A34SBUT...

Reviews: