background image

Time Format

Setting the Time Format

1.  Access the System Settings menu (above).
2.  Tap Time Format.
3.  Tap on 24 Hours or 12 hours with am/

pm.

4.  Tap the back arrow.

Keyboard

Setting the Keyboard Layout.

1.  From the Main Menu screen, tap the 

Settings icon. 

2.  Tap Keyboard.
3.  Select QWERTY (default) or ABC keyboard 

layouts.

Units of Measure

Selecting Units of Measure

1.  Access the System Settings menu (above).
2.  Tap Units.
3.  Tap on the desired unit of measure.
4.  Tap the back arrow.

Regions

1.  From the Main Menu screen, tap the 

Settings icon.   

2.  Tap Region.
3.  Select an available map that is installed in 

your receiver.

GPS

Setting the GPS Position

It is useful to set a GPS position if you are not 
receiving satellite information quickly due 
to travelling over 800 km/500 mi with the 
Magellan RoadMate receiver turned off. Setting 
the GPS position will allow the Magellan 
RoadMate receiver to compute which satellites 
are available and calculate the position more 
quickly.

1.  From the Main Menu screen, tap the 

Settings icon.   

2.  Tap GPS Options.
3.  Tap Set GPS Position.
4.  Enter an address as you were selecting a 

destination.

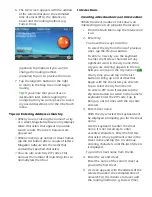
Viewing the GPS Status

1.  From the Main Menu screen, tap the 

Settings icon.   

2.  Tap GPS.
3.  Tap Status.
4.  (Optionally you can tap on the satellite 

signal indicator in the upper right corner 
of the OneTouch screen to access the 
GPS Status screen.)

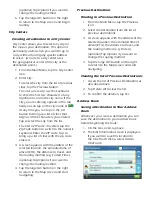
Auto Power Off

Setting Auto Power Off

Auto power is the duration of time that the 
Magellan RoadMate receiver remains idle 
before turning off automatically.

1.  Access the System Settings menu (above).
2.  Tap Auto-Off.
3.  Tap on the desired duration.
4.  Tap the back arrow.

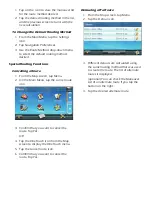
Default System Settings

Restoring All Default System Settings

1.  Access the System Settings menu (above).
2.  Tap Restore Default.
3.  Confirm that you want to proceed in 

restoring all the system defaults.

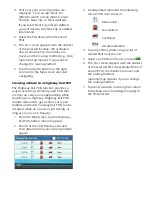
Product Information

Viewing Product Information

1.  From the Main Menu screen, tap the 

Settings icon.   

2.  Tap Product Information.
3.  (Note: Scroll down the page to view the 

Serial Number and Software Version.)

MAGELAN GPS

GPS SYSTEMS

Summary of Contents for RoadMate 9250T-LMB

Page 1: ...User Manual 9250T LMB Magellan RoadMate www CARiD com...

Page 2: ...mation so as to avoid delays in your travel The user interface for the Magellan RoadMate receiver is easy and simple to follow once you understand the basics You may never need to refer to this manual...

Page 3: ...re using the Magellan Content Manager application D micro SD card slot The microSD card is available for accessing optional map regions Reset If you are experiencing problems with your Magellan receiv...

Page 4: ...iver will automatically ask you if you want to pair a phone 2 After selecting Yes the receiver is in pairing mode Follow the instructions in your phone manual to set it in pairing mode 3 After the pho...

Page 5: ...ain Menu 2 Tap the Settings icon 3 Tap Sound 4 Tap the check box for Smart Volume When checked Smart Volume is on Brightness Accessing the Brightness Control 1 Access the Main Menu 2 Tap the Settings...

Page 6: ...he Map screen Address Book Access the Address Book where you can save addresses and destinations to have available when needed Settings Displays the Settings menu This menu can be used to access funct...

Page 7: ...for in the list check to see if the name has an apostrophe or hyphen The more characters you enter the smaller the list of possible options is from which to choose When entering a street or city name...

Page 8: ...tap the button to continue The button can be tapped to display the list of cities that begin with the letters entered Quickspell and Smart City Search makes entering an address quick and easy with li...

Page 9: ...saved search criteria and favorite destinations In routing mode additional information is displayed providing detailed information about the route you have selected A Turn instructions for next maneuv...

Page 10: ...y will switch to 2D at higher zoom levels 1 Tap the or zoom level buttons at the bottom of the Map screen to set the desired zoom level Panning on the Map 1 While viewing the Map screen slide your fin...

Page 11: ...OneTouch menu as well as the address book check the Add to OneTouch box 4 Tap the Name field and use the keypad to enter a name for the Address Book entry optional Tap List Categories to select a cat...

Page 12: ...he GO screen is displayed Tap GO to begin routing Volume The volume can be adjusted or muted from the Map screen The volume can also be adjusted from Settings Sound Changing the Volume from the Map Sc...

Page 13: ...u selected here you can do this by going to the Address Book found in the Main menu and edit the entry labeled Home Saving an Address to a OneTouch Icon 1 Tap the Edit button in the top right corner o...

Page 14: ...ies or continue defining your search criteria 6 Using the keypad enter a name for the button and tap Setting a Route to a OneTouch Icon With the OneTouch menu set up you can now go to a saved address...

Page 15: ...ng up a list of cities that begin with the characters you entered Tap to select the city from the list To enter a ZIP code if needed tap the Zip Code button to switch to the numeric keyboard Enter the...

Page 16: ...From the Main Menu tap the Intersection icon 2 Enter City You have three ways to do this To select the city from the list of previous cities tap the Previous button To enter a new city use the keyboa...

Page 17: ...ities with the zip code entered 3 A screen appears with the address of the selected location the estimated time of arrival ETA the distance to travel and the routing method e g Fastest Time optional T...

Page 18: ...eTouch button you want it assigned too Accessing an Address in Your Address Book 1 From the Main Menu tap the Address Book icon 2 To easily find the desired address you can tap the top left corner of...

Page 19: ...re displayed You can tap Near for different search criteria Near Current Position Near City or Near Address If you select Near City or Near Address you will need to enter the city or address informati...

Page 20: ...exit you are approaching while travelling on a highway Highway Exit POIs include restaurants gas stations car repair facilities and hotels Freeway Exit POIs can be accessed while on a route or just d...

Page 21: ...treet 2 Access the Maneuver List 3 Tap the Avoid icon for the maneuver you want to avoid 4 Tap Yes to confirm 5 The Magellan RoadMate receiver recalculates the route and the Map screen returns Types o...

Page 22: ...Map screen tap Menu 2 On the Main Menu tap the cancel route icon 3 Confirm that you want to cancel the route Tap Yes OR 4 Tap the OneTouch icon from the Map screen to display the OneTouch menu 5 Tap...

Page 23: ...creen will display the computed delay due to traffic in the red box below the traffic icon Traffic signals being received and no delay found on route Delay is less than 15 of entire route Time display...

Page 24: ...u want to accept the connection Tap Yes 10 Wait while the communication is established 11 You may now import contacts from your phone Tap Yes to begin importing If you choose not to import your contac...

Page 25: ...on 2 Tap Dial Pad 3 Using the keypad enter the number you want to call 4 Tap the green call button 5 The Magellan RoadMate will begin calling the number Dialing a Phone Number from the Address Book 1...

Page 26: ...ric Data 1 When connecting to an automated answering service you are sometimes required to enter a number in response to an automated question Tap the button and a numeric keypad is displayed that can...

Page 27: ...p or North Up in 2D Mode 1 From the Main Menu screen tap the Settings icon 2 Tap Map 3 Tap 3D 2D Heading Up or 2D North Up to toggle between settings Assigning Visible POIs To avoid cluttering of the...

Page 28: ...From the Main Menu screen tap the Settings icon 2 Tap Navigation Preferences 3 Use the drop down menu to select the default sound you want played when alerting you to a turn Enabling Landmark Guidance...

Page 29: ...es above the speed limit you want the warnings to be alerted or highways and other roads Traffic Enabling Traffic This option is used when you want to turn traffic off Traffic information is available...

Page 30: ...and calculate the position more quickly 1 From the Main Menu screen tap the Settings icon 2 Tap GPS Options 3 Tap Set GPS Position 4 Enter an address as you were selecting a destination Viewing the G...

Reviews: