

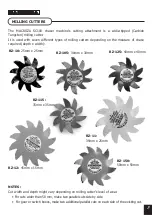


INSTALLING THE MILLING CUTTER
• There are several sizes of MACROZA milling cutter depending on the width and depth of the
chase.
• Only original MACROZA milling cutters should be used as they are designed specifically for
the MACROZA SC-100.
• Make sure that the MACROZA SC-100 is switched off and unplugged from mains power
before handling the milling cutter.
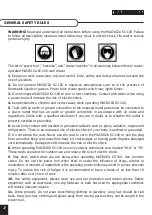
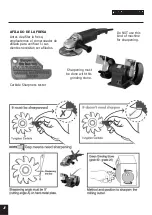
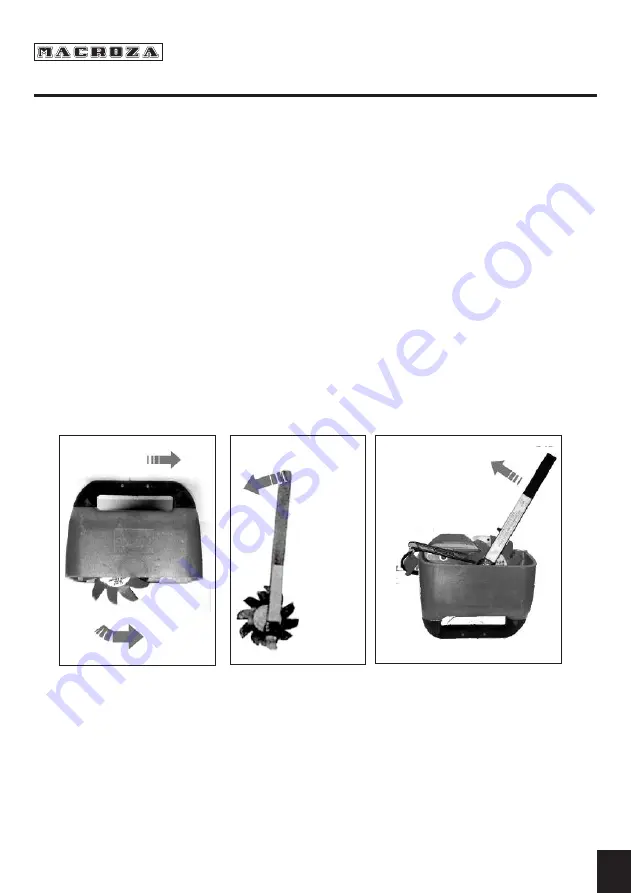
• Install milling cutter as shown in Figure 1, with teeth facing downwards in cutting position.
• Milling cutter shaft rotates to the left as indicated on arrow engraved on the milling cutter
cover (Figure1).
• Before installing the milling cutter it is very important to place a washer (supplied with the
machine and cutters) between the shaft and milling cutter. This will make it easier to remove
the milling cutter after use.
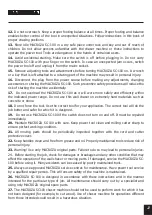
• To remove milling cutter, use the special wrench as shown on Figure 2.
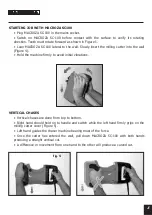
• Fix the spanner between the shaft and milling cutter cover. Once the spanner is attached hit
the special wrench as shown in Figure 3. Do not hit the special wrench if the spanner it is
not fixed between the shaft and milling cutter cover.
VERY IMPORTANT:
Check the following each time before using MACROZA SC-100
• Milling cutter does not have any widia (Carbide Tungsten) tip missing.
• Ensure all milling cutter teeth are sharpened.
9
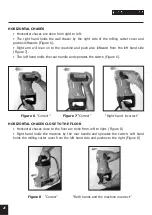
“Direction of thrust”
“Rotation”
“Loosen
with the
special
wrench, ho-
oking it to
the lower
tooth and
the opposi-
te lip”
Fig. 3


