background image


Orion II                                                                                                             User Guide 


If the system 
doesn’t recognise 
the drive, turn on 
the power first, 
before connecting 
the interface cable. 


Installation on a PC 

If the drive has been pre-installed and setup already, you do 
not need to prepare anything else and can use it straight away. 
If you have installed the drive yourself and this is a brand new 
HDD, you will have to create a partition first and format the 
drive before it can be used. 
 

  Turn on your Computer and start Windows 

  Connect the Orion and turn it on 

  Let Windows search and install the driver automatically 

  Open “My Computer” to see your external hard drive 


For factory new drives and more info about formatting, see 
“Partitioning & Formatting”. 
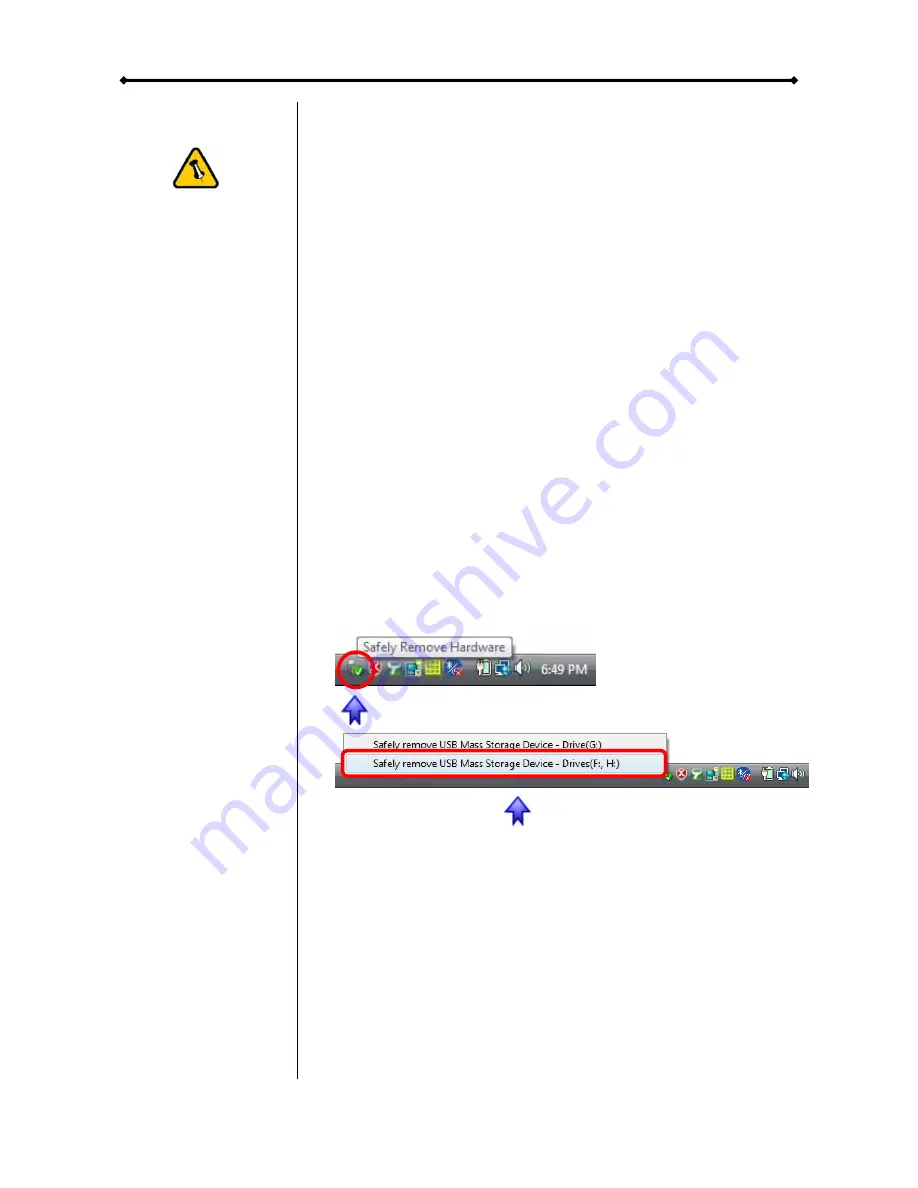


Removal Procedure 

For the safe removal of your drive and to assure that no data is 
lost, always follow the correct unplug procedure. Otherwise, an 
error message will appear. 
 

  Click on the taskbar icon for external hardware 


  Choose your external hard drive and confirm to remove it 


Page 8  /  Chapter 3 - System Set Up 

Summary of Contents for Orion II

Page 1: ...Orion II Storage Enclosure for 3 5 Hard Drives User Manual v1 0 EN...

Page 2: ...DATA BACKUP 2 CHAPTER 2 INSTALLING THE HDD 3 USB 2 0 ESATA 3 USB 2 0 5 CHAPTER 3 SYSTEM SET UP 7 CONNECTION TO YOUR COMPUTER 7 DETAILED VIEW 7 REAR VIEW USB 2 0 ESATA 7 REAR VIEW USB 2 0 7 INSTALLATI...

Page 3: ...e aluminium plastic enclosure fits together perfectly to secure your valuable data content Orion stays cool without a fan or heat sink keeping the design compact and virtually silent during operation...

Page 4: ...OS 10 3 or above Your hardware device must have the correct corresponding port eg USB 2 0 or PCI card eSATA Plug and Play support required for host card driver LED Indicator The Orion is using a singl...

Page 5: ...HDD Your unit may come with a pre installed hard drive Before opening such an enclosure please read the warranty and any other notes from your vendor carefully as this could void your warranty USB 2...

Page 6: ...drive with the 2 screws from the bottom as seen in following illustration 5 Slide the cover back into place 6 Fasten the 2 screws on the rear panel to finish the assembly 7 Use the two stickers to co...

Page 7: ...bridge board and your hard drive before you close up the case USB 2 0 1 Remove the 2 screws on the rear panel of the enclosure 2 Slide and lift the cover off the body 3 Carefully install the hard driv...

Page 8: ...roughed up surface on the inside of the top cover Be careful not to damage any components during the installation 6 Slide the cover back into place 7 Fasten the 2 screws on the rear panel to finish th...

Page 9: ...he drive to cool down Do not expose the product to water or humid conditions Always check for visible damage and defects of power and interface cables before using it We recommend using the cables and...

Page 10: ...drive before it can be used Turn on your Computer and start Windows Connect the Orion and turn it on Let Windows search and install the driver automatically Open My Computer to see your external hard...

Page 11: ...a partition first and format the drive before it will show up Turn on your computer and start Mac OS Connect the Orion and turn it on No driver installation required The external drive will mount and...

Page 12: ...o erase all data on your drive PC running Windows Disk Management Program Right click on My Computer and choose Manage Select Disk Management Choose the drive you want to format and right click on it...

Page 13: ...t Disk Utility in the utilities folder Choose your external drive and format it according to your requirement For Mac OS X we recommend formatting the drive using the native Mac file system HFS also k...

Page 14: ...ual covers all interfaces and combinations for the Orion enclosure Images and descriptions might therefore slightly vary between this manual and the actual product you have Copyright 2007 by Macpower...

Reviews: