Hydra LAN User Guide
2.2 How to login
To configure your Hydra LAN, you will need to use the web browser, enter the IP address
and then use the web configuration for further setup. To find out the IP address of your
device once it is connected to the network, there are several different ways as described
on the following pages.
2.2.1 Login on a PC
Use the NetTool utility included on the CD. This will list the device automatically and allow
you to access the web configuration interface with a simple click of your mouse. You may
also use the same utility at a later point to map the network drive after you setup your
shares.
1. Turn on your Hydra LAN and make sure it is connected to the same network as your
computer.
2. Start the NetTool utility by double clicking on the EXE file and then press the “Setup”
button.
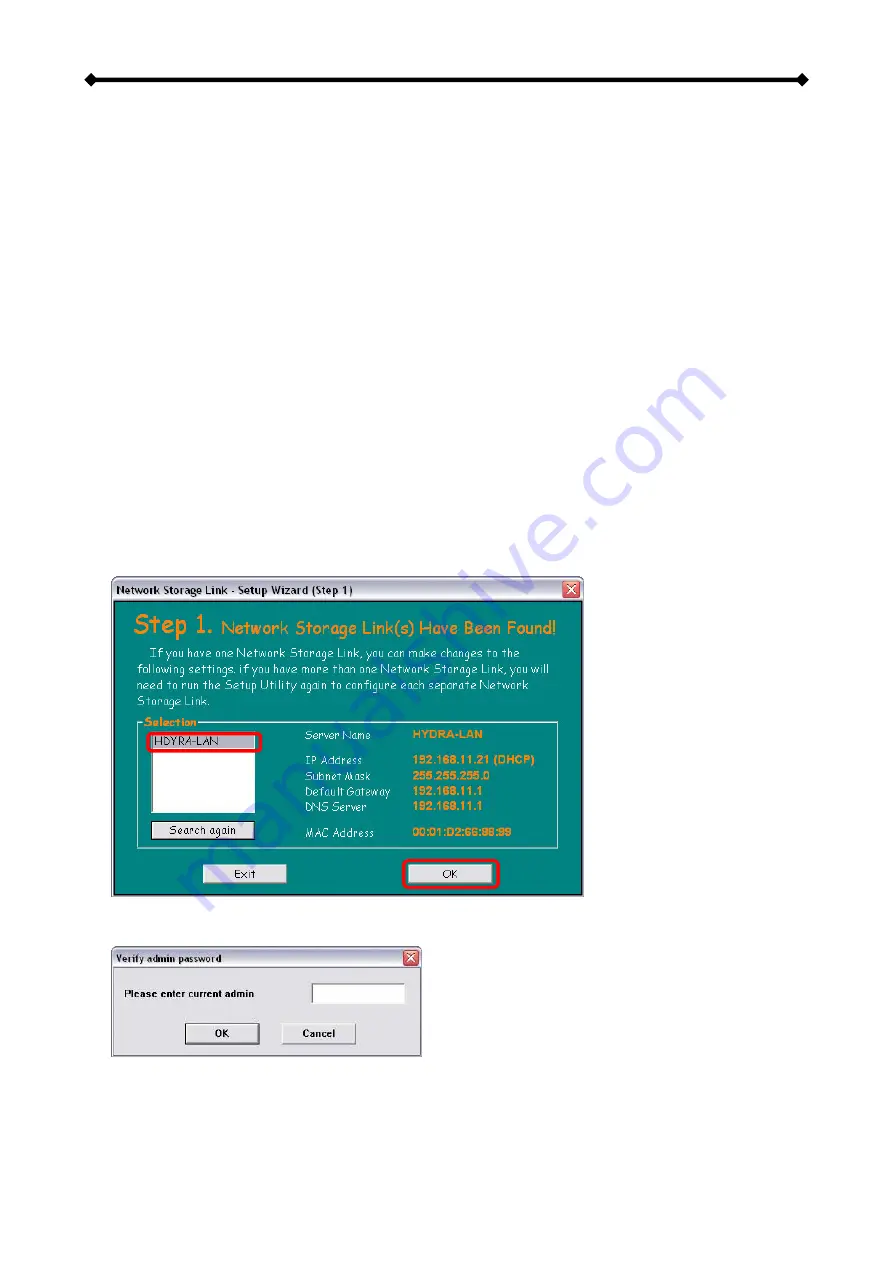
3. Your Hydra LAN will automatically show up in the device list, but if not, make sure the
NetTool has access to the network and search again. You might have to configure your
firewall or even temporarily turn it off.
4. Select your device and click on OK to start the setup wizard.
2
1
5. Before you can access the settings, you will have to enter the admin password. The
default login is admin/admin, so enter admin for the password and press OK to login.
Page 10 / Chapter 2 - System Setup


