22
ONYX 1200F
ONYX 1200F
Another option for either a desktop or laptop com-
puter is to purchase an external FireWire-equipped hard
drive, again preferably a 7200 rpm drive with an 8 MB
cache. This can be connected to one of the FireWire con-
nections on the Onyx 1200F, or directly to your computer,
and appears as an available drive to your computer.
Installing the Drivers and Onyx 1200F Console
When connecting the Onyx 1200F to a PC, it is neces-
sary to first install the Onyx FireWire Windows drivers
and the Onyx 1200F Console. The Macintosh OS X 10.3.9
(and above) has FireWire drivers built-in, so it is not
necessary to install drivers on a Mac. However, you do
need to install the Onyx 1200F Console on a Mac.
For the PC:
1. Insert the CD provided with the Onyx 1200F into
your CD drive.
2. Click “Start > Run > Browse” and navigate to the
CD drive. Double-click the file named:
“SetupOnyxFSeries_xxx.exe” where xxx is the revi-
sion level of the installation.
3. Click “OK” in the Run window.
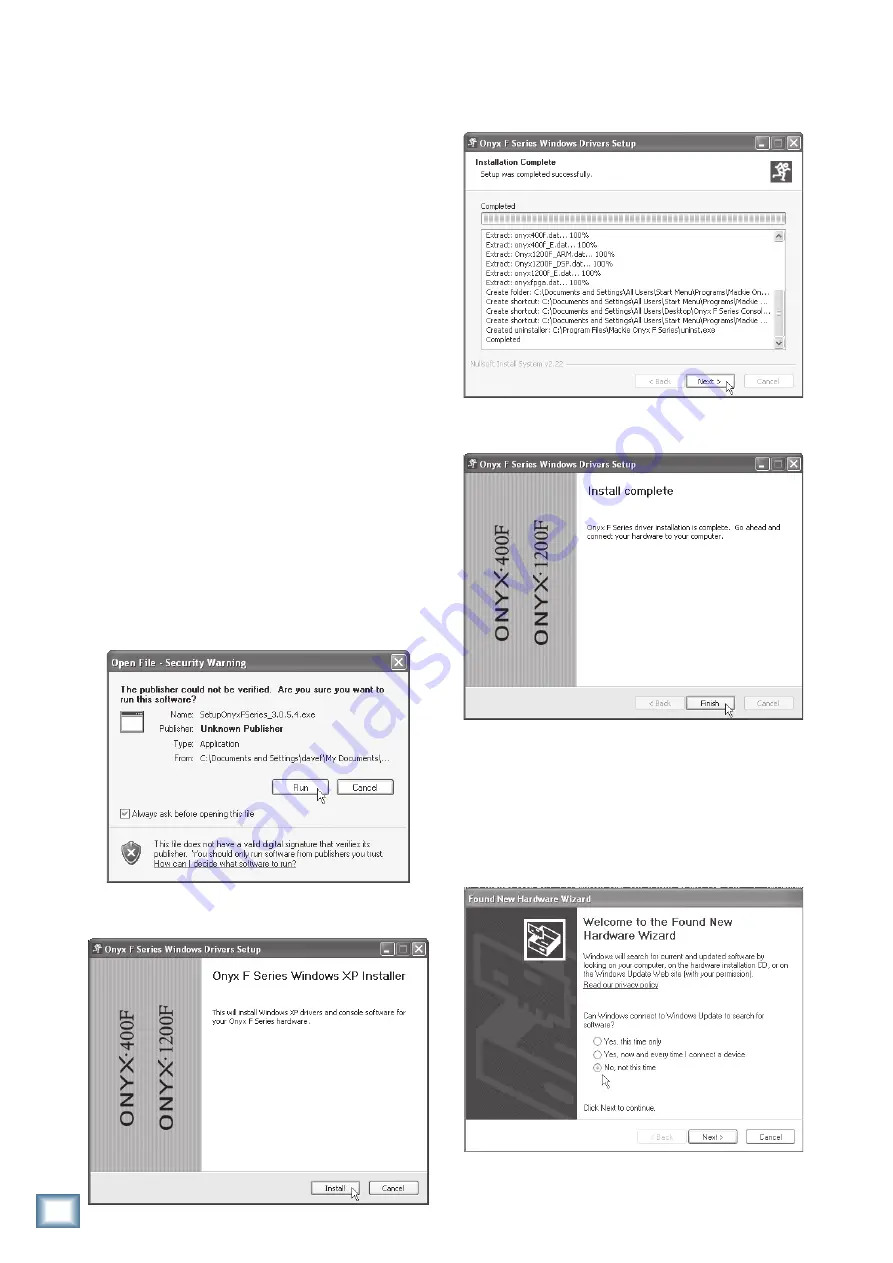
4. You may get a “Security Warning” about running the
installer. It’s okay. Click “Run.”
5. The Onyx F Series Windows XP Installer window
opens. Click “Install” to continue.
6. When the installation is completed, the Onyx F
Series Windows Drivers Setup window indicates
that the “Setup was completed successfully.” Click
“Next” to continue.
7. The “Install Complete” window opens. Click “Finish”
to complete the installation.
8. Connect the Onyx 1200F to your computer with the
FireWire cable that was included in the box and
turn it on.
9. After a few seconds, the “Found New Hardware
Wizard” opens. Select “No, not this time” where it
asks to connect to Windows Update. Click "Next"
to continue.


