DX810 – 28
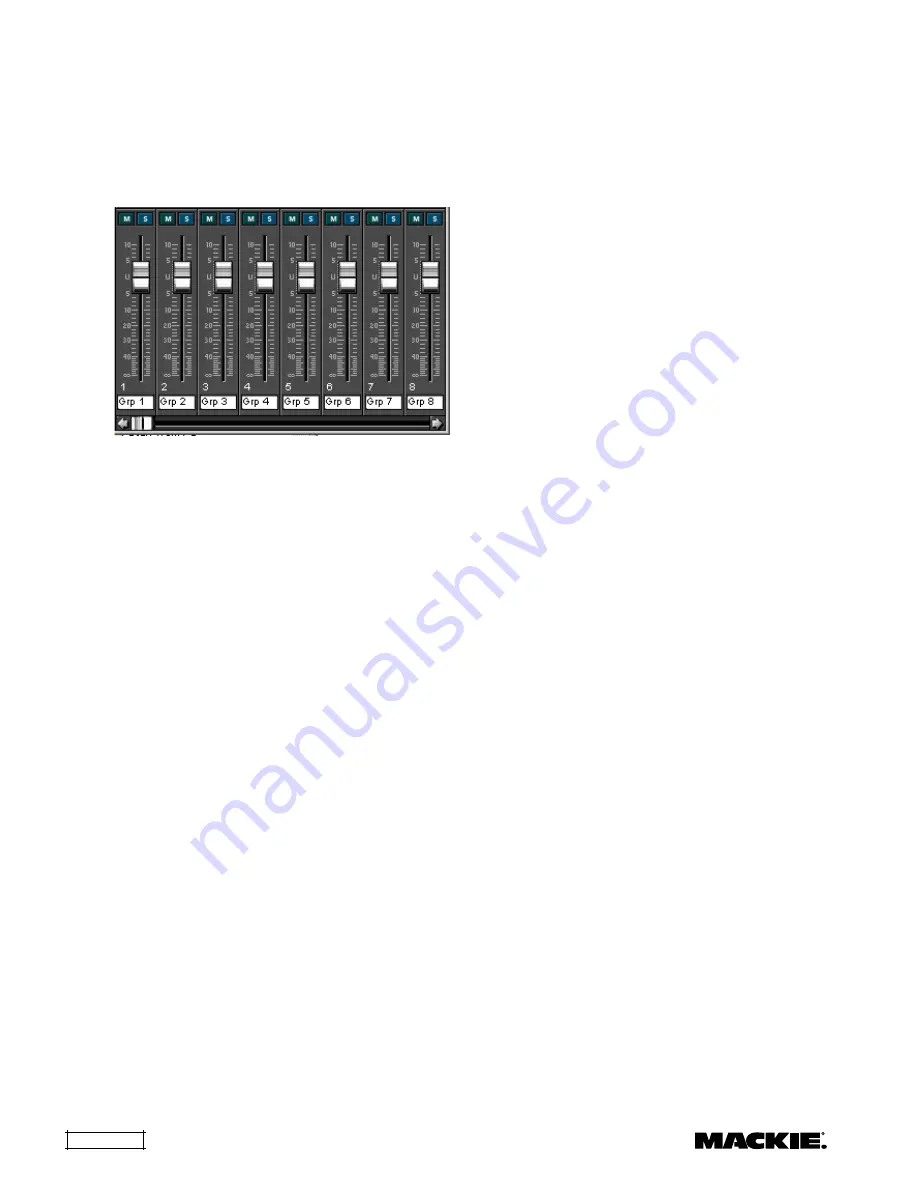
Group Section
This section includes the 32 control groups.
Eight groups are displayed at one time. However,
the horizontal fader at the bottom allows you to
scroll through all the control groups.
There is a mute and select button associated
with each Control Group.
To assign or unassign a crosspoint or output to a
group:
1. Click the select (S) button for the desired group. If
any crosspoints or outputs are assigned to the
selected group, their select buttons light.
2. Click the select (S) button for the crosspoints you
want to assign to the selected group. The group
fader affects the mix level for each crosspoint to a
single output.
3. Click the SELECT button in the Input Section to
assign the input fader to the selected group. The
group fader affects the mix level for each input to
all the outputs.
4. Click the associated letter button (A-J) in the
Output Section to assign an output to the selected
group. The group fader affects a single output
level.
5. Click the Groups button in the Top Section to view
and verify group assignments.
Group assignments are saved in each preset.
This allows different combinations of crosspoints,
inputs, and outputs to be assigned to the same
group number in separate presets.
Click the (
M
) button to mute the group. This
mutes all crosspoints, inputs, and outputs assigned
to the group. Click the
Mute Ind
button to view the
Active Mute Groups
indicator.
Ctrl+click the (
M
) button to engage the enable
(
E
) function. This mutes the group normally, and
unmutes it when the enable button is on (active).
Ctrl+click the enable (
E
) button to change back to
the mute function.
Exclusive Enable Program Selection
Control Groups can be enabled exclusively; that
is, when one group is enabled, other groups are
automatically disabled so that only one group is active
at a time. Use this feature to configure a zone so
that one input at a time can be selected in the mix.
Up to eight programs (inputs) can be selected
individually in a room using two DX-SW4 remote
control units configured to select (force on) groups.
To configure groups for Exclusive Enable:
1. For this example, use Groups 1-4. Ctrl+click the (M)
button on Groups 1-4 to engage the enable
function. The (M) will change to an (E).
2. Click the select button (S) for the first group. For
this example, use Groups 1-4.
3. Ctrl+click the select button for the second group.
The button will start blinking.
4. Ctrl+click the select button for the remaining
groups (3-4) that you want to associate with the
exclusive enable function.
5. Click the select button for the first group to turn it
off. The other three select buttons stop blinking.
6. Click the select button for the second group.
7. Ctrl+click the select buttons for the first, third, and
fourth groups.
8. Click the select button for the second group to turn
it off.
9. Click the select button for the third group, and
Ctrl+click the select buttons for the first, second,
and fourth groups. Click the select button for the
third group to turn it off.
10. Click the select button for the fourth group, and
Ctrl+click the select buttons for the first, second,
and third groups. Click the select button for the
fourth group to turn it off.
Now when you click on the enable buttons for
Groups 1-4, only one at a time can be selected.
The group fader controls the relative level for all
the crosspoints, inputs, and outputs assigned to it.
At the unity gain position (
U
), all the levels are at
their assigned values and the group fader has no
effect. Reduce the group fader 10 dB, and all the
levels assigned to that group are reduced 10 dB,
relative to their assigned value. Note that the group
fader can increase the level 10 dB. However, if an
assigned level is already at +10 dB, it will not
change. The maximum overall gain available for any
crosspoint, input, or output is +10 dB.
Use the box at the bottom of the Group Section
to enter a name for the group (e.g., Voc, Drum),
using up to 32 characters.


