D8B Manual • Chapter 3 • page 70
Solo Latch
• When Solo Latch is checked, SOLO buttons
remain engaged even when a new SOLO button is
pressed.
• When Solo Latch is not checked, new SOLO
selections disengage previous SOLO selections.
• If Solo Latch is not set (checkbox not selected),
multiple solos may be manually latched by either:
°
pressing and holding another solo switch while
initiating more solos, or pressing multiple solos
at one time.
°
pressing and holding [Shift] while initiating
more solo’s.
To allow this operation, set the “Solo Latch”
checkbox in the Mix Options Setup window, or
press GENERAL in the Setup Section and, under
Solo, select “SOLO LATCH” ON or OFF in the Fat
Channel Display.
Link Speakers
• When the Link Speakers checkbox is enabled, the
Mains and Near Field SPEAKER LEVEL control
is linked. Increasing or decreasing the SPEAKER
LEVEL control simultaneously adjusts both the
Near Field and the Main Control Room Output.
This provides a consistent level when A/B’ing
between speaker sets. The default option is an
unlinked state.
• Holding down the [Shift] key and spinning the
SPEAKER LEVEL V-Pot temporarily breaks the
link. This can be used to establish a level offset
between the two stereo output pairs. The level
difference is maintained in the same operational
manner as linked channel parameter offsets. The
link offset may be updated at any time, using the
[Shift] key.
Faders to Tape
• When this option is checked, source channel
faders control the level to the tape outputs 1–24.
• When this option is not checked, level to tape
outputs 1–24 are adjusted by selecting LEVEL TO
TAPE in the V-Pot Assign section and adjusting
the channel V-pots.
Use V3 Style EQ
• When checked, the D8B uses the version 3.0 EQ
algorithm for channels 1-48. This allows complete
backward compatibility with 3.0 sessions.
• When not checked, the new and improved v5.1 EQ
algorithm is used.
Calibrate
• This operation resets the minimum and maximum
fader values for the OS.
• For optimum performance and positioning
response, the fader calibration may be used
periodically. The calibration takes a few minutes
to perform its routine, so take a break, will ya?
Caution:
Do not touch the faders during the
calibration procedure. Doing so could damage the
servo motors.
Note:
This procedure is only available from
the Mix Options Setup window on the screen.
Dim Amount
• This sets the amount of attenuation for the DIM
button in the Control Room section.
• Choose from –20 dB, –30 dB, –40 dB, and –inf dB
(Cut).
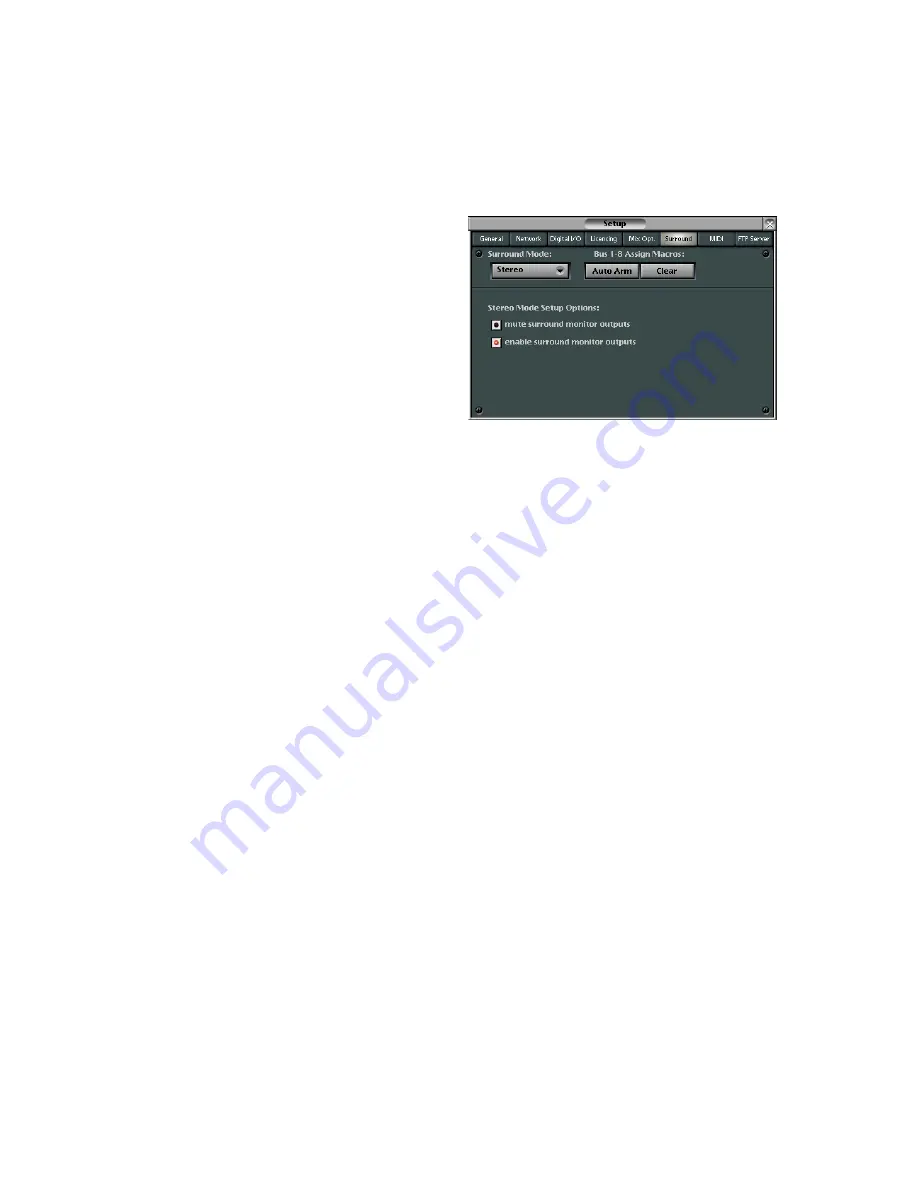
Surround
Surround Mode
• This pull-down list provides access to the various
Surround Sound modes available on the D8B.
• All standard mix modes are selectable through the
Surround Mode list, including Stereo, Quad,
LCRS, 5.1, 6.1, 7.1 (SDDS), and 7.1 (TP).
Auto Arm
• Once the Surround Mode is selected, Auto Arm
provides a quick and easy way to arm all the
channel buses to feed the appropriate outputs.
• Stereo automatically activates all L/R
assignments for all appropriate channels.
• Quad automatically activates bus assignments
1, 2, 5, and 6.
• LCRS automatically activates bus assignments
1, 2, 3, and 4.
• 5.1 automatically activates bus assignments 1–6.
• 6.1 automatically activates bus assignments 1–7.
• 7.1 automatically activates bus assignments 1–8.
Clear
• Automatically clears all bus assignments
(whether set manually or activated automatically
through the Auto Arm feature).
Stereo Mode Setup Options
• Choose whether to mute the analog Bus 1-8
outputs when Stereo mode is selected for the
surround mode.
• This is recommended when using the bus outputs
for surround monitoring.
Summary of Contents for Digital 8Bus D8B v5.1
Page 1: ...OWNER OWNER S MANUAL S MANUAL...
Page 9: ...D8B Manual Chapter 1 page 3 Chapter 1 Getting Ready...
Page 27: ...D8B Manual Chapter 2 page 21 Chapter 2 Where Is It...
Page 47: ...D8B Manual Chapter 3 page 41 Chapter 3 What s On TV...
Page 101: ...D8B Manual Chapter 4 page 95 Chapter 4 Applications...
Page 147: ...D8B Manual Appendices page 141 Appendices...
Page 198: ......


