Manual URYXXON
®
500
MN
50
Manual URYXXON
®
500 V 01 / 03.10
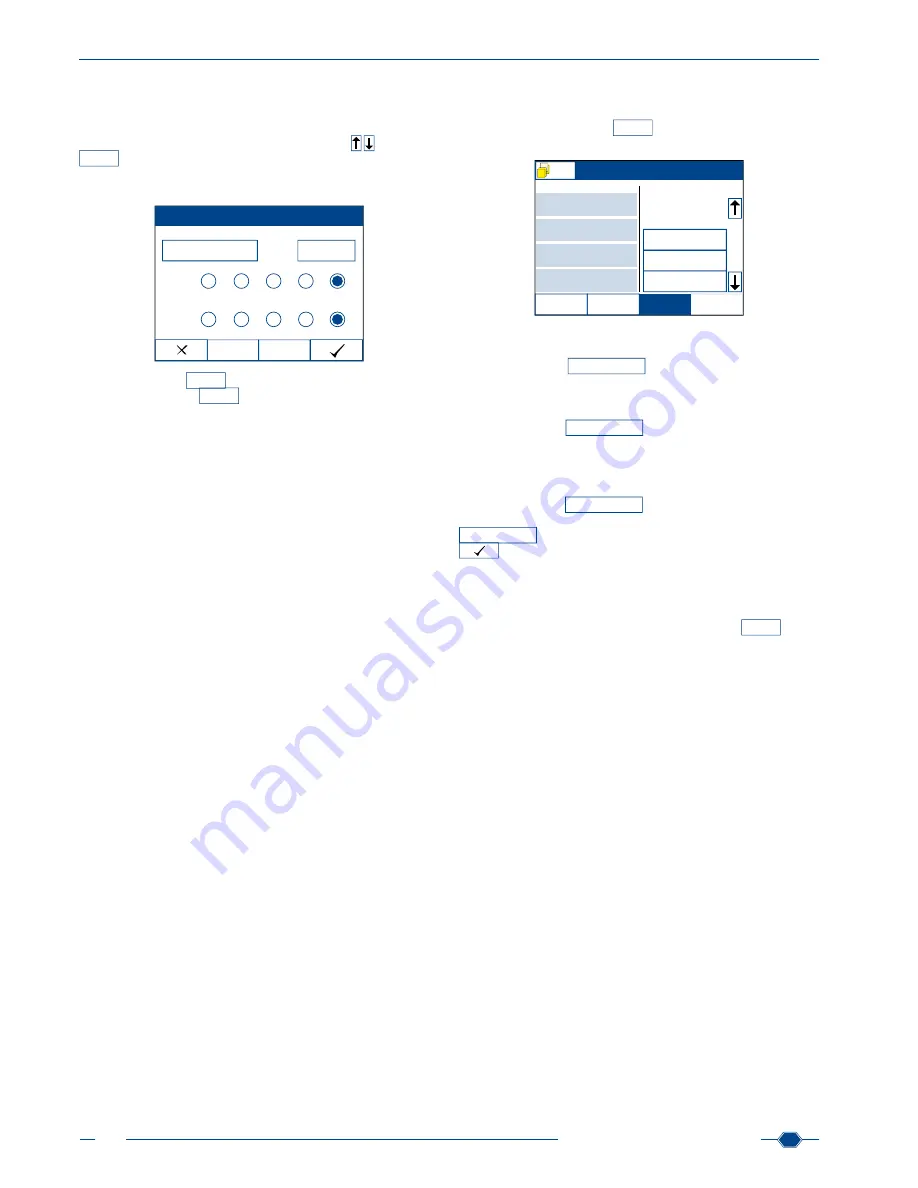
13.4.2. Edit worklist
As for every sample, you can edit the worklist entries and add
additional information as well. To do so, press on an ID in the
worklist, or choose an ID via the scroll-arrows
and press
Edit
selected
. The edit screen for measurements appears and you can
add or edit ID, Seq.No., clarity and colour, respectively
(see Cus-
tomization, chapter 8.8)
.
Edit next sample
Id
Clarity
Color
Seq.No.
0012
55875410
clear cloudy dark turbid None
yellow
red
brown other None
Delete
Skip
The activity-button
Delete
allows you to delete an entry from the
worklist. If you press
Skip
, the entry will be placed at the end
of the list.
Note: You can only edit information for samples, as long as they
are in the worklist. Therefore, always edit samples before you
place the respective strip on the transport tray. As soon as the
strip has been drawn into the housing, the data cannot be edited
anymore.
13.4.3. Measuring with the worklist
When you measure with the worklist, patient IDs are already set
for every sample. The sample’s ID which will be measured next
is always in the left side of the start screen under ID.
Dip the test strip into the sample. To start measuring, place the
test strip on the left side of the instrument onto the black trans-
port tray. The light briefly flashes green, thus indicating automatic
strip detection. Right after, the transport rack moves to take the
strip into the instrument. During that time, the light is red, be
-
cause no other strip can be placed while the strip is drawn into
the housing. The measurement of the strip is automatic.
Make sure to always place the strips onto the transport rack in
the order corresponding to the worklist entries. Once the strip
has been drawn in, a new sequence number appears and the ID
on the left side is replaced with the first ID from the worklist on the
right. The worklist on the right moves up by one entry.
If necessary, add supplemental information and place the next
strip onto the transport rack. Thus, you can work your way to the
end of the list.
Within a worklist, you cannot change the sequence numbers,
since the individual measurements are pre-defined by the entries
in the worklist.
Note: It is very important to place the strips onto the transport
rack according to the order defined by the worklist, so that the
correct strips will be measured for displayed ID.
13.4.4. Options
On the right side of the screen underneath the worklist, you
can find the activity-button
Options
. These options include three
choices.
Insert strip
ID
Seq.No.
Clarity
Color
Next sample
Worklist
Edit
Emergency
Options
Edit
selected
Menu
15 10
0001
55816478
yellow
clear
BLD
UBG
BIL
PRO
NIT
KET
GLU
pH
55674276
55156472
55684123
55741836
55412754
55971287
55147528
Load worklist
Print worklist
Delete worklist
13.4.4.1. Load list
The activity-button
Load worklist
allows you to load an existing
worklist from your LIS
(see Create a worklist, chapter 13.4.1)
.
13.4.4.2. Print list
The activity-button
Print worklist
allows you to print all IDs in the
worklist, including the respective sequence number and supple
-
mental information. Press the button to start printing.
13.4.4.3. Delete list
The activity-button
Delete worklist
removes all entries in the work-
list irrevocably. In order to delete the list, press the activity-button
Delete worklist
and confirm the following security question with
. The results of samples from the worklist that have al-
ready been measured remain in the instrument’s memory.
13.4.5. Emergency measurement
You can expedite an emergency measurement while you are
working with a worklist. Press the activity-button
Emergecy
in the
lower left part of the screen. The menu for patient and sample in-
formation appears, and you can enter patient ID, etc. The new ID
is placed as the next sample in the left part of the screen, while
the other samples all move back one position. Then, perform the
measurement as usual.
Summary of Contents for URYXXON 500
Page 1: ...URYXXON 500 Handbuch Manual...
Page 2: ...URYXXON 500 MN Inhalt Index Deutsch 3 English 29...
Page 3: ...URYXXON 500 Handbuch...
Page 29: ...URYXXON 500 Manual...


