13
14
Please highlight icon to select the corresponding function. After completing the setup,
click the save button. The system will go back to the previous menu.
At the bottom of the menu, there are color bars for your reference. GREEN stands for regular
recording, YELLOW stands for motion detection and RED stands for alarm recording.
Figure 2-5
2.4
MaNuaL reCOrd
Note: Please make sure you have the record operation set correctly and you have
properly installed the formatted Hdd.
You can right click the mouse or in the main menu, from Advanced->Manual Record to go to
record interface.
There are three states: schedule / manual / stop. Highlight the icon“○” to select the
corresponding channel. See Figure 2-6.
• Manual: The highest priority. After manual setup, all selected channels will begin
standard recording.
• Schedule: Channel records as you have set in recording setup
(Main Menu->Setting->Schedule)
• Stop: All channels stop recording.
Figure 2-6
2.5
eNCOde
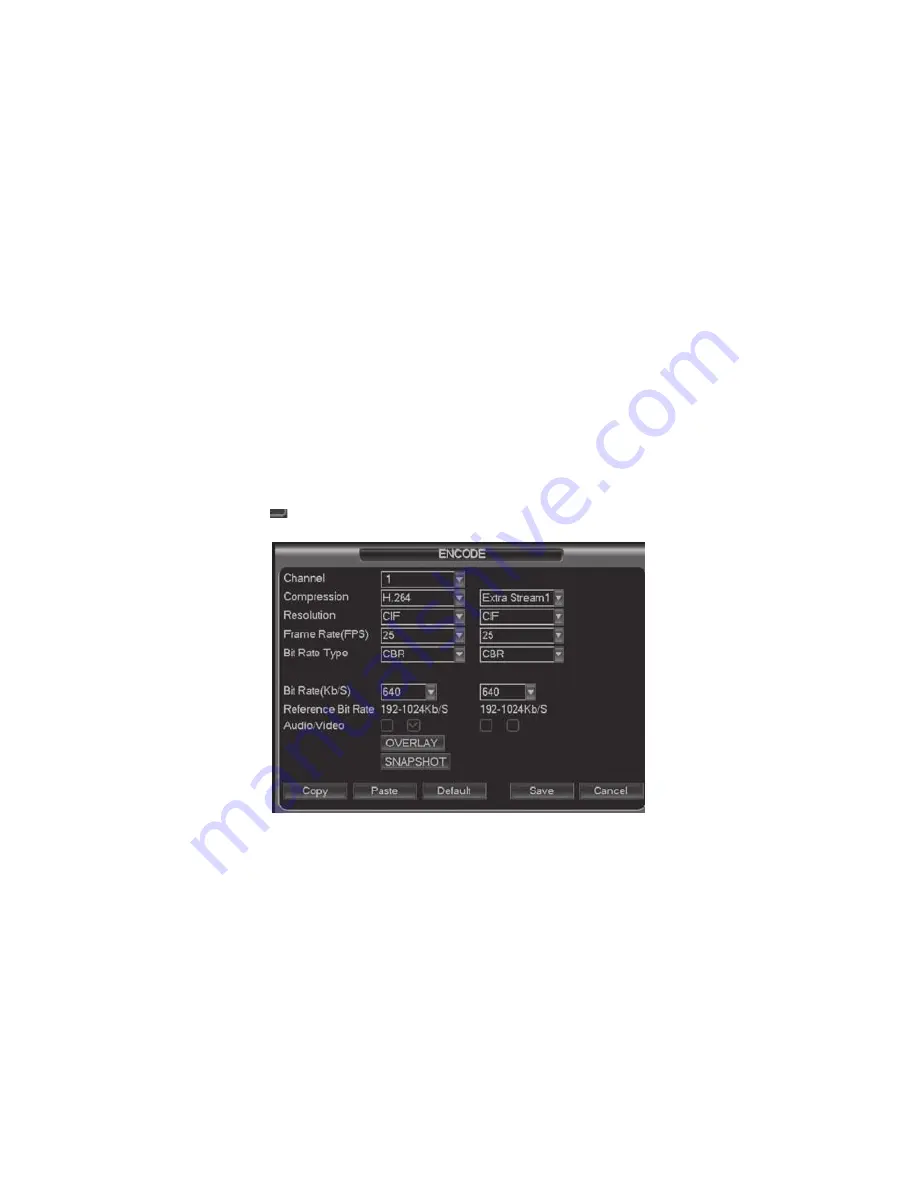
Encode interface is shown as in Figure 2-7.
• Channel: Select the channel you want.
• Compression: System supports H.264.
• Resolution: System supports various resolutions, you can select from the dropdown
list. This series main stream supports D1/HD1/BCIF/CIF/QCIF. The channel extra
stream supports CIF/QCIF.
• Frame rate: It ranges from 1f/s to 25f/s in NTSC mode and 1f/s to 30f/s in PAL mode.
• Bit rate type: system supports two types: CBR and VBR. In VBR mode, you can set
video quality.
• Quality: There are six levels ranging from 1 to 6. The sixth level has the highest image
quality.
• Video/audio: you can enable or disable the video/audio. Please note the video is
enabled for main stream by default. For extra stream, please enable video first and
then enable audio.
• Snapshot: Click the snapshot button, you can see it contains the four items: mode/
image size/image quality/snapshot frequency. Please refer to chapter 2.3.3 for detail
information.
Please highlight icon to select the corresponding function.
Figure 2-7


