background image

40

41

MLMP475iSSP46-M&S-2

MLMP475iSSP46-M&S-2

In

 more 

detail

 . . .

In

 more 

detail

 . . .

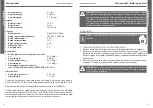
Maintenance table with schedules

Part

T

o

 do

Before/

after 

each 

use

First 

month 

or 

5 hours

Every 

3 months 

or 

25 hours

Every 

6 months 

or 

50 hours

Every 

year 

or 

100 hours

Every 

2 years 

or 

250 hours

Engine oil

check

x

replace

x

$LU¿OWHU

check

x

clean

x

replace

x

Spark plug

check/adjust

x

clean

x

replace

x

Spark plug cap

c

lean

x

Fuel tank

clean

x

Fuel tube

clean

Every 2 years (replace if necessary)

Cutting means

replace

Replace the cutting means (29) after 50 hours of mowing, or 2 years whichever is 

sooner regardless of condition. 

Battery

charge

x

1.  Keep the product clean. Remove debris after each use and before storage.
2.  Regular and proper cleaning helps to ensure safe operation and prolongs the life 

of the product.

3.  Inspect the product before each use for worn and damaged parts. Do not operate 

LWLI\RX¿QGEURNHQDQGZRUQSDUWV5HSODFHZRUQSDUWVDVQHFHVVDU\RUFRQWDFW

an authorised service centre for repair before using the product again.

WARNING!

 Only perform repairs and maintenance work according to these 

LQVWUXFWLRQV$OOIXUWKHUZRUNVPXVWEHSHUIRUPHGE\DTXDOL¿HGVSHFLDOLVW

Cleaning

1.  Clean the product with a slightly damp cloth and mild soap. Use a brush for areas 

that are hard to reach.

2.  In particular, clean the air vents (11) after every use with a cloth and brush.
3.  Remove stubborn dirt with high pressure air (max. 3 bar).
4.  Clean the underbody and cutting means (29) using the water hose connector (14).

NOTE:

 Do not use chemical, alkaline, abrasive or other aggressive detergents 

or disinfectants to clean this product as they might be harmful to its surfaces.

Maintenance

Before and after each use, check the product and accessories for wear and damage. 
If required, exchange them for new ones as described in this instruction manual. 
Observe the technical requirements.

WARNING!

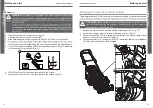
 It is required to tip the product when performing the maintenance. 

7KHIXHOWDQNPXVWEHHPSW\RUIXHOFDQOHDNZKLFKFRXOGUHVXOWLQ¿UHRU

explosion. 

NOTE:

 Always empty the fuel tank and keep the spark plug upside down. 

2WKHUZLVHWKHIXHORUHQJLQHRLOPLJKWFRQWDPLQDWHWKHDLU¿OWHU

(13a)/spark 

SOXJDQGPLJKWPDNHLWGLI¿FXOWVWDUWWKHHQJLQH

After use

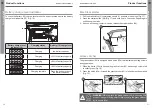
1.  Stop the engine, disconnect the spark plug connector (15) and let the product cool.
2.  Check, clean and store the product as described in the maintenance table.

Care and maintenance

Care and maintenance

Summary of Contents for MLMP475iSSP46-M&S-2

Page 1: ...dom EU Manufacturer ational Products B V Rapenburgerstraat 175E 1011 VM Amsterdam The Netherlands www diy com To view instruction manuals online Petrol Lawnmower 140 cm3 Original Instructions MLMP475i...

Page 2: ...1 While mowing always wear protective footwear and long trousers Do not operate the product when barefoot or wearing open sandals 2 Thoroughly inspect the area where the product is to be used and remo...

Page 3: ...proper maintenance or using non genuine parts not recommended by the manufacturer may lead to malfunction failure of the product Many accidents are caused by poorly maintained products 5 Before using...

Page 4: ...duct once every 3 months to avoid shortening its battery life 4 Never store the product with petrol in the tank inside a building where fumes can UHDFK DQ RSHQ DPH RU VSDUN 5 7R UHGXFH WKH UH KD DUG N...

Page 5: ...se only Always charge the battery indoors 2 Only charge the battery with the engine off 3 Protect the charger against moisture and wet conditions There is a risk of electric shock 4 Do not place any o...

Page 6: ...like personal injuries and damage to property kW Kilowatt ml Millilitre cm3 Cubic centimetre g kWh Gram per kilowatt per hour min or min 1 Per minute kg h Kilogram per hour mm Millimetre C Degree Cel...

Page 7: ...the operator or other bystanders Always ensure that other people and pets remain at a safe distance from the product when it is in operation In general children must not come near the area where the...

Page 8: ...nsportation handle 2 Drive bar 3 Brake clutch 4 Upper handle bar 5 Lower handle bar 6 Drive wire 7 Brake wire 8 Side lever x2 a Washer b Bolt 9 Wire clip 10 Battery with charge level indicator 11 Air...

Page 9: ...ith plastic bags sheets and small parts There is a danger of choking and suffocation Nominal power 2 1 kW Spark plug type XC92YC Spark plug gap 0 7 0 8 mm Battery Battery voltage 10 8 V Battery type L...

Page 10: ...ees Fig 1 Repeat on the other side to unlock the lower handle bar 5 3 Unfold the lower handle bar 5 from storage position to working position 4 Align the pin of the handle bar lock 23 with one of the...

Page 11: ...ing holes of the upper handle bar 4 and the lower handle bar 5 LJ 0DNH VXUH WKH ZLUHV FRUG LQJ LQ KRRN RI WKH KDQGOH VXSSRUW 3 5 4 3 6 Fix the upper handle bar 4 to the lower handle bar 5 with the sid...

Page 12: ...equipped with a 4 stroke engine Before operation it is necessary to add suitable fuel and engine oil separately WARNING This product contains a separate operator s manual for the engine Service the en...

Page 13: ...5 hours The battery charger level indicator 10 turns off when battery is fully charged 10 11 21 10 21 10 34 Engine oil WARNING This product is not supplied with oil However for manufacturing reasons i...

Page 14: ...se brake clutch Storage Empty fuel tank Empty oil Clean and maintain Store WARNING This quick start provides only a short overview of how to start and stop the product For safe use it is essential to...

Page 15: ...rass e g pasture grass or for shredding leaves 2 For safety reasons it is essential to read the entire instruction manual before the UVW RSHUDWLRQ DQG WR REVHUYH DOO WKH LQVWUXFWLRQV WKHUHLQ 3 This pr...

Page 16: ...volume left to collect grass Fig 18 2 When the hatch 25b is closed the grass catcher 25 is full and must be emptied Fig 19 25b 18 19 25b WARNING Always attach the grass catcher 25 when using this SURG...

Page 17: ...harge chute 30 into the grass catcher 25 Use a proper tool such as a brush WARNING Never use your hands or feet to remove grass clippings from the rear discharge chute 30 4 Empty the grass clippings o...

Page 18: ...23 clicks in place 7 Lift up the product by its transportation handle 1a so that it standards vertically Fig 25 Cutting height adjustment WARNING Before adjusting the cutting height stop the engine a...

Page 19: ...crews are tightened 13a is clean Check if the electric starter battery 10 is charged 2 Always push the product using the handle 1 Keep the handle bar dry and free from lubricant to ensure safe support...

Page 20: ...to address a problem instantly can cause a malfunction which can result in serious injury or even death WARNING Stop the engine disconnect the spark plug connector 15 and let the product cool before p...

Page 21: ...O IXUWKHU ZRUNV PXVW EH SHUIRUPHG E D TXDOL HG VSHFLDOLVW Cleaning 1 Clean the product with a slightly damp cloth and mild soap Use a brush for areas that are hard to reach 2 In particular clean the a...

Page 22: ...one by an experienced operator Rework or sharpening blades is not recommended unless it is done NOTE We strongly recommend jacking the product when performing inspection and work on the cutting means...

Page 23: ...engine Use the Parts Repair Dealer Locator on BRIGGSandSTRATTON com to locate an engine dealer nearest you For service of the product outside of the engine contact Sertronics by helpline 0800 4840045...

Page 24: ...eaning section 3 Loosen the side levers 8 Unlock the lower handle bar lock 23 and fold the lower 5 and the upper handle bars 4 4 Store the product and its accessories in a well ventilated dry storage...

Page 25: ...t recycling centers in order to conserve natural resources Each country should have its collection centers for electrical and electronic equipment recycling For information about your recycling drop o...

Page 26: ...y be guaranteed until expiry of the original period guarantee period This guarantee covers product failures and malfunctions provided the product was used for the purpose for which it is intended and...

Page 27: ...52 53 MLMP475iSSP46 M S 2 MLMP475iSSP46 M S 2 In more detail In more detail...

Reviews: