background image

EN

17

Getting

 started...

MLM1737

 by MacAllister

NOTE: 

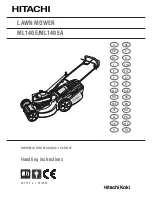
Always carry the grass catcher (8) by its handle (8a).

Before hooking the grass catcher (8), check if the mulching insert (19)

is in the rear discharge chute (18). Take away the mulching insert (19)

before hooking the grass catcher (8).

NOTE: 

The mulching insert (19) must be removed if the grass catcher 

(8) is used.

Before you start

18a

8a

15

2.

1.

Fig. 7

Summary of Contents for MLM1737

Page 1: ...MLM1737 Original Instructions_MNL_MLM1737_V1_211010 WARNING Read the instructions before using the product EN Lawnmower 1700W 37cm ...

Page 2: ...through them thoroughly before use and retain them for future reference Safety information Your product Before you start Product functions Operation Care and maintenance Troubleshooting Recycling and disposal Guarantee Technical specifications Declaration of conformity 02 03 12 13 19 20 24 28 32 33 34 36 38 ...

Page 3: ...enance shall not be made by children without supervision 1 Read the instructions carefully Be familiar with the controls and the proper use of the product 2 Never allow children persons with reduced physical sensory or mental capabilities or lack of experience and knowledge or people unfamiliar with these instructions to use the product Local regulations may restrict the age of the operator Electr...

Page 4: ...refoot or wearing open sandals Avoid wearing clothing that is loose fitting or that has hanging cords or ties 3 Thoroughly inspect the area where the product is to be used and remove all objects which can be thrown by the product 4 Before using always visually inspect to see that the cutting blade cutting blade bolts and cutting blade assembly are not worn or damaged Replace worn or damaged cuttin...

Page 5: ...the product or switch on the product carefully according to instructions and with feet well away from the cutting blade s 12 Do not tilt the product when switching on the motor except if the product has to be tilted for starting In this case do not tilt it more than absolutely necessary and lift only the part which is away from the operator 13 Do not start the product when standing in front of the...

Page 6: ...s not in use 2 Disconnect the product from the power supply i e remove the battery pack and or safety key before carrying out maintenance or cleaning work 3 Improper maintenance will lead to malfunction failure of the product 4 Inspect and maintain the product regularly Keep all nuts bolts and screws tight to be sure the product is in safe working condition 5 Check the grass catcher frequently for...

Page 7: ...or its service agent Vibration and noise reduction To reduce the impact of noise and vibration emission limit the time of operation use low vibration and low noise operating modes as well as wear personal protective equipment Take the following points into account to minimise the vibration and noise exposure risks 1 Only use the product as intended by its design and these instructions 2 Ensure tha...

Page 8: ...e product checked by a qualified professional and repaired if necessary before you operate it again Residual risks Even if you are operating this product in accordance with all the safety requirements potential risks of injury and damage remain The following dangers can arise in connection with the structure and design of this product 1 Health defects resulting from vibration emission if the produ...

Page 9: ...ng others the following symbols and abbreviations Familiarise yourself with them to reduce hazards like personal injuries and damage to property V Volt alternating voltage Hz Hertz min or Per minute W Watt min 1 g Gram kg Kilogram mm Millimetre m Metre cm Centimeter l Litre dB A Decibel A rated m s Metres per second squared Lock to tighten or secure Unlock to loosen Read the instruction Note Remar...

Page 10: ...istance from the product when it is in operation In general children must not come near the area where the product is Cutting blade continues to rotate after the product is switched off Wait until all machine components have completely stopped before touching the product Pay special attention when working on the cutting blade Beware of sharp blades Blades continue to rotate after the motor is swit...

Page 11: ... enhanced or double insulation WEEE symbol Waste electrical products should not be disposed of with household waste Please recycle where facilities exist Check with your Local Authority or local store for recycling advice The product complies with the applicable European directives and an evaluation method of conformity for these directives was done UK Conformity Assessed 96 ...

Page 12: ...EN 12 Getting started MLM1737 by MacAllister Your product Your product 12d 12c 12b 12a 19a 19 19b 18a 18 18b 1 2 2a 3 4 5 6 7 8 9 10 11 12 13 14 15 16 17 8a ...

Page 13: ...uction manual WARNING The product and the packaging are not children s toys Children must not play with plastic bags sheets and small parts There is a danger of choking and suffocation Unpacking 1 Unpack all parts and lay them on a flat stable surface 2 Remove all packing materials and shipping devices if applicable 3 Make sure the delivery contents are complete and free of any damage If you find ...

Page 14: ...osition to work position Fig 1 step 2 3 Secure the lower handle bar 7 by folding up the clamp levers 6 towards the lower handle bar 7 If the clamp lever 6 cannot be folded loosen it and fold again If it is too loose tighten it by turning the clamp lever 6 clockwise Fig 2 Before you start Assembly NOTE Take care of small parts that are removed during assembly or when making adjustments Keep them se...

Page 15: ...rds the handle If clamp lever 6 cannot be folded loosen it and fold again If it is too loose tighten it by swinging the clamp lever 6 Fig 3 step 3 7 Do it again on the other side Make sure that the interconnection cord 16 run on the upper side of the handle bars 5 7 8 Secure the inter connection cord 16 with two wire clips 17 Fig 4 Pull the inter connection cord 16 to avoid contact with the rear w...

Page 16: ...dle 8a is already preassembled on the top cover 8b and its position is rotatable to fit the intended use Fig 6 3 The grass catcher 8 is ready for use WARNING Make sure the clamp levers 6 are properly tightened before using the product WARNING Do not attempt to use the product without the grass catcher attached danger of flying objects The motor must be switched off and the blade must have stopped ...

Page 17: ... handle 8a Before hooking the grass catcher 8 check if the mulching insert 19 is in the rear discharge chute 18 Take away the mulching insert 19 before hooking the grass catcher 8 NOTE The mulching insert 19 must be removed if the grass catcher 8 is used Before you start 18a 8a 15 2 1 Fig 7 ...

Page 18: ...t comply with the information on the rating label If using an extension cord it must be suitable for outdoor use with sockets protected against water splashing Ensure the extension cord is of the proper size and type for your product 1 5 mm2 for up to 60 m 2 5 mm2 for up to 100 m NOTE The product is equipped with a power cord with the length of 10 m If a proper extension cord is required for opera...

Page 19: ...etail MLM1737 by MacAllister In more detail Product functions Operation Care and maintenance Troubleshooting Recycling and disposal Guarantee Technical specifications Declaration of conformity 20 24 28 32 33 34 36 38 ...

Page 20: ...er supply before adjusting the handle height To ensure safe operation the height adjustment of the handle bar is limited to the indicated positions Do not attempt to adjust any other height Lower handle bar Adjust the lower handle bars 7 to a suitable height according to your needs There are three handle heights to choose 1 Unfold and loosen the clamp levers 6 anti clockwise on both sides of the l...

Page 21: ...dle bar 7 with the mounting hole of the upper handle bar 5 Fig 11 step 3 4 Pass the mounting bolt 6b through the mounting holes to the end 5 Attach the washer 6a and screw in the clamp lever 6 clockwise lock it by folding up the clamp lever 6 towards the handle bar If clamp lever 6 cannot be folded loosen it and fold again If it is too loose tighten it by swinging the clamp lever 6 6 Do it again o...

Page 22: ... 3 WARNING Ensure that the lever 11 engages in the slot after each adjustment WARNING Switch the product off and wait that the cutting blade had come to a complete stop before adjusting the cutting height Disconnect the plug from the power supply before adjusting the cutting height WARNING Do not attempt to use the product without the grass catcher attached when collecting grass danger of flying o...

Page 23: ...er is full and must be emptied Fig 14 Emptying Empty the grass catcher 8 frequently during use Do not wait until it is completely full We recommend emptying it when it is half full 1 Switch the product off and make sure that the motor has stopped and the blade has stopped rotating 2 Lift the deflector guard 15 and lift the grass catcher 8 off the hooks 3 Remove the grass clippings from the rear di...

Page 24: ... push the product using the grip handle 1 Keep the handles dry to ensure safe support 4 Ensure that the air vents are always unobstructed and clear Clean them if necessary with a soft brush Blocked air vents may lead to overheating and damage the product Product functions Operation Mulching insert General operation NOTE Mulching means cutting and returning the grass clippings to the lawn in one st...

Page 25: ...ts moving forward and begins mowing 5 Release the start levers 3 to stop the mower 1 Make sure that the lawn is clear of stones sticks wire or other objects that could damage the product or its product 2 Do not cut wet grass because it tends to stick to the underbody of the product preventing the proper discharge of grass clippings and it could also cause you to slip and fall Mowing NOTE The produ...

Page 26: ...hing 1 Insert the mulching insert 19 into the rear discharge chute 18 make sure the grass catcher 8 is not fitted to the product 2 Avoid mowing when the grass is wet from rain or dew Wet grass may form clumps which interfere with the mulching action and reduce runtime The best time to mow grass is late afternoon when the grass is dry and the newly WARNING If the product strikes a foreign object st...

Page 27: ...roduct off and wait for the blade to come to a complete stop Then turn the product on its side Using an object such as a wooden stick remove any accumulation of grass in the blade area Be careful of the sharp edges of the blade Clean often after cutting new grass and after every use 5 Certain types of grass or grass conditions may require an area to be mulched a second time to fully disperse the g...

Page 28: ...spect the product before each use for worn and damaged parts Do not operate it if you find broken and worn parts WARNING Only perform repairs and maintenance work according to these instructions All further works must be performed by a qualified specialist Care and maintenance NOTE Do not use chemical alkaline abrasive or other aggressive detergents or disinfectants to clean this product as they m...

Page 29: ...atus of the flange 12b onto the spindle 12a firstly then attach the cutting blade 12c and hex nut 12d properly Tighten the hex nut 12d clockwise with 20 Nm min 25 Nm max to ensure safe operation of your product 6 Replace this cutting blade after 50 hours mowing or 2 years whichever is sooner regardless of condition If the cutting blade is cracked or damaged you must immediately replace it with a n...

Page 30: ...sons in order to avoid a safety hazard Care and maintenance UK plug only for UK market If you need to replace the fitted plug then follow the instructions below IMPORTANT The wires in the mains lead are coloured in accordance with the following code Blue Neutral Brown Live As the colours of the wire in the mains lead of this product may not correspond with the coloured marking identifying the term...

Page 31: ...uct in a place that is inaccessible to children The ideal storage temperature is between 10 C and 30 C 6 We recommend using the original package for storage or covering the product with a suitable cloth or enclosure to protect it against dust 1 Switch the product off disconnect the plug from the power supply before transporting it anywhere 2 Attach transportation guards if applicable 3 Always tran...

Page 32: ...eplace with a new one 3 2 Only cut materials according to the product capacity 3 3 Adjust the cutting height 4 Product suddenly stops 4 1 Cutting device is dull damaged 4 2 Cutting device is blocked 4 1 Replace with a new one 4 2 Remove blockage 5 Excessive vibration or noise 5 1 Cutting device is dull damaged 5 2 Cutting material exceeds capacity 5 3 Cutting height is incorrect 5 4 Bolts nuts are...

Page 33: ...e recycle where facilities exist Check with your Local Authority or local store for recycling advice For further information visit www recycle more co uk The product comes in a package that protects it against damage during shipping Keep the package until you are sure that all parts have been delivered and the product is working properly Recycle the package afterwards ...

Page 34: ...ntee covers product failures and malfunctions provided the product was used for the purpose for which it is intended and subject to installation cleaning care and maintenance in accordance with the information contained in these terms and conditions in the user manual and standard practice provided that standard practice does not conflict with the user manual This guarantee does not cover defects ...

Page 35: ...e detail MLM1737 by MacAllister Guarantee Distributor B Q plc Chandlers Ford Hants SO53 3LE United Kingdom www diy com Screwfix Direct Limited Trade House Mead Avenue Yeovil BA22 8RT United Kingdom www screwfix com ...

Page 36: ...sured sound power level LWA 94 04 dB A Uncertainty KWA 0 88 dB A Guaranteed sound power level LWA 96 dB A Vibration values Hand arm vibration ah 2 5 m s Uncertainty K 1 5 m s2 The sound values have been determined according to noise test code given in EN 60335 2 77 using the basic standards EN ISO 11094 and EN ISO 3744 The sound intensity level for the operator may exceed 80 dB A and ear protectio...

Page 37: ...e of the product the vibration values can differ from the declared total Adopt proper measures to protect yourself against vibration exposures Take the whole work process including times the product is running under no load or switched off into consideration Proper measures include among others regular maintenance and care of the product and accessories keeping hands warm periodical breaks and pro...

Page 38: ...EN 38 In more detail MLM1737 by MacAllister Declaration of conformity Declaration of conformity ...

Page 39: ......

Page 40: ......

Reviews: