M86 Security Threat Analysis Reporter User Manual Download Page 157

 A

PPENDICES

 S

ECTION


A

PPENDIX

 A

M86 S

ECURITY

 U

SER

 G

UIDE

147

Windows XP SP2 Pop-up Blocker

This sub-section provides information on setting up pop-up 
blocking and disabling pop-up blocking in Windows XP SP2.

Set up Pop-up Blocking

There are two ways to enable the pop-up blocking feature in 
the IE browser.

Use the Internet Options dialog box

1. From the IE browser, go to the toolbar and select 

Tools > 

Internet Options

 to open the Internet Options dialog 

box.

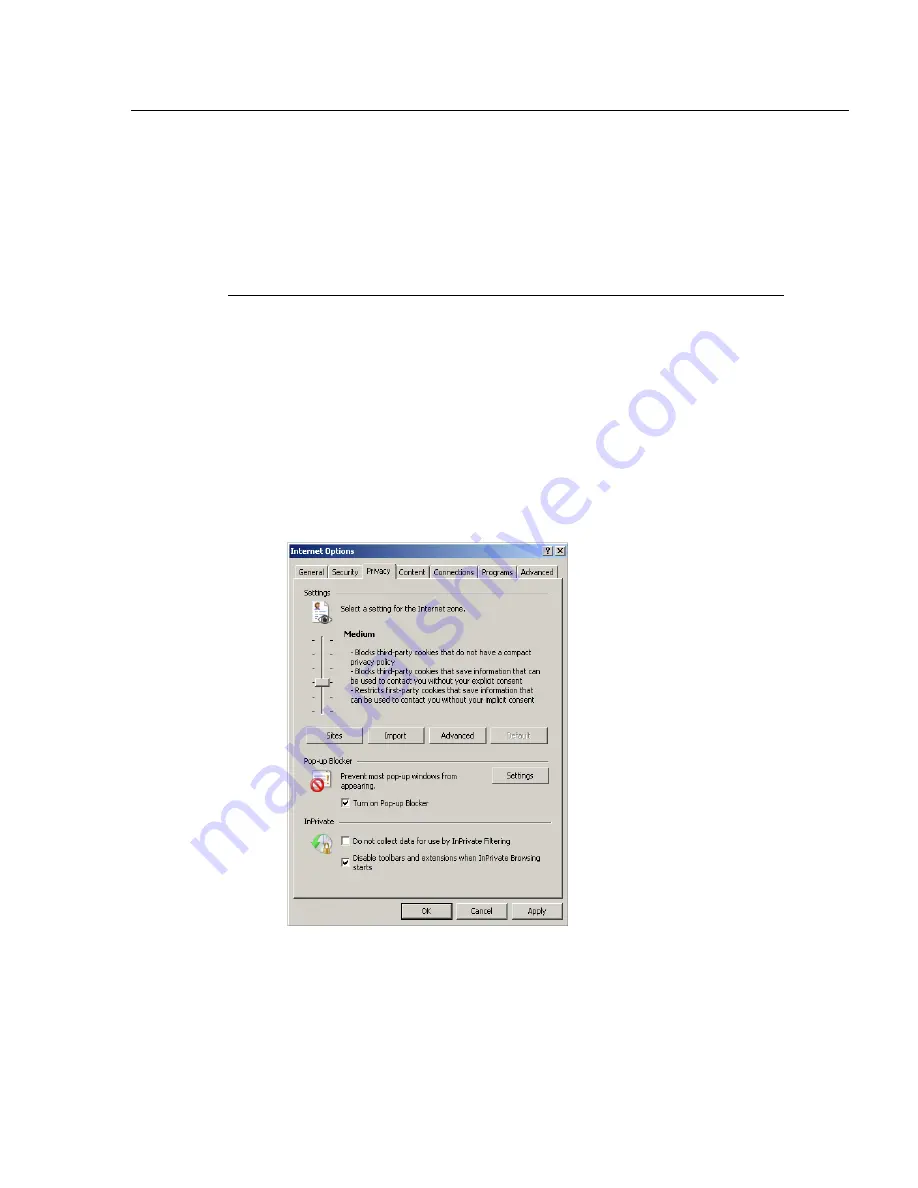
2. Click the Privacy tab:

Fig. A-7  Enable pop-up blocking

3. In the Pop-up Blocker frame, check “Turn on Pop-up 

Blocker”.

Summary of Contents for Threat Analysis Reporter

Page 1: ...M86 Threat Analysis Reporter USER GUIDE Software Version 2 1 10 Document Version 06 01 10...

Page 2: ...ntation and disclaims any implied war ranties of merchantability and fitness for a particular purpose M86 Security shall not be liable for any error or for incidental or consequential damages in conne...

Page 3: ...al Setup 10 Procedures for Logging On Off 11 Access the TAR Administrator Login window 11 Log in 12 Navigation toolbar menu links and topics 13 Exit the user interface 14 Navigation Tips and Conventio...

Page 4: ...tup 33 Add a Group 34 View Edit an Admin Group s Permissions 36 View Admin Group settings 36 Edit Admin Group settings 37 Delete an Administrator Group 37 Chapter 3 Admins Setup 38 Add an Administrato...

Page 5: ...ection 70 Bandwidth Gauges tab selection 72 Manually lock out an end user 73 Low severity lockout 74 Medium and High severity lockout 75 End user workstation lockout 75 Low severity URL medium URL ban...

Page 6: ...tor console 102 Chapter 5 Identify Users Threats 103 Perform a Custom Search 103 Specify Search Criteria 104 View URLs within the accessed category 106 ADMINISTRATION SECTION 107 Introduction 107 Chap...

Page 7: ...4 Perform Backup Restoration 127 Execute a Backup on Demand 129 Restore User Settings 130 Restore to Factory Default Settings 131 Reset to Factory Default Settings frame 131 Wizard Login window 132 T...

Page 8: ...ion Bar 150 Set up the Information Bar 150 Access the Client 150 Appendix B 152 System Tray Alerts Setup Usage 152 LDAP server configuration 152 Create the System Tray logon script 152 Assign System T...

Page 9: ...e 170 Step 5 Contact Technical Support 171 Power supply failure 171 Step 1 Identify the failed power supply 171 Step 2 Unplug the power cord 171 Step 3 Replace the failed power supply 172 Step 4 Conta...

Page 10: ...CONTENTS x M86 SECURITY USER GUIDE...

Page 11: ...ate Internet usage policies M86 s Threat Analysis Reporter TAR is designed to offer administrators or management dynamic real time graphical snapshots of their network s Internet traffic supported by...

Page 12: ...iminary Setup Section This section includes infor mation on creating and maintaining user accounts Configuration Section This section includes informa tion on configuring TAR to alert you to any end u...

Page 13: ...ns are used throughout this user guide NOTE The note icon is followed by italicized text providing additional information about the current subject TIP The tip icon is followed by italicized text givi...

Page 14: ...ndow or panel that can be clicked with your mouse to execute a command checkbox a small square in a dialog box window or panel used for indi cating whether or not you wish to select an option This obj...

Page 15: ...a group of objects such as fields text boxes list boxes buttons radio buttons checkboxes accordions tables tabs and or tables Objects within a frame belong to a specific function or group A frame ofte...

Page 16: ...splays from which you make a selection radio button a small circular object in a dialog box window or screen used for selecting an option This object allows you to toggle between two choices By clicki...

Page 17: ...at least two objects posi tioned beside one another that display content specified to its label when clicked A tab can display anywhere in a panel usually above a frame text box an area in a dialog b...

Page 18: ...5 Macintosh OS X Version 10 5 or 10 6 running Safari 4 0 Firefox 3 5 Flash plug in version 9 or later Screen resolution set at 1024 x 768 with color quality set at 16 bits 256MB RAM Pentium III 600 M...

Page 19: ...nts High speed connection from the TAR server to client workstations HTTPS connection to M86 s software update server Internet connectivity for downloading Java virtual machine Flash if not already in...

Page 20: ...perform the initial configuration of the server so that it can be accessed via an IP address on your network NOTE If you do not have the Threat Analysis Reporter Installation Guide contact M86 Securi...

Page 21: ...address or host name and use port number 8443 for a secure network connection plus 8e6tar For example if your IP address is 210 10 131 34 type in https 210 10 131 34 8443 8e6tar Using a host name exam...

Page 22: ...he application press the Tab key on your keyboard to move to the next field To return to a previous field press Shift Tab 2 In the Password field type in your password the default password is testpass...

Page 23: ...this link to display menu selections for accessing panels that let you set up and maintain poli cies used for triggering warnings when gauges approach their upper threshold limits Report Analysis mou...

Page 24: ...the latest user guides in the pdf format for this product Logout click this link to log out of this application When your session has been terminated the login window re displays Exit the user interfa...

Page 25: ...your keyboard to advance to the next field in a panel Expand contract a column Columns can be expanded or contracted by first mousing over the divider in the column header to display the arrow and dou...

Page 26: ...orm the action on the items Sort records by another column header Records can often be sorted by a different column header by clicking the header for that column This action sorts the records that dis...

Page 27: ...user groups administrator permis sion groups and group administrator profiles Chapter 1 User Groups Setup This chapter explains how to set up user groups whose Internet activity will be monitored by g...

Page 28: ...er Groups as detailed in the next chapters in this section 1 In the navigation toolbar mouse over the Administration menu link to display topics available to you 2 Click User Groups to display the Use...

Page 29: ...odify or delete an existing user group rebuild a user group on demand or refresh the display of the current list TIP Click Gauges at the top of the screen to re display the default gauges view NOTES T...

Page 30: ...he user groups icon with an exclamation point indi cates the user group cannot be rebuilt on demand View a list of members in a user group To view a list of members that belong to an existing user gro...

Page 31: ...Ending IP ranges previously added for that user group Single Users accordion view a list of User Names and IP Addresses for individual users previously selected from the Available Users list for that...

Page 32: ...Group panel At the top of this panel are the Patterns IP Ranges and Single Users checkboxes and the Group Name field greyed out frames corresponding to these checkboxes display below The only checkbox...

Page 33: ...to be included in the new group A pattern consists of a wildcard or a wildcard plus one or more alphanumeric characters If any patterns have been inherited from the base group these display in the Par...

Page 34: ...2 1 4 Add user group Patterns Preview Pattern Users The Patterns frame displays the pattern you added to the Assigned Patterns list box The Resolved Users frame includes a list of each user resolved...

Page 35: ...g a Starting IP and Ending IP range Beneath those fields is a section in which you can Calculate an IP Range by entering a single IP Address and Subnet Mask At the bottom of this frame is the Assigned...

Page 36: ...necessary edits can be made to these fields To add an IP address range without selecting from the Parent Ranges frame a Enter the Starting IP address b Enter the Ending IP address To calculate an IP a...

Page 37: ...dd user group IP range added Remove an IP address range To remove an IP address range from the Assigned Ranges list box 1 Click the row to highlight and select it this action acti vates the Remove IP...

Page 38: ...is populated with individual users from the base user group For each record in the list the User Name or IP address and corresponding IP Address display The list box below includes the target Assigne...

Page 39: ...er terms to narrow the selection of Available Users For example Type in 150 to only display results matching an IP address that begins with 150 2 Click Apply to display filtered results in the Availab...

Page 40: ...Y USER GUIDE Remove users from the Add tab To remove users from this user group 1 Select the user s from the Add tab this action activates the Remove button Fig 2 1 8 Add user group remove user from S...

Page 41: ...only frame with settings made in it that frame is activated Any frame without settings made in it displays greyed out 3 Make any of these edits To make entries in a frame that is not yet activated cl...

Page 42: ...ild Delete a User Group NOTES A user group can only be deleted by the administrator who added it A base group cannot be deleted To delete a user group 1 In the User Groups panel select the user group...

Page 43: ...ranted by the administrator who set up his her account as detailed in this chapter and in Chapter 3 In the navigation toolbar mouse over the Administration menu link and select Admin Groups to open th...

Page 44: ...s to be assigned This will distinguish the name from other names such as those set up for user groups 3 In the Group Privileges section click the appropriate checkbox es to specify the type of access...

Page 45: ...e TAR server or synchronize with TAR the source Web Filter s supplied library category updates custom cate gories and or user group information URL Gauges Monitor and manage URL gauges Web Filter Acce...

Page 46: ...ngs In the Admin Groups frame click the name of the adminis trator group to highlight the group name activate all buttons and to populate the Group Privileges frame with previously saved settings Fig...

Page 47: ...l selections in the Group Privileges frame Delete an Administrator Group 1 In the Group Names list box click the name of the admin istrator group to highlight the group name activate all buttons and t...

Page 48: ...chapter In the navigation toolbar mouse over the Administration menu link and select Add Edit Admins to display the Add Edit Admins panel Fig 2 3 1 Add Edit Admins panel At the left side of this pane...

Page 49: ...om of the Admins frame click Add Admin to clear and reset the Admin Detail frame 2 In the Admin Detail frame make the following entries or selections as appropriate Fig 2 3 2 New administrator informa...

Page 50: ...using the System Tray feature that triggers an alert in his her System Tray if an end user s Internet usage has reached the upper threshold estab lished for a gauge s alert the LDAP User Name and Dom...

Page 51: ...your selection s and to activate the Add Group button Click Add Group to include the user group s in the Assigned User Groups list box TIP To remove any user group from the Assigned User Groups list b...

Page 52: ...s selection NOTE The global administrator profile that was created during the wizard hardware installation process displays at minimum the TAR Login ID Email address and greyed out in the Assigned Use...

Page 53: ...word entries and User Groups selections The following information can be added modified or deleted Work Phone number Home Phone number Location information LDAP User Name or Domain name the latter two...

Page 54: ...fied but cannot be deleted 1 In the Admin Names list box select the group adminis trator s TAR Login ID 2 Click Delete Admin to open the Confirm dialog box with the message Are you sure you want to de...

Page 55: ...ges are configured and monitored Chapter 3 Alerts Lockout Management This chapter explains how alerts are set up and used and how to manage end user lockouts Chapter 4 Analyze Usage Trends This chapte...

Page 56: ...s A URL gauge is comprised of library categories and moni tors a targeted user group s access of URLs in a specified library category A bandwidth gauge is comprised of protocols port numbers and monit...

Page 57: ...he top portion of the gauge is comprised of three colored sections one in which the gauge s dial is posi tioned green safe section yellow warning section or red network threat section This position of...

Page 58: ...tioned in the green section of the gauge indicating there is no immediate threat for the library categories in this gauge group If the threat level for a gauge is high exceeding 66 percent of the ceil...

Page 59: ...ort used under the following conditions when running a second Web server on the same machine the other is using port 80 as a Web proxy and caching server or when running a Web server as a non root use...

Page 60: ...214 TCP UDP port for Kazaa Morpheous Grokster etc 4662 TCP UDP port for eMule eDonkey etc 4665 TCP UDP port for eDonkey 2000 6346 TCP UDP port for Gnutella file sharing Frost Wire LimeWire BearShare e...

Page 61: ...lecting this menu topic displays the panel that lets you edit the gauge s components This is a shortcut to use instead of going to the Add Edit Gauges panel selecting the gauge and then clicking Edit...

Page 62: ...oing to Dashboard Settings selecting the gauge from the list and then clicking the Disable Gauge icon See Hide Disable Delete Rear range Gauges in Chapter 2 of the Configuration Section Delete Gauge R...

Page 63: ...a group administrator if permissions were granted by the administrator who set up his her account as detailed in the Preliminary Setup Section 1 In the navigation toolbar mouse over the the Gauges me...

Page 64: ...uges to view the contents of this tab By default this tab includes the following list of Gauge Names FTP HTTP IM P2P SMTP For each Gauge Name in this list the following infor mation displays Group Thr...

Page 65: ...cordions for Gauge Components and User Member ship to the right When adding a new gauge do the following Name the gauge and specify group threshold limits timespan values and the method s to be used b...

Page 66: ...n arrow buttons to increment decrement the current byte value by one Make a selection from the pull down menu if you need to change the byte unit kB MB GB 3 Use the slider tool to specify the Timespan...

Page 67: ...or library categories ports the end user should not access For bandwidth gauges to modify criteria in the Port Number field type a specific value in the pre populated field and or use the up down arr...

Page 68: ...n click remove to move the selection s back to the Available Threats Groups list Assign user groups To assign user groups to be monitored by the gauge 1 Click the User Membership accordion to open it...

Page 69: ...up to the Assigned User Groups list box TIP To remove a user group from the Assigned User Groups list box click the user group to highlight it and then click remove to move the group back to the Avail...

Page 70: ...Gauges tab 2 Select the gauge from the list to activate all buttons below and populate the Gauge Components frame to the right Fig 3 2 6 Select the gauge to be edited 3 Click Edit Gauge to display the...

Page 71: ...clicking the Edit Gauge icon at the bottom left of the gauge 4 Edit any of the following criteria as necessary Gauge Information Gauge Name Group Threshold Timespan in minutes Gauge Method see Specif...

Page 72: ...b section gauges can be hidden disabled and deleted from the gauges dashboard by right clicking the gauge to display its menu and then choosing the appropriate topic See Gauge Usage Shortcuts in Chapt...

Page 73: ...the dashboard disabled This icon in the third column indicates the gauge does not display in the dashboard This gauge most likely has not been deleted because it will be used on a later occasion NOTE...

Page 74: ...Bandwidth Gauges tab 2 In the State column click the icon in the third column Disable Gauge to change the gauge s status to disabled Show a gauge To re display a gauge in the dashboard again 1 Select...

Page 75: ...the desired position in the dashboard Delete a gauge To delete a gauge 1 Select the gauge in the URL Gauges or Bandwidth Gauges tab 2 In the Actions column click the X icon in the far right column to...

Page 76: ...he highest to lowest end user score Gauge Ranking Use this option for a snapshot of a specific gauge s end user activity ranked in order by the highest to lowest end user score Either option lets you...

Page 77: ...ndwidth tab this score includes the end user s byte total for Inbound Outbound protocols ports 2 To drill down and view additional information about an end user s activity click the User Name in the a...

Page 78: ...er s Total score for all gauges he she affected End users are ranked in descending order by their Total score 2 Perform one of two drill down actions from here Access the User Summary panel by clickin...

Page 79: ...p accordion is expanded by default and displays a list of groups in which the end user belongs Gauge Readings frame to the right that includes the URL Gauges and Bandwidth Gauges tabs each showing the...

Page 80: ...me with a score to activate the Threat View button 2 Click Threat View to display the Threat View User panel which includes criteria that is based on the type of gauges to be viewed URL or bandwidth U...

Page 81: ...71 Fig 3 2 12 Threat View User panel for URL Gauges tab selection For each URL included in the list the Timestamp displays using military time in the YYYY MM DD HH MM SS format 2 Click a URL from the...

Page 82: ...gauges the Threat View User panel contains the Threats frame showing the Ports column and corre sponding Inbound Outbound bandwidth usage by the end user for that port and the combined Total inbound...

Page 83: ...Unlimited is selected the end user remains locked out of the specified areas on the Internet network until the admin istrator unlocks his her workstation To unlock the end user go to the Gauges Locko...

Page 84: ...splays Do the following If using the URL tab choose the library category catego ries from the list Up to 15 categories or one threat group class can be added If using the Bandwidth tab make a selectio...

Page 85: ...hen they are locked out based on the severity of the lockout low medium or high and the gauge type URL or bandwidth Low severity URL medium URL bandwidth lockout In a low or medium severity URL lockou...

Page 86: ...obal Administrator Section of the M86 Web Filter User Guide M86 IR Web Filter User Guide or the Web Filter portion of the M86 WFR User Guide for information about fields in the block page and how to u...

Page 87: ...t of Internet network for an indefinite time period as a result of his her Internet activity the admin istrator can determine when to unlock that end user s work station These functions are available...

Page 88: ...uge Names Adult Content Bandwidth Illegal Security Shopping For each Gauge Name in this list the following infor mation displays Group Threshold 200 Timespan minutes 15 by default Click Bandwidth Gaug...

Page 89: ...eft and the greyed out target panel displays to the right containing the Email Addresses and Low Lockout Components accordions 3 In the Alert Information frame type in the Alert Name to be used for th...

Page 90: ...if he she reaches the threshold limit set up in a gauge alert NOTE The System Tray alert feature is only available for an administrator with an Active Directory LDAP account user name and domain and i...

Page 91: ...reshold of X in which X represents the alert threshold on the gauge name gauge Beneath this information the date and time YYYY MM DD HH MM SS and clickable URL display for each URL accessed by the use...

Page 92: ...nt value by one Click add for URL gauges or add port for band width gauges to move the selection s to the Assigned Threats Groups list box TIP To remove one or more library categories ports from the A...

Page 93: ...the URL Gauges or Bandwidth Gauges tab 2 Select the gauge for which an alert will be viewed and or modified This action populates the Alerts frame list box with any existing alerts created for that g...

Page 94: ...Tray Lockout yes no If a Lockout was set up for the alert the following infor mation displays below Lockout Severity Low Medium High Duration minutes To the right of this window the Email Addresses an...

Page 95: ...Alerts frame with alerts for that gauge and to activate all buttons beneath the frame 3 Click Edit Alert to open the edit Alert panel Fig 3 3 5 Edit an alert 4 The following items can be edited Alert...

Page 96: ...h Gauges tab 2 Select the gauge from the list to populate the Alerts frame with alerts for that gauge and to activate all buttons beneath the frame 3 Click Delete Alert to open the Confirm dialog box...

Page 97: ...display its contents Fig 3 3 6 Alert Logs panel The alert log contains a list of alert records for the most recent 24 hour time period Each record displays in a separate row For each row in the list...

Page 98: ...Alert Action criteria yes no Email System Tray Lockout yes no If a Lockout was set up for the alert the following infor mation displays below Lockout Severity Low Medium High Duration minutes To the r...

Page 99: ...se over the Gauges menu link and select Lockouts to open the Lockouts panel 2 Select the URL Gauges or Bandwidth Gauges tab to display its contents Fig 3 3 8 View Lockouts The lockout list contains re...

Page 100: ...e larger calendar for the current month with today s date highlighted TIP To view the calendar for the previous month click the left arrow at the top left of the box To view the calendar for the next...

Page 101: ...nd user s and to remove the record s from the list NOTE By unlocking an end user s workstation all records in this list pertaining to that end user are removed from the list Access User Summary detail...

Page 102: ...k If more information is required in your analysis the Web Filter application or the Enterprise Reporter s Web Client and Administrator console can be accessed via the TAR user interface so you can ge...

Page 103: ...ne chart showing details for a pie chart View activity for an individual gauge To view activity for any individual URL or bandwidth gauge 1 If the gauges dashboard does not currently display choose Da...

Page 104: ...lt each slice of the pie represents the percentage of end user hits in a library category during the last hour the total for all categories in that gauge equaling 100 percent For a Bandwidth gauge By...

Page 105: ...erall Bandwidth Trend Chart Total Traffic The pie trend chart that displays in the middle of this panel includes the following information For URL gauges By default each slice of the pie represents th...

Page 106: ...s that can be performed in this panel appears in the Navigate a trend chart sub section Navigate a trend chart The following actions can be performed in this panel View gauge activity for a different...

Page 107: ...ion displays the gauge URL byte average score in one hour increments for the past 12 hour time period 1 Day This selection displays the gauge URL byte average score in one hour increments for the past...

Page 108: ...using over that slice of the pie chart Fig 3 4 3 Pie Gauge Trend Chart slice The following information displays for that pie slice gauge component name percentage of that pie slice based on a total of...

Page 109: ...rill into a pie slice to display a line Trend Chart By default this chart contains the following information linear depiction of the total end user SCORE in fixed time increments using the MM DD YYYY...

Page 110: ...in the chart Fig 3 4 5 Line Trend Chart data If the chart includes more than one line and more than one point is located in the area of the mouse pointer a separate box appears for each point in that...

Page 111: ...is included in the Overall Bandwidth Trend Chart To view only Inbound or Outbound activity click the Inbound or Outbound button above the pie chart to the right of the Total button Print a trend char...

Page 112: ...the Web Filter to launch the login window for the Web Filter user interface at that IP address or the Web Filter Welcome window if using the global administrator single sign on account NOTE See the M...

Page 113: ...get offending entities by performing a custom search to identify which users URLs and port are being accessed Perform a Custom Search In the navigation toolbar mouse over the Report Analysis menu link...

Page 114: ...s as possible To identify activities for a specific threat class group Select that threat class or group For bandwidth gauges to query activities for a specific port number click the Port Number check...

Page 115: ...r a URL search User user name IP address Threat name and the end user s total Score for that record For a bandwidth search User user name IP address Ports number Inbound score Outbound score and the e...

Page 116: ...etails button 2 Click View Details to display a list of URLs and corre sponding Timestamp using the YYYY MM DD HH MM SS format for each URL in the library category accessed by the end user within the...

Page 117: ...1 View the User Profiles List This chapter explains the options for viewing end user information comprising the User Profiles list Chapter 2 View Administrator Activity This chapter explains how to vi...

Page 118: ...5 Install Software Updates This chapter explains how the global administrator installs software updates on the TAR server Chapter 6 View Hard Disk Status This chapter explains how to view the current...

Page 119: ...n can be forced between the two servers see Chapter 4 Maintain the Device Registry The User Profiles panel is available to a group administrator only if permissions were granted by the administrator w...

Page 120: ...d enter a user name If IP Address was selected enter an IP address 3 Click Search to display a record that matches your criteria TIPS After performing a search if you wish to re display all end users...

Page 121: ...recent administrative activity performed on TAR In the navigation toolbar with the Administration tab selected click Admin Trails to display the Admin Trails panel Fig 4 2 1 Admin Trails panel The Ac...

Page 122: ...vity types performed on TAR within the past 30 days 2 In the Date Range field click the calendar icon on the left to open the larger calendar for the current month with today s date highlighted TIP To...

Page 123: ...ISTRATION SECTION CHAPTER 2 VIEW ADMINISTRATOR ACTIVITY M86 SECURITY USER GUIDE 113 7 Click Search to display the specified records for the selected dates in the Results list Fig 4 2 2 Admin Trails re...

Page 124: ...icable and Timestamp using the YYYY MM DD HH MM SS format The information that displays in these columns differs depending on the type of search performed and if an administrator name was selected fro...

Page 125: ...e navigation toolbar with the Administration tab selected click Device Registry to display the Device Registry panel Fig 4 3 1 Device Registry This panel is comprised of icons representing devices set...

Page 126: ...ly display in the user interface Sync All Devices Click this button to synchronize Web Filter devices library Categories and or User Groups New Web Filter Click this button to add another Web Filter t...

Page 127: ...2 Click Yes to proceed with that action Restart the TAR server 1 Click Reboot TAR to open the REBOOT dialog box with the following message Restarting Threat Analysis Reporter could lose unsaved work f...

Page 128: ...Filter pop up window Fig 4 3 2 Web Filter pop up window The Device Type WF displays and cannot be edited 2 Edit any of the following Name Name of the application IP IP address of the server Source Web...

Page 129: ...this Web Filter will be the source server click the Source Web Filter checkbox TIP Click Cancel to close this pop up window 5 Click Save to save and process your information and to return to the Devic...

Page 130: ...server Threat Analysis Reporter Maintenance View TAR device criteria Go to the TAR server icon in the Device Registry panel and click Edit to open the Threat Analysis Reporter pop up window Fig 4 3 4...

Page 131: ...ss range a Type in the IP Address b Type in the Subnet Mask c Click Add to add the bandwidth IP range in the list box To remove a bandwidth IP address range a Select the IP address range from the list...

Page 132: ...e Reporter pop up window Fig 4 3 5 Enterprise Reporter window add The Device Type ER displays and cannot be edited 2 Type in the Name of the server 3 Type in the IP address of the server TIP Click Can...

Page 133: ...ing Name Name of the server IP IP address of the server TIP Click Cancel to close this pop up window 3 Click Save to save your edits and to close the pop up window Delete the ER device from the regist...

Page 134: ...up window Fig 4 3 7 SMTP window The following information displays Name of server Device Type SMTP IP address Port number if appli cable Username if applicable Password if appli cable Authentication t...

Page 135: ...ose this pop up window View Proxy Server device criteria 1 Go to the image of the Proxy Server in the Device Registry panel and click View to open the Proxy Server pop up window The following informat...

Page 136: ...ce Web Filter to TAR Source Web Filter Devices Make this selection to synchronize information from all devices tied to the source Web Filter server SMTP server patch server proxy server NTP server wit...

Page 137: ...tinent to the administrator who configured the gauges and do not include other administrators configuration settings These features are available to a group administrator only if permissions were gran...

Page 138: ...inistrator By default TAR performs an automatic backup each morning at 2 00 a m Automatic backup files display with the characters auto_ and use the YYYYMMDD format For example auto_20100116 displays...

Page 139: ...ckup Configuration Settings button Fig 4 4 2 Backup on demand TIP Spaces cannot be entered in this field but numerals upper and lowercase characters and the underscore _ character can be used 2 Click...

Page 140: ...from the Configuration Files box select the file to be restored by clicking on it to highlight it Fig 4 4 3 Restore Personal Settings 2 Click Restore Configuration Settings to restore settings from t...

Page 141: ...trator group and gauge configuration will be purged and administrator and group settings cannot be restored Reset to Factory Default Settings frame 1 In the Reset to Factory Default Settings panel Ple...

Page 142: ...ick Yes to accept it and to go to the Wizard Login window Fig 4 4 6 Wizard Login window Wizard Login window 1 In the Wizard Login window see Fig 4 4 6 type in the Username created during the wizard ha...

Page 143: ...t it from the list box and then click Remove 6 In the Web Filter Setup section type in the Server Name and Server IP address indicate if this Web Filter will be Set as Source and then click Add to inc...

Page 144: ...erprise Reporter click the radio button corresponding to Yes or No If Yes was selected enter the Server Name and Server IP address of the ER server connected to the Source Web Filter server Fig 4 4 8...

Page 145: ...e by email or in writing Hours Regular office hours are from Monday through Friday 8 a m to 5 p m PST After hours support is available for emergency issues only Requests for assistance are routed to a...

Page 146: ...orporate Headquarters USA 828 West Taft Avenue Orange CA 92865 4232 USA Local 714 282 6111 Fax 714 282 6116 Domestic US 1 888 786 7999 International 1 714 282 6111 M86 Taiwan 7 Fl No 1 Sec 2 Ren Ai Rd...

Page 147: ...tempt to resolve the issue directly If your issue needs to be escalated you will be given a ticket number for reference and a senior level technician will contact you to resolve the issue If your issu...

Page 148: ...curity warrants that the M86 product s do es not infringe on any third party copyrights or patents This warranty shall not apply to the extent that infringement is based on any misuse or modification...

Page 149: ...voice line Technical support information Online http www m86security com support Toll Free 888 786 7999 press 3 Telephone 1 714 282 6111 press 3 E mail support m86security com Have the following info...

Page 150: ...rnished as necessary to maintain the proper operational condition of the product s If parts are discontinued from production during the Warranty Period immediate replacement product s or hardware part...

Page 151: ...ns on how to disable pop up blocking software for the following products Yahoo Toolbar Google Toolbar AdwareSafe and Windows XP Service Pack 2 SP2 Yahoo Toolbar Pop up Blocker Add the Client to the Wh...

Page 152: ...Blocker dialog box Fig A 2 Allow pop ups from source 3 Select the source from the Sources of Recently Blocked Pop Ups list box to activate the Allow button 4 Click Allow to move the selected source t...

Page 153: ...ite List To add the Client to the white list so that it will always be allowed to pass go to the Google Toolbar and click the Pop up blocker button Fig A 3 Pop up blocker button enabled Clicking this...

Page 154: ...p up blocking Popup protection off by clicking the pop up icon 1 In the IE browser go to the SearchSafe toolbar and click the icon for popups blocked to toggle to Popup protec tion off This action tur...

Page 155: ...irefox browser go to the toolbar and select Tools Options to open the Options dialog box 2 Click the Content tab at the top of this box to open the Content section Fig A 5 Mozilla Firefox Pop up Windo...

Page 156: ...g A 6 Mozilla Firefox Pop up Window Exceptions 4 Enter the Address of the web site to let the client pass 5 Click Allow to add the URL to the list box section below 6 Click Close to close the Allowed...

Page 157: ...ng in Windows XP SP2 Set up Pop up Blocking There are two ways to enable the pop up blocking feature in the IE browser Use the Internet Options dialog box 1 From the IE browser go to the toolbar and s...

Page 158: ...e IE browser go to the toolbar and select Tools Pop up Blocker Turn On Pop up Blocker Fig A 8 Toolbar setup When you click Turn On Pop up Blocker this menu selec tion changes to Turn Off Pop up Blocke...

Page 159: ...se the IE Toolbar 1 With pop up blocking enabled go to the toolbar and select Tools Pop up Blocker Pop up Blocker Settings to open the Pop up Blocker Settings dialog box Fig A 9 Pop up Blocker Setting...

Page 160: ...ools Pop up Blocker Pop up Blocker Settings to open the Pop up Blocker Settings dialog box see Fig A 9 2 In the Notifications and Filter Level frame click the checkbox for Show Information Bar when a...

Page 161: ...ECURITY USER GUIDE 151 3 Click Yes to add the Client to your white list and to close the dialog box NOTE To view your white list go to the Pop up Blocker Settings dialog box see Fig A 9 and see the en...

Page 162: ...ain and is not available if using IP groups authentication NOTE In order to use this feature the LDAP Username and Domain set up in the administrator s profile account see Chapter 3 in the Preliminary...

Page 163: ...UIDE 153 2 In the Run dialog box type in the path to the scripts folder C WINDOWS sysvol domain scripts 3 Click OK to open the scripts folder Fig B 2 C WINDOWS sysvol domain scripts window 4 Right cli...

Page 164: ...ext Document Fig B 3 New Text Document 6 Type the following text in the blank document file echo off start X X X X win tartrayw32 exe ta X X X X in which X X X X represents the IP address of the TAR s...

Page 165: ...open the Save As window Fig B 4 Save As dialog box 8 In the File name field type in the name for the file using the filename bat format For example tartray21 bat NOTE Be sure that the Save as type fi...

Page 166: ...ript to as many administrators as needed 1 From the taskbar of the LDAP server go to Start Programs Administrative Tools Active Directory Users and Computers to open the Active Directory Users and Com...

Page 167: ...rs folder 3 In the Properties dialog box click the Profile tab to display its contents 4 In the Login script field type in the bat filename For example tartray21 bat 5 Click Apply to save your entry 6...

Page 168: ...load in the System Tray if the TAR server is not actively running Use the TAR Alert icon s menu When right clicking the TAR Alert icon the following pop up menu items display Tar Admin Interface click...

Page 169: ...he standard gauge to a yellow gauge pictured to the far left in the image below The following message appears briefly above the yellow gauge New M86 TAR Alert The following message displays whenever m...

Page 170: ...splays beneath this message followed by the Close button If more than one alert was triggered the alert box includes the following message and button to the right of the Close button X more alerts in...

Page 171: ...three parts Hardware Compo nents Server Interface and Troubleshooting in the event of a failure in one of the drives power supplies or fans NOTE As part of the ongoing maintenance procedure for your R...

Page 172: ...er supplies and five sets of dual cooling fans 10 in total Part 2 Server Interface LED indicators in SL and HL units On an SL and HL unit the following LED indicators for software and hardware status...

Page 173: ...tor Color Condition Description LOG Green On Downloading a log Off No log download detected RAID Green On RAID mode enabled and running Off RAID mode is inactive Red On Check user interface for status...

Page 174: ...you to the status of that feature on the unit H chassis front panel SL chassis front panel HL chassis front panel The buttons and LED indicators for the depicted icons func tion as follows UID button...

Page 175: ...in the control panel this icon also displays on the front panel on each hard drive carrier Hard drive activity is indi cated by a green LED on an H or HL server and by an amber LED on an SL server An...

Page 176: ...ys when the UID button on the control panel is pressed This LED remains lit until the UID button is pressed again Power Supplies LED indicators The power supplies are located at the right on the rear...

Page 177: ...admin istrator of the server This email identifies the failed hard drive by its number HD 1 or HD 2 Upon receiving this alert the administrator should verify the status of the drives by first going to...

Page 178: ...ailed hard drive detected The Hardware Detector panel displays the current RAID Array Status for the two hard drives HD 1 and HD 2 Normally when both hard drives are functioning without failure no tex...

Page 179: ...nistrator console go to the server to replace the drive Press the red release button to release the handle on the carrier and then extend the handle fully and pull the carrier out towards you Replace...

Page 180: ...ebuild process The Results alert box displays the following messages if the RAID rebuild proceeds as expected RAID rebuild process starting Rebuild has completed successfully It will take approximatel...

Page 181: ...ssis by an audible alarm and an amber power supply LED or an unlit LED on the front and rear of the chassis NOTE A steady amber power supply LED also may indicate a disconnected or loose power supply...

Page 182: ...rds you 3 Note that an audible alarm sounds and the LED is unlit when the power supply is disengaged Replace the failed power supply with your spare replacement power supply The alarm will turn off an...

Page 183: ...orization number and for instructions on returning the unit to M86 Security A steady red LED on and not flashing indicates an over heating condition which may be caused by cables obstructing the airfl...

Page 184: ...them to the source Web Filter FTP File Transfer Protocol is used for transferring files from one computer to another on the Internet or an intranet global administrator An authorized administrator of...

Page 185: ...the keywords were found SMTP Simple Mail Transfer Protocol is used for transfer ring email messages between servers synchronization A process by which two or more machines run in parallel to each oth...

Page 186: ...the global address of Web pages and other resources on the Internet A URL is comprised of two parts The first part of the address specifies which protocol to use such as http The second part specifie...

Page 187: ...up definition 174 base group in TAR 22 58 button terminology 4 byte score in TAR 48 C checkbox terminology 4 Ctrl key 15 custom category definition 174 custom search in TAR 103 D delete a gauge 62 dev...

Page 188: ...r 2 definition 174 group administrator 2 definition 174 H H server 161 hide a gauge 62 HL server 161 How to access the Add Edit Gauges panel 53 add a new alert 79 add a new gauge 55 drill down into a...

Page 189: ...8 Java Virtual Machine 8 Java virtual machine 9 JavaScript 8 L LDAP 152 definition 175 server types supported in TAR 19 user authentication in TAR 21 LED indicators 162 library categories definition...

Page 190: ...op up blocking disable 141 pop up box window terminology 6 Product Warranties section 138 protocol bandwidth gauge 46 definition 175 pull down menu terminology 6 R radio button terminology 6 rearrange...

Page 191: ...equirements 8 System Tray 152 T tab terminology 7 TCP definition 175 TCP port in TAR 49 technical support 135 text box terminology 7 timespan 56 timespan for gauges in TAR 61 tooltip information 16 Tr...

Page 192: ...INDEX 182 M86 SECURITY USER GUIDE...

Reviews: