


FinishLynx P
LATINUM
Package Quick Start Guide - For Vision Cameras
7
Step 15:
Create a Competition Directory for FinishLynx and LynxPad to Share
1. Follow the instructions on the
2. In FinishLynx, click
File
|
Options
|
Event
. Click the
Browse
button next to the
Event
Directory
:
text field and
navigate to the directory
you created in Step 4. Click
Ok
.
3. Open the LynxPad software.
4. Click
File
|
Options
…
and
uncheck
the
Load Existing
Results on Program Start
box. Click
Ok
.
5. Open the sample competition by clicking
File
|
Open
.
Navigate to
C:\LynxPadData\Sample
and then double-click
the
lynx.cmp
file. A practice competition opens on the
screen.
6. Still in LynxPad, click
File
|
Options
…
. Click the
Browse
button next to the
Directory:
text field. Navigate to the
directory you created earlier. Select it and click
Ok
. Click
Apply
and then click
Ok
again.
7. Still in LynxPad, click
File
|
Save as
…
and navigate to a
location you wish to save the LynxPad data. Click
Ok
. Now,
FinishLynx can get start lists created in LynxPad, and
LynxPad can import results generated by FinishLynx.
Step 16:
Use FinishLynx with LynxPad Data
1. In FinishLynx, click
to load the schedule of events from
LynxPad. The
Go To Event
dialog appears.
2. Click
Load Schedule
once and then expand the drop-down
list; a list of events appears. Select the
110 Meter Hurdles
Men (9, 3, 1)
event in the list, and then click
Ok
. The first
heat of the third round of the men’s 110m hurdles opens on
the FinishLynx screen.
3. Either use a starting gun or tap the end of the sensor with
your hand
– this simulates the firing of the starting gun and
starts the yellow FinishLynx timer.
4. Toggle the Capture by clicking the button next to the yellow
timer
, and then have your assistant run through the
finish line.
5. Practice evaluating the image by following the same steps
you followed earlier in Step 3:
6. Click
File
|
Save
to save the race to the
Practice
competition
directory.
7.
(Optional)
Print the results and a portion of the FinishLynx
image by right-clicking on the image and drawing a box
around the portion you want to appear in your printout. For
example, the first place finisher or a close finish between
two competitors. Click
Ok
and then select the printer from
the
dialog to send the image with results to the printer.
8. Click
File
|
Close
Window
and then click
Yes
to save
changes you made to the FinishLynx image when you
cropped it.
9. In LynxPad, click to highlight
Men 110 Meter Hurdles
in the
Events
window. The start list appears in the
Heats
window.
10. Still in LynxPad, click
Competition
|
Refresh All Results
.
The results from the race you just evaluated appear in
LynxPad.
NOTE: If you plan on using the same directory for each
meet, it is recommended that you move all of the contents
to another directory prior to the start of the next meet. This
will archive your files in case you need them for results
verification, as well as keep the main directory from
becoming cluttered.
Optional:
Using the 2.8-10mm P-Iris Lens
First, connect the lens cable to the Remote serial port on the
back of the camera. Then, configure your camera settings to
use the 2.8-10mm P-Iris lens: in FinishLynx, access the
camera settings by clicking
. Under the Setup tab,
locate the
Iris Type:
setting and select the
P-Iris
radio
button. Click Ok.
Remotely adjust lens aperture
to control the amount of
light in the lens. If your picture looks too white or washed
out, use the Close Iris button
in FinishLynx to let less
light in. Likewise, if your picture looks too dark, use the
Open Iris button
in FinishLynx to let more light in. To
enable the Auto Iris feature: click
check Auto Iris, and then click OK. FinishLynx will now
automatically remotely open and close the iris depending on
the amount of light.
Note:
By default, the iris will be in the
closed
position, so it
is normal for the image in FinishLynx to be very dark or
black at first, until you open the iris.
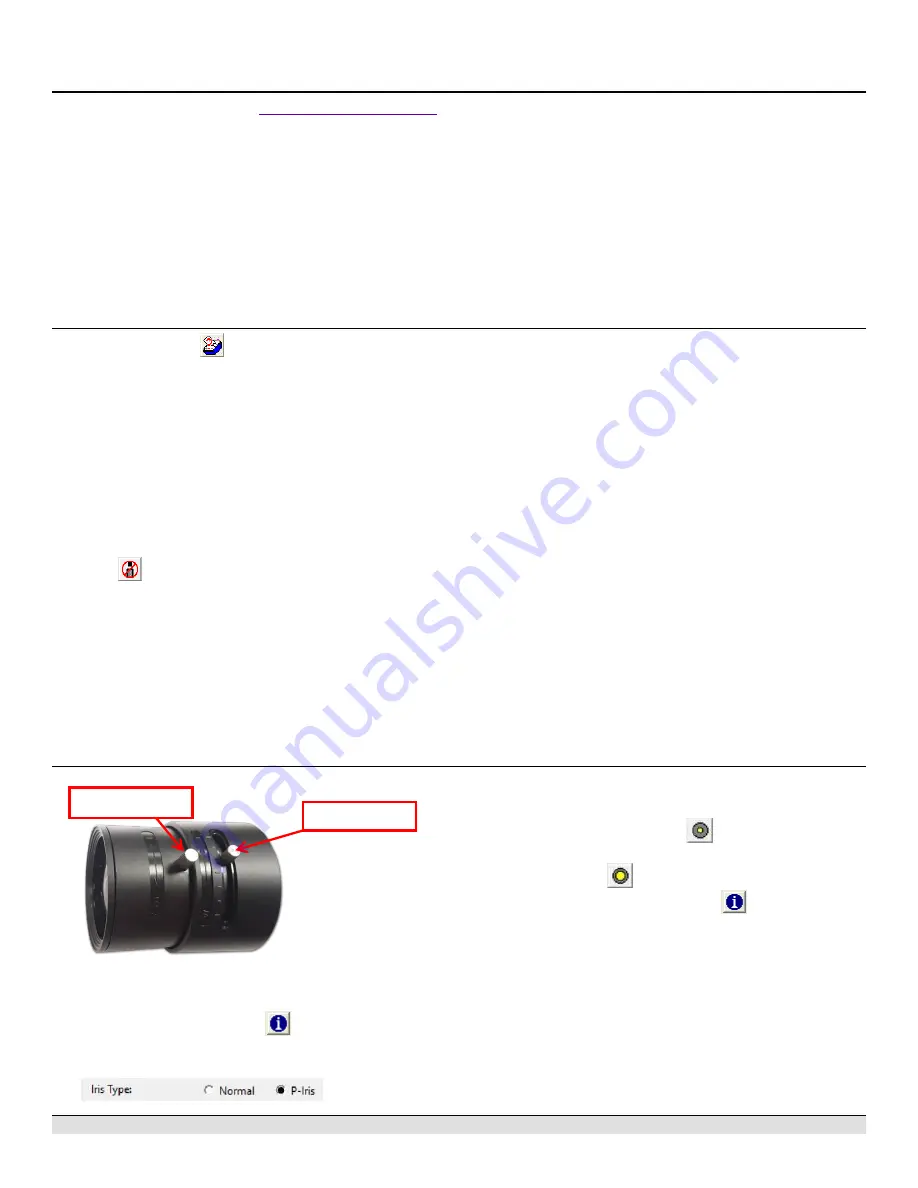
Manually adjust lens focus and zoom rings
.
This lens is a
varifocal
lens, meaning it will not stay in focus when you
change the zoom. This step will require some fine tuning to
Zoom Adjuster
Focus Adjuster


