Lynx FinishLynx Platinum Quick Start Manual Download Page 2

FinishLynx P

LATINUM

 Package Quick Start Guide - For Vision Cameras 


Quick-Start Guide

 - FinishLynx Platinum Package Timing System  

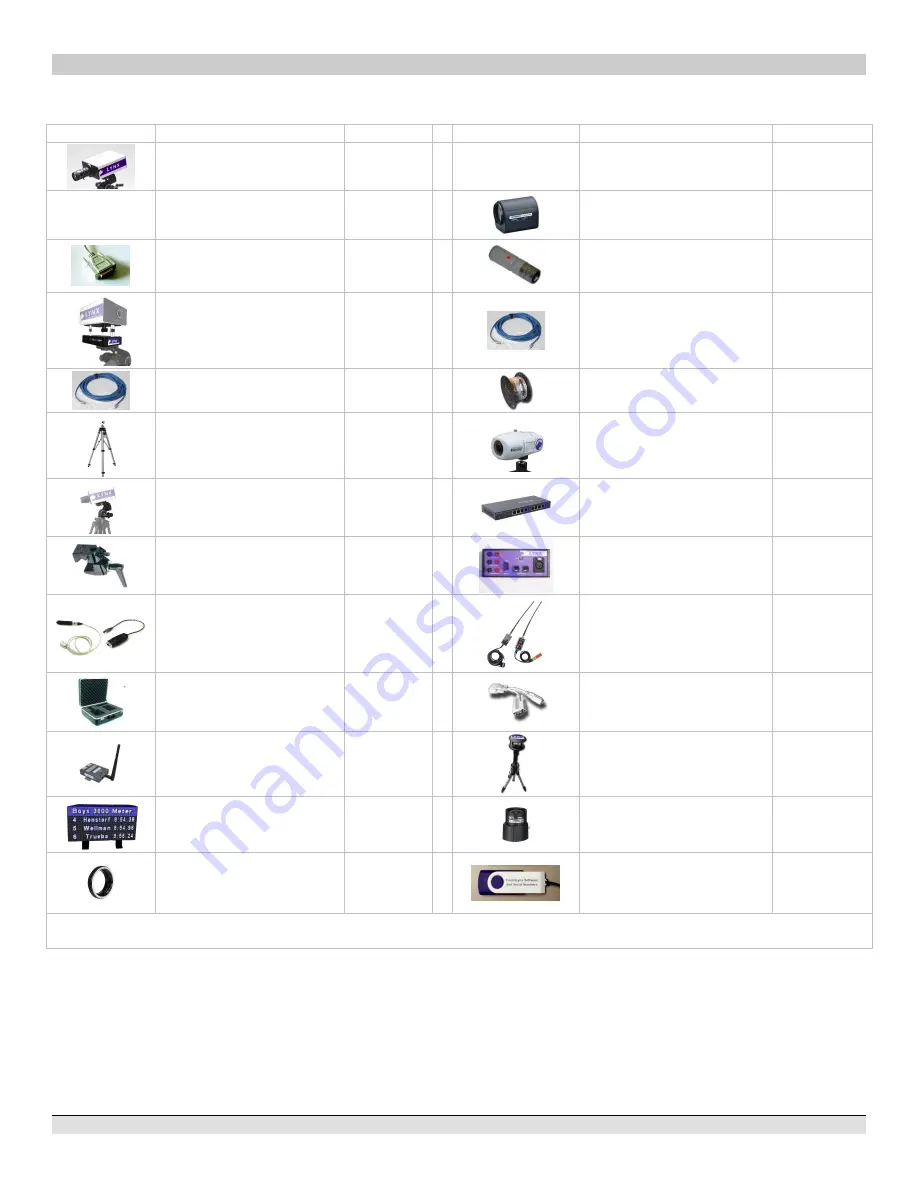
Verify that your FinishLynx Platinum Package contains the components pictured here. If not, or if you need help, call: (978) 556 9780 - USA


Item 

Description 

ID 


Item 

Description 

ID 


EtherLynx Vision high sensitivity 

Primary camera (x2) 

5L500 


Not Pictured 

Video Display Module 

VDM 

Not pictured 

Timing option embedded in 

camera 

5LTE 


2 x C-Mount 8-48mm f1.2 

Motorized Zoom Lens 

C848M 


Connection box cable 

451 


Normally closed start sensor with 

light 

3L400 


Remote Positioner (x2) 

2L102 


100 ft. Ethernet cable 

C10BT 


25 ft. Ethernet cables (x4) 

C10BT 


500 ft. start sensor cable 

3A100 


Tripod (x3) 

BG3036 


IdentiLynx Full Frame Video 

Camera kit 

IdentiLynx 


Geared Head (x2) 

BG3275 


8 port 10/100 Power over 

Ethernet switch 

PoE-Switch 


Super Head Clamp (x2) 

BG2909 


Connection box 

C-Box 


Capture button and USB/Serial 

adapter 

1A205U 


RadioLynx Transmitter and 

Receiver (includes RadioLynx 

start sensor (red case) 

3L900 


2 x Carrying case 

1A207 


Button splitter 

B-SPL 


Wired SeriaLynx 

8L108 


Sonic Wind Gauge with Tripod 

and 50m cable 

WG-Lynx 


Lynx 84x168 Pixel LED Display 

KLXLED084

x168 


2x CS Mount 2.8-10mm P-Iris 

lens 

CS2810P 


CS Mount to C Mount Adapter 

MCS-C 


Lynx USB Flash Drive  with 

FinishLynx32, LynxPad, and 

Plugins 

5LSW, 5LPRW 

5LPACM 

5LPNCP and 

9LSW01 

Be sure to keep your USB flash drive safe. It includes your Serial Numbers, Software, & Quick-Start Guides.  

To access the files, insert the flash drive in your computer and click on 

START.html


Items not included 


Laptop running Microsoft Windows. Your computer needs: two available USB ports, and one available Ethernet port. 


Flathead screwdriver. (optional) 


Step ladder and table. (optional) 


Plumb bob and string. (optional) 


Printer (optional). 


Recommended

: UPS 

– Uninterruptible Power Supply (Battery Backup)  


Summary of Contents for FinishLynx Platinum

Page 1: ...FinishLynx PLATINUM Package Quick Start Guide For Vision Cameras 1 FinishLynx Platinum package Quick Start Guide For EtherLynx Vision Cameras ...

Page 2: ... switch PoE Switch Super Head Clamp x2 BG2909 Connection box C Box Capture button and USB Serial adapter 1A205U RadioLynx Transmitter and Receiver includes RadioLynx start sensor red case 3L900 2 x Carrying case 1A207 Button splitter B SPL Wired SeriaLynx 8L108 Sonic Wind Gauge with Tripod and 50m cable WG Lynx Lynx 84x168 Pixel LED Display KLXLED084 x168 2x CS Mount 2 8 10mm P Iris lens CS2810P C...

Page 3: ... Capture Mode ACM plug ins When prompted enter the serial numbers from your flash drive 1 Start FinishLynx by clicking the Windows Start button and selecting All Programs FinishLynx 2 Verify that you have correctly installed the RL NCP and ACM plug ins by clicking Help from the Menu bar and selecting About When the About FinishLynx window appears the NCP ACM and RL plug ins are listed with the ser...

Page 4: ... track Step 7 Attach the cameras to the tripods NOTE Primary camera is marked TIMING ENABLED on camera ID plate on base of camera 1 Secure the remote positioner to the camera bottom by turning the black handled thumbscrew Make sure the FinishLynx label faces in the same direction as the camera lens will face Note Cables omitted for clarity and actual lens may vary from model shown 2 Connect the ca...

Page 5: ...reen status bar to complete its cycle Align Camera in EasyAlign 2 D Video Mode 1 Activate EasyAlign by clicking on the 2 D Align Icon in the top left hand corner of the FinishLynx Hardware Control screen 2 The icon turns green and the 2 D video viewer appears within the software The 2 D viewer makes it easy to see how your camera is aligned on the finish The goal is to align the green vertical lin...

Page 6: ...owing information will help to set up the ACM feature for stopping or pausing the running time with each race 1 In Camera Settings navigate to the Inputs tab and set Photo Eye to Internal 2 Click OK to close the Camera Settings 3 Go to Scoreboard Options and set the Offset to 0 03 C Manually Control ACM 1 Click File New to create a new blank event or click the Create New Blank Event button in the ...

Page 7: ...a portion of the FinishLynx image by right clicking on the image and drawing a box around the portion you want to appear in your printout For example the first place finisher or a close finish between two competitors Click Ok and then select the printer from the Print dialog to send the image with results to the printer 8 Click File Close Window and then click Yes to save changes you made to the F...

Page 8: ...ss light in 5 Have your assistant run through the finish line and watch where they appear on the computer monitor The goal is for the runner s torso to be fully visible in both the inside and outside lanes Now have your assistant run through the inner most and outer most lanes Adjust the tilt of the camera until they are clearly visible on both ends of the finish line Note It may be necessary to m...

Reviews: