background image

The Keyboards 

11 

E-EQ-VX4OGWW-H-ARC 

VX4 User’s Guide 

Secondary Keys LED 

The VMT keyboard is equipped with several secondary keys. These keys are identified by the 
superscripted text found on the keyboard keys. The secondary keys are accessible by using two 
(2) keystrokes: the <2

nd

> key followed by the superscripted key. 


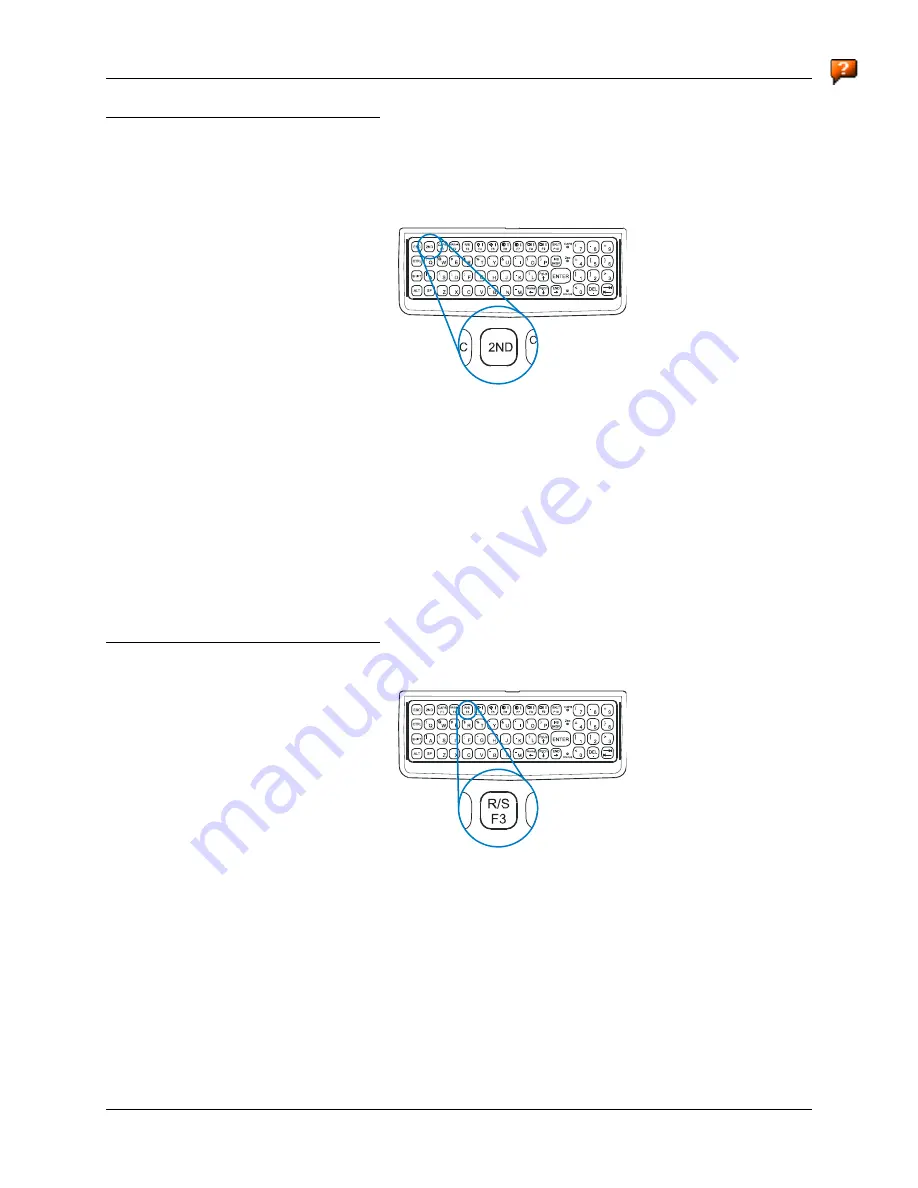
Figure 7  The Secondary Key 

Once the <2

nd

> state is enabled (by pressing the <2

nd

> key) the Secondary Mode LED is 

illuminated and the <2

nd

> state is enabled until another key is pressed. The <2

nd

> key is toggled on 

with a <2

nd

> keypress and then immediately off with another <2

nd

> keypress. 

For example: 

Press <2

nd

> and <F1> to turn CapsLock on and off. 

Press <2

nd

> and <

> to initiate the PgUp command. 

Press <2

nd

> and <Q> to type the “!” key. 

Press <2

nd

> and <BkSp> to enter the Insert (Ins) mode. 

Status LED 


Figure 8  The Resume/Suspend Key 

The Status LED, located on the front of the keyboard, is illuminated green when the unit is 
powered on. The Status LED is dark when power is disconnected.  

Note: 

This LED should not be lit when power is disconnected from the VX4.  

The Resume/Suspend key has no effect on a VX4.  All power management is controlled by 
Microsoft Windows.  Windows Power Management contains options to set the display timer, hard 
disk timer and standby timer.  Please refer to “Status Indicator” in the “Operation” section of this 
manual for more details on Windows Power Management. 

Summary of Contents for VX4

Page 1: ...NT NOTICE LXE s VX4 is obsolete This electronic manual has been made available as a courtesy to LXE s VX4 customers Please contact your LXE customer support representative for assistance Copyright December 2005 by LXE Inc All Rights Reserved VX4A136OPGDWW E EQ VX4OGWW H ARC ...

Page 2: ...ss GA 30092 U S A 770 447 4224 Trademarks LXE is a registered trademark of LXE Inc Microsoft Windows and the Windows logo are registered trademarks of Microsoft Corporation in the United States and or other countries All other brand or product names are trademarks or registered trademarks of their respective companies or organizations When this manual is in PDF format Acrobat Reader Copyright 1987...

Page 3: ...anners Updated Accessories listing effective July 2004 G Appendix B Regulatory Notices and Safety Information Updated the 6726 Declaration of Conformity H Cover Page Updated logo H Notices Added WEEE statement H Accessories Updated Accessories listing to reflect currently available items H External Power Supply Optional Added temperature statement H Appendix B Regulatory Notices and Safety Informa...

Page 4: ......

Page 5: ...tcuts 8 Key Maps 9 Unused Key Functions 9 NumLock and the VX4 9 Keyboard Backlight 9 Keyboard LEDs 10 CAPS LED 10 Secondary Keys LED 11 Status LED 11 Control Keys 12 Power Supply 13 Backup Battery 13 Getting Help 14 Manuals and Accessories 14 Manuals 14 Accessories 14 INSTALLATION 17 Install Mounting Brackets 17 Components 17 Mounting Dimensions 18 Mounting Positions 18 Torque Measurements 19 Cabl...

Page 6: ... Headset 37 Connect Ethernet Cable 38 Connect Power Cable 39 External Power Supply Optional 40 Vehicle 12 60VDC Direct Connection 41 Fuse Replacement for the VX4 44 OPERATION 45 Powering On Off 45 Reset Key Sequence Reboot 46 Factory Default Settings 46 Keyboard Backlight 46 Display and Touchscreen 47 Cleaning the Display 47 Adjust Screen Display 47 Adjust Speaker Volume 48 Microsoft Windows Event...

Page 7: ...C VX4 User s Guide APPENDIX A KEY MAPS 53 Standard Keypad 53 Key Map 101 Key Equivalencies 54 TN3270 Terminal Emulator Keypad 59 TN5250 Terminal Emulator Keypad 59 APPENDIX B REGULATORY NOTICES AND SAFETY INFORMATION 61 Approvals 63 INDEX 75 ...

Page 8: ...egrated Keyboard Bracket Assembly 28 Figure 23 Cable Tie Holders and Cable Hooks 29 Figure 24 Assembled VMT Integrated Keyboard Bracket 30 Figure 25 Keyboard Connection Location and Keyboard 31 Figure 26 Connect 2 4GHz Antenna 32 Figure 27 Connect Serial Scanner Cable 33 Figure 28 VX4 with Generic Barcode Scanner Attached 34 Figure 29 Generic Barcode Scanner 34 Figure 30 Connect Serial Cable to CO...

Page 9: ...ngle or dual diversity antenna Ethernet port2 Choice of storage media Extended temperature version3 This document is one in a series covering the VX4 family of computers For VX4 computers equipped with Microsoft Windows CE NET Operating System VX4 CE NET User s Guide VX4 CE NET Reference Guide For VX4 computers equipped with Microsoft Windows 98 2000 or XP operating systems VX4 User s Guide VX4 Re...

Page 10: ...radio type ATTENTION Keyword that indicates vital or pivotal information to follow Attention symbol that indicates vital or pivotal information to follow Also when marked on product means to refer to the manual or operator s guide International fuse replacement symbol When marked on the product the label includes fuse ratings in volts v and amperes a for the product Note Keyword that indicates imm...

Page 11: ... non condensing Extended Temperature version Startup 4 F to 122 F 20 C to 50 C non condensing Operating 22ºF to 122ºF 30ºC to 50ºF non condensing Storage Temperature Standard version 14 F to 158 F 10 C to 70 C non condensing Extended Temperature version 13 F to 158 F 25 C to 70 C non condensing Water Sand Dust IP66 per IEC60529 Operating Humidity Up to 90 non condensing at 104 F 40 C Vibration Bas...

Page 12: ...ral the sequence of events is 1 Install Vehicle Mounting Bracket and keyboard mounting bracket on vehicle 2 Secure VX4 in Mounting Bracket Assembly 3 Connect vehicle power source to VX4 power cable 4 Connect power cable to the VX4 5 Connect accessories to VX4 e g scanner antenna keyboard 6 Secure all cables to the VX4 with the Strain Relief Cable Clamps 7 Turn the VX4 on The VX4 and its keyboard s...

Page 13: ...set 6 COM1 Scanner Connector5 7 COM2 Connector5 8 USB Cable Connector 9 Keyboard Connector 10 Power Connector 11 Power Switch 12 Fuse Figure 1 VX4 Components 4 The Ethernet connector is optional It is not present on all VX4 s 5 COM1 is configured with Pin 9 5V COM2 is configured with Pin 9 RI Refer to the VX4 Reference Guide Chapter 4 System Configuration for more information ...

Page 14: ...or refer to commercially available Microsoft Windows user guides or the Windows on line Help application for these standard Windows configuration options PCMCIA and ATA Slots The VX4 has two active PCMCIA slots and two Secondary IDE ATA slots The right slots Slot 0 and Slot 1 are PCMCIA slots They support the Personal Computer Memory Card International Association PCMCIA 2 1 standards These slots ...

Page 15: ...Keyboard Installation These documents are available on the LXE Manuals CD The LXE VMT keyboard is a customized keyboard connected to the VX4 with a keyed watertight connector The LXE VMT keyboard features a 60 key keyboard The keyboard backlight is controlled manually See Keyboard Backlight below The keyboard has 101 keyboard functions including a numeric keyboard pad Please refer to Appendix A Ke...

Page 16: ...CTRL X Cut CTRL V Paste CTRL Z Undo DELETE Delete SHIFT with any of the arrow keys Select more than one item in a window or on the desktop or select text within a document CTRL A Select all ALT ESC Cycle through items in the order they were opened CTRL ESC Display the Start menu ALT Underlined letter in a menu name Display the corresponding menu Underlined letter in a command name on an open menu ...

Page 17: ... the VX4 are listed in Appendix A Key Maps Unused Key Functions There are several key functions that are not used on the VX4 These include F3 The Resume Suspend function is not used as Microsoft Windows controls all power management modes F4 F5 F6 and F7 The Display Brightness and Contrast functions are not used as these properties are not adjustable on the TFT display on the VX4 F8 and F9 The Vol...

Page 18: ... Secondary Mode LED Indicator 3 Status LED Indicator Figure 5 Keyboard LEDs CAPS LED This LED indicates the state of the keyboard CapsLock mode If CapsLock is enabled this LED is illuminated green When CapsLock is off the LED is dark Figure 6 The CapsLock Key Press 2nd then F1 to toggle CapsLock On and Off The default value of CapsLock is Off ...

Page 19: ...nd keypress For example Press 2nd and F1 to turn CapsLock on and off Press 2nd and to initiate the PgUp command Press 2nd and Q to type the key Press 2nd and BkSp to enter the Insert Ins mode Status LED Figure 8 The Resume Suspend Key The Status LED located on the front of the keyboard is illuminated green when the unit is powered on The Status LED is dark when power is disconnected Note This LED ...

Page 20: ...stments The F8 and F9 keys have no function as the sound volume on the VX4 is controlled with the Sound icon in the Microsoft Windows System Tray The F10 key is used to toggle the backlight as part of the keypress sequence 2nd CTRL F10 This key sequence immediately toggles the status of the keyboard backlight Pressing 2nd F10 has no effect on the keyboard backlight 1 Display Brightness Control Key...

Page 21: ...tion titled Installation sub section titled External Power Supply Power input is fused for protection and the fuse is externally accessible See section titled Installation sub section titled Fuse Replacement for the VX4 Backup Battery The internal 270 mAh Lithium backup coin cell battery provides power to maintain the real time clock when the VX4 is not powered from an external source The backup b...

Page 22: ...ssories Cables Cable Shielded DB 9F to DB 25F 6 ft 9000A052CBL6D9D25 Cable Shielded Printer PC DB 9F to DB 25F 6 ft 9000A053CBL6D9D25 Cable Shielded PC DB 9F to DB 9F 6 ft 9000A054CBL6D9D9 Cable 1 ft Mini DIN to water tight keyboard connector 9000A069CBL1PS6ML4 Cable USB adapter 9000A068CBL12M4USB Brackets and Keyboards LXE VMT Keyboard 9000A153KBDSTDWW LXE VMT Keyboard 5250 9000A154KYBD5250WW LXE...

Page 23: ...Temp Solid State 9000A254HDDCF64MBLT 4 Scanners Scanner Powerscan SR 8 Cbl WW 8300A326SCNRPWRSR8DA9F Scanner Powerscan SR 12 Cbl US 8300A327SCNRPWRSR12DA9F Scanner Powerscan SR 11 Cbl PS 2 US 8300A330SCNRPWRSR11PS2 Scanner Powerscan LR 8 Cbl WW 8310A326SCNRPWRLR8DA9F Scanner Powerscan LR 12 Cbl US 8310A327SCNRPWRLR12DA9F Scanner Powerscan LR 12 Cbl PS 2 US 8310A330SCNRPWRLR11PS2 Scanner Powerscan ...

Page 24: ...16 Manuals and Accessories VX4 User s Guide E EQ VX4OGWW H ARC ...

Page 25: ...64 56 N m Note Torquing tool is not supplied by LXE Bolts washers and wrench needed when attaching the bottom mounting bracket to the vehicle are not supplied by LXE Before installation begins verify you have the following vehicle mounting bracket assembly components Components Back Mounting Bracket Assembly This bracket is attached to the VX4 It is pre assembled at LXE 6 each 8 32 x 7 16 Pan Head...

Page 26: ...7 3 mm 3 6 05 in 153 6 mm 4 1 02 in 25 9 mm 5 3 00 in 76 2 mm 6 Vehicle Mount Footprint 7 0 18 in 4 5 mm 8 0 88 in 22 3 mm 9 1 25 in 31 75 mm Figure 10 VX4 Bracket Mounting Dimensions Not To Scale Mounting Positions Figure 11 Suggested Mounting Positions Viewing angle is 45 to both sides of the bottom mounting bracket ...

Page 27: ...uing tool capable of torquing to 50 inch pounds 5 64 56 N m Torque pan head screws to 16 0 1 in lb 1 8 11 N m when assembling the back mounting bracket to the VX4 Torque bolts to 50 0 5 in lb 5 64 56 N m when assembling the bottom mounting bracket to the back mounting bracket Figure 12 Torque Measurements ...

Page 28: ... x 7 16 Pan Head Screw 5 Strain Relief Cable Clamps and 2 Cable Ties Connect Strain Relief Cable Clamps to the back of the VX4 Connect Cable Ties to the VX4 and the back mounting bracket 1 Turn the VX4 off before attaching the accessories 2 Install accessories and the strain relief cable clamps 3 Mount the accessories cable to the VX4 with the strain relief cable clamps ensuring a slack loop remai...

Page 29: ...he cable tie through the top opening in the push mount 2 Snap the push mount through the top hole and toward the VX4 as shown in the above figure 3 Place the cable power COM port over the tie and lift up the pointed end of the tie Slide it through the narrow opening at the top of the cable tie keeping the serrated sides together 4 Slide the tail of the cable tie closed until cables are snug ...

Page 30: ...on the bottom of the VX4 2 Attach the bottom mounting bracket to the vehicle mounting surface using six 1 4 bolts or equivalent fasteners Note 1 4 Bolts not included IMPORTANT Mount to the most rigid surface available Figure 15 Connect Bottom Bracket to Vehicle After the bottom bracket has been attached to a rigid horizontal surface you are ready to assemble the VX4 bracket configuration ...

Page 31: ...k mounting bracket 2 Place the VX4 face down on a stable surface 3 Position the back mounting bracket on the VX4 matching the screw holes in the bracket to the screw holes on the back of the VX4 4 Insert a pan head screw into each of six holes Torque the screws to 16 1 in lb 1 8 11 N m Figure 17 VX4 Connected to Back Bracket Now you are ready to attach the VX4 in the bracket assembly to the vehicl...

Page 32: ... as it is inserted Important Do not torque bolts until all bolts are in place and viewing angle is adjusted 3 Loosen the hex bolts on both sides to adjust the viewing angle of the mounted VX4 4 Torque the hex bolts to 50 5 in lb 5 64 56 N m Note Test the torque on the bolts frequently during operation and re tighten if necessary to 50 5 in lb 5 64 56 N m 5 Connect all cables to the VX4 Secure the ...

Page 33: ...Install Mounting Brackets 25 E EQ VX4OGWW H ARC VX4 User s Guide Figure 19 VX4 in Vehicle Bracket ...

Page 34: ... keyboard base aligning the four screw holes in the keyboard with the four mounting holes in the bracket flanges When positioned correctly the bracket should overlap at the top of the keyboard 3 Attach the keyboard to the bracket with four screws included Tighten to 9 1 in lb 1 02 N m 4 Attach the keyboard bracket assembly to the vehicle s mounting surface using four 1 4 bolts or equivalent Note B...

Page 35: ...required for assembled bracket 2 6 2 inch 157 mm 3 Bottom Bracket footprint 4 4 4 inch 111 5 mm 5 2 3 inch 57 2 mm 6 4 0 inch 101 6 mm 7 0 9 inch 22 4 mm 8 0 3 inch 6 6 mm 9 1 1 inch 27 7 mm 10 4 0 inch 101 6 mm 11 0 3 inch 7 6 mm 12 2 9 inch 72 6 mm 13 11 9 inch 302 0 mm Figure 21 VMT Remote Keyboard Mounting Dimensions ...

Page 36: ... 1 Loosen the VMT viewing angle adjustment bolts 1 of the Main Mounting Bracket Assembly 2 2 Remove the two bolts and washers from the left side of the Main Mounting Bracket assembly and mount the left Keyboard Arm 3 to the Main Mounting Bracket assembly loosely using the washers and two new bolts 3 Remove the two bolts and washers from the right side of the Main Mounting Bracket assembly and moun...

Page 37: ... by hand Important Do not torque bolts until all bolts are in place and viewing angle is adjusted Note Periodically check the connectors and retighten if necessary 8 Tie Wrap Holders 9 Cable Hooks Figure 23 Cable Tie Holders and Cable Hooks 8 Insert cable ties into the Tie Wrap holders 8 on the bottom of the Keyboard Bracket 9 Wrap excess cable length under the Keyboard Bracket on the Cable Hooks ...

Page 38: ...30 Install Mounting Brackets VX4 User s Guide E EQ VX4OGWW H ARC Figure 24 Assembled VMT Integrated Keyboard Bracket ...

Page 39: ...igure 25 Keyboard Connection Location and Keyboard 1 Turn the VX4 off before attaching the keyboard cable 2 Insert the keyboard cable into the VX4 keyboard connector aligning the groove on top of the cable with the notch at the top of the VX4 connector 3 Once the pins are firmly seated tighten turning clockwise the connector into place 4 Secure the cable with the strain relief cable clamps ensurin...

Page 40: ...tenna Place the antenna base over the antenna pin Push down and twist clockwise until the antenna is secure Repeat for second antenna connector if present Adjust the antenna angle to improve RF communications with the computer network Note Substitution of antennas is not permitted unless authorized by LXE Use of unauthorized antennas will void the FCC emissions certification of the VX4 Vehicle Rem...

Page 41: ...de RI To change Pin 9 of either port please refer to Chapter 4 System Configuration in the VX4 Reference Guide The scanner cable is attached to the connector marked COM1 SCANNER The scanner receives power from the VX4 The cable requires a nine pin D shell female connector for the VX4 Note Use of a shielded cable is required to maintain FCC and CISPR22 emissions compliance Figure 27 Connect Serial ...

Page 42: ...remove it from the VX4 and store the scanner in a closed container or bag Figure 28 VX4 with Generic Barcode Scanner Attached 1 Good Scan LED or equivalent 2 Trigger 3 Laser Aperture at Front Figure 29 Generic Barcode Scanner Refer to the documentation received with the barcode scanner for complete instructions ...

Page 43: ...System Configuration in the VX4 Reference Guide The printer or PC cable requires a nine pin D shell female connector for the VX4 The printer or PC cable is attached to the connector marked COM2 Note Use of a shielded cable is required to maintain FCC and CISPR22 emissions compliance Figure 30 Connect Serial Cable to COM2 1 Seat the connector firmly over the pins and turn the thumbscrews in a clock...

Page 44: ...en turning clockwise the connector into place Figure 32 Connect USB Device to Adapter Cable 3 Plug the desired device such as a USB mouse or floppy drive into the end of the adapter cable with the USB port Refer to the documentation for your USB device for more details on installation USB devices may be installed removed or swapped without turning off the VX4 Note The USB Host Controller or USB Po...

Page 45: ...rt is configured for the LXE supplied headset ONLY Off the shelf PC speakers and headphones do not use the same pinout Figure 33 Connect External Headset 1 Remove the plug covering the audio jack 2 Insert the speaker or headphone plug into the audio connector making sure the plug is firmly seated in the connector jack 3 Replace the plug when the speaker or headset is removed from the audio jack ...

Page 46: ...X4 near the antenna connector The VX4 Ethernet connector accepts standard RJ 45 Ethernet cable not included the same as any PCs on the network Figure 34 Connect Ethernet Cable 1 Remove the plug covering the Ethernet jack 2 Insert the network cable and ensure it is firmly seated in the connector jack 3 To remove the Ethernet cable press the release tab on the cable end 4 Replace the plug when the E...

Page 47: ...following section titled External Power Supply 3 Connect power by inserting the power plug into the power connector on the bottom of the VX4 4 Both the plug and receptacle are keyed and care must be used when connecting the power cable Tighten the nut of the power plug clockwise until tight Secure the cable with the strain relief cable clamps ensuring a slack loop remains between the cable clamp a...

Page 48: ...5 A The external power supply may be connected to either a 120V 60Hz supply or outside North America to a 230V 50Hz supply using the appropriate detachable cordset In all cases connect to a properly grounded source of supply provided with maximum 15 Amp overcurrent protection 10 Amp for 230V circuits How To Connect External Power Supply 1 Turn the VX4 off 2 Connect the detachable cordset provided ...

Page 49: ... explosion Explosive gas mixture may be vented from battery Work only in well ventilated area Avoid creating arcs and sparks at battery terminals 1 To Vehicle Battery 2 To Vehicle Mounted Device 3 Green GND 4 Red White DC 5 Red Black DC 6 12 60 VDC Figure 37 Direct Vehicle Power Connection Cable Fuse Not Shown 1 Vehicle Electrical System 2 5 Amp Slow Blow Fuse 3 DC 4 DC 5 Vehicle Chassis 6 Red Whi...

Page 50: ...his temperature Do not expose the cable to chemicals or oil that may cause the wiring insulation to deteriorate Note If the vehicle is equipped with a panel containing Silicon Controller Rectifiers SCR s avoid routing the power cable in close proximity to these devices Always route the cable so that it does not interfere with safe operation and maintenance of the vehicle Use proper electrical and ...

Page 51: ... to the vehicle structure at approximately one foot intervals taking care not to over tighten and pinch conductors or penetrate outer cable jacket 5 Connect the cable to the VX4 by aligning the water tight connector pins to the power connector push down on the water tight connector and twist it to fasten securely 6 Turn the VX4 on ...

Page 52: ...5 5x20mm 1 Fuse 2 Twist in this direction to remove 3 Twist in this direction to insert Figure 40 Fuse Replacement 1 Turn the VX4 off and disconnect the power cable from the VX4 2 While holding the VX4 over a level surface push the fuse cover in and twist it one quarter turn counterclockwise A flat head screwdriver may be used to twist the fuse cover 3 Remove the fuse 4 Discard the fuse and place ...

Page 53: ...disconnecting any power source Always shut down Microsoft Windows before turning the power off Figure 41 The VX4 Power Switch Powering off the VX4 without properly shutting down Microsoft Windows can corrupt Windows ALWAYS shut down Windows before powering off the VX4 Powering off the VX4 before a write to disk function has completed may result in the corruption of the flash drive if so equipped A...

Page 54: ... configured using BIOS Setup Note Options in the Microsoft Windows Control Panel make access to the BIOS unnecessary in many cases Only those setting not controlled by Windows are listed below For more information on Windows settings please refer to commercially available Windows guides Factory Default Settings Boot Sequence Hard Drive Removable Devices CD ROM drive Network boot in this order Lega...

Page 55: ...s to it by using the Hampshire TSHARC Control Panel on the Microsoft Windows Programs menu Please refer to your System Administrator or the VX4 Reference Guide for information on touch screen calibration Cleaning the Display Keep fingers and rough or sharp objects away from the scan aperture and display If the glass becomes soiled or smudged clean only with a standard household cleaner such as Win...

Page 56: ...below the enter key that is illuminated green when the unit is powered on The LED is dark when power is disconnected All power management and modes are handled by Microsoft Windows Note This LED should not be lit when power is disconnected from the VX4 Status LED Condition Off VX4 is Off Steady Green The VX4 is powered On and the display is On or The VX4 is powered On and the display is Off Press ...

Page 57: ...urning the monitor and hard disk off are accessed from the Power Management icon Figure 42 Microsoft Windows Power Management For more information on configuring Microsoft Windows Power Management please refer to the Windows Help feature The Power Management defaults for the VX4 are System standby Never Turn off monitor After 15 minutes Turn off hard disks After 1 hour ...

Page 58: ...warning labels placed on laser scanners Figure 43 Caution Labels Class II Scanner Figure 44 Caution Labels Class IIIA Scanner Do not pour spray or spill any liquid on the scanner The Barcode Scanner contains the circuitry scanning motor and laser Handle with appropriate care Cleaning the Scan Aperture Keep fingers and rough or sharp objects away from the scan aperture and display If the glass beco...

Page 59: ...to the VX4 operator The assumption is that the unit has been configured and the touch panel calibrated by the System Administrator prior to releasing the VX4 for operator use Note Always use the point of the stylus for tapping or making strokes on the display Never use an actual pen pencil or sharp object to write on the touch screen The touchscreen input performs the same function as the mouse th...

Page 60: ...eep sequences The scan beam must cross every bar and space on the barcode Correct Scan Incorrect Scan Incorrect Scan Figure 45 Scan Beam Distance from Label Large barcodes can be scanned at the maximum distance Hold the scanner closer to small barcodes or with bars that are very close together Note Do not position the scanner exactly perpendicular to the barcode being scanned In this position ligh...

Page 61: ...s lists the commands used when running LXE s ANSI Plus with 2 4GHz radio LDS Plus with 2 4GHz radio Terminal Emulation TE or RFTerm programs When running these programs please refer to the following terminal emulation reference guides for equivalent keys and keypress sequences ANSI Plus Reference Guide LDS Plus Reference Guide RFTerm Reference Guide ...

Page 62: ...d with a 2nd F1 key sequence The CAPS LED on the VMT keyboard is illuminated when CapsLock is On Press These Keys and Then To get this key 2 nd Shift Ctrl Alt CapsLock Press this key Increase Brightness 7 x F4 Decrease Brightness 7 x F5 Increase Contrast 7 x F6 Decrease Contrast 7 x F7 Increase Volume 8 x F8 Decrease Volume 8 x F9 Keyboard Backlight 9 x x F10 Suspend Resume 10 x F3 2 nd 2 nd Shift...

Page 63: ... Down Arrow Right Arrow Right Arrow Left Arrow Left Arrow Insert x Ins BkSp Delete numeric x DOT Home x Left Arrow End x Right Arrow Page Up x Up Arrow Page Down x Down Arrow Right Shift x x F7 Right Alt x x F8 Right Ctrl x x F9 ScrollLock x x F4 NumLock x x F10 F1 F1 F2 F2 F3 F3 F4 F4 F5 F5 F6 F6 F7 F7 F8 F8 F9 F9 F10 F10 F11 x x F1 F12 x x F2 a A b B c C d D e E f F g G h H 11 Press Ctrl then 2n...

Page 64: ...se Keys and Then To get this key 2 nd Shift Ctrl Alt CapsLock Press this key i I j J k K l L m M n N o O p P q Q r R s S t T u U v V w W x X y Y z Z A x A B x B C x C D x D E x E F x F G x G H x H I x I J x J K x K L x L M x M N x N O x O P x P Q x Q R x R S x S T x T U x U V x V ...

Page 65: ...c 1 NumLock On 1 numeric x 1 NumLock Off 2 numeric 2 NumLock On 2 numeric x 2 NumLock Off 3 numeric 3 NumLock On 3 numeric x 3 NumLock Off 4 numeric 4 NumLock On 4 numeric x 4 NumLock Off 5 numeric 5 NumLock On 5 numeric x 5 NumLock Off 6 numeric 6 NumLock On 6 numeric x 6 NumLock Off 7 numeric 7 NumLock On 7 numeric x 7 NumLock Off 8 numeric 8 NumLock On 8 numeric x 8 NumLock Off 9 numeric 9 NumL...

Page 66: ...this key 2 nd Shift Ctrl Alt CapsLock Press this key x 1 x 2 x 3 x 4 x 5 x 6 numeric x x 7 alpha x 7 numeric x x 8 alpha x 8 numeric x x 9 alpha x 9 numeric x I alpha x x I colon x D semicolon x F x L x N _ underscore x M comma x J apostrophe x H tilde x B x S x A x G x Q x W x E x R x T x Y x U x O x P ...

Page 67: ...ng terminal emulation reference guides for equivalent keys and keypress sequences TN3270 Terminal Reference Guide RFTerm Reference Guide TN5250 Terminal Emulator Keypad Figure 48 IBM 5250 Specific Keypad This keypad is designed to allow the user to enter terminal emulator commands when running LXE s TN5250 Terminal Emulation TE programs When running these programs please refer to the following ter...

Page 68: ...60 TN5250 Terminal Emulator Keypad VX4 User s Guide E EQ VX4OGWW H ARC ...

Page 69: ...ss A product In a domestic environment this product may cause radio interference in which case the user may be required to take adequate measures Industry Canada This Class A digital apparatus meets all requirements of the Canadian Interference Causing Equipment Regulations Operation is subject to the following two conditions 1 this device may not cause harmful interference and 2 this device must ...

Page 70: ...e identified by the label May or may not include the 0560 Notified Body No Permitted for use in Austria Belgium Denmark Finland Germany Greece Hungary Iceland Italy Ireland Liechtenstein Luxembourg Netherlands Norway Portugal Spain Sweden Switzerland and the United Kingdom Permitted for use in France Important This symbol is placed on the product to remind users to dispose of Waste Electrical and ...

Page 71: ... System 2 4GHz Type II PCMCIA Card FCC Part 15 Subpart C FCC Part 2 ETS 300 328 ETS 300 826 IC RSS 139 IC RSS 102 Unlicensed Operation Unlicensed Operation Requires License for Outdoor Use 4810P3S01 LXE Part No LXE 6200 System 900MHz Type III PCMCIA Card FCC Part 15 Subpart C IC RSS 210 Unlicensed Operation Unlicensed Operation 6526 LXE Model No 6726 LXE Model No LXE 6500 6700 System 2 4GHz Type I...

Page 72: ...compatibility Generic immunity standard Part 1 Residential commercial and light industrial EN 61000 4 2 1995 Electrostatic discharge immunity test EN 61000 4 3 1997 Radiated radio frequency electromagnetic field immunity test EN 61000 4 6 1996 RF conducted immunity test Radio Frequency Standards EN 300 328 2000 Radio Equipment and Systems RES Wideband transmission systems Technical characteristics...

Page 73: ...ectromagnetic compatibility Generic immunity standard Part 1 Residential commercial and light industrial EN 61000 4 2 1995 Electrostatic discharge immunity test EN 61000 4 3 1997 Radiated radio frequency electromagnetic field immunity test EN 61000 4 6 1996 RF conducted immunity test Radio Frequency Standards ETS 300 328 1996 Radio Equipment and Systems RES Wideband transmission systems Technical ...

Page 74: ...atibility Generic immunity standard Part 1 Residential commercial and light industrial EN 61000 4 2 1995 Electrostatic discharge immunity test EN 61000 4 3 1997 Radiated radio frequency electromagnetic field immunity test EN 61000 4 6 1996 RF conducted immunity test Radio Frequency Standards EN 300 328 1996 Radio Equipment and Systems RES Wideband transmission systems Technical characteristics and...

Page 75: ...ard for radio equipment and services Part 1 Common technical requirements Electromagnetic compatibility and Radio spectrum Matters ERM ElectroMagnetic Compatibility EMC standard for radio equipment and services Part 17 Specific conditions for Wideband data and HIPERLAN equipment Radio EN 300 328 1 and 2 2000 7 Radio Equipment and Systems RES Wideband transmission systems Technical characteristics ...

Page 76: ...r LXE MX2 series computers 153179 0001 0 dBi 17 dBm Omni Access Point Antenna 153325 0001 0 dBi 17 dBm Omni Access Point Antenna 480424 0400 0 dBi 17 dBm Omni Access Point Antenna 153599 0001 3 dBi 17 dBm Omni Access Point Antenna 153600 0001 3 dBi 17 dBm Omni Access Point Antenna 480424 3404 3 dBi 17 dBm Omni Access Point Antenna 155846 0001 3 dBi 17 dBm Spire Access Point Antenna 155845 0001 6 d...

Page 77: ...RM ElectroMagnetic Compatibility EMC standard for radio equipment and services Part 17 Specific conditions for Wideband data and HIPERLAN equipment EN 55022 1998 Limits and methods of measurement of radio disturbance characteristics of information technology equipment Radio Standards EN 300 328 1 and 2 2000 7 Radio Equipment and Systems RES Wideband transmission systems Technical characteristics a...

Page 78: ... also outside the scope of this DoC Dedicated Antennas for use with LXE 6816 LXE Antenna Part Number LXE Model Number Antenna Gain Max Radio Power Level Antenna Description 153180 0001 N A 2 2 dBi 17 dBm Cushcraft Omni Antenna 155846 0001 6000A279ANT3SPIREL 6000A280ANT3SPIRER 6000A283ANT3INDSPR 3 dBi 17 dBm Spire Omni Antenna 155845 0001 6000A277ANT6SPIREL 6000A278ANT6SPIRER 6000A282ANT3INDSPR 6 d...

Page 79: ...Hersteller empfohlenen Typ ersetzen DE Attenzione Batteria al litio Pericolo di esplosione qualora la batteria venga sostituita in maniera scorretta Sostituire solo con lo stesso tipo o equivalente consigliato per il fabbricante IT Atenção Contém pilha de lítio Há perigo de explosão no caso de uma substituição incorreta Substitua somente pelo mesmo tipo ou equivalente recomendado pelo fabricante P...

Page 80: ...4OGWW H ARC Lithium Battery Safety Statement GR KR JP CN Dikkat TR Legend Chinese CN Italian IT Danish DK Japanese JP Dutch NL Korean KR English US Norwegian NO Finnish FI Portuguese PT French FR Spanish ES German DE Swedish SE Greek GR Turkish TR ...

Page 81: ...ροφοδοτικό ITE πιστοποιημένο κατά IEC με ονομαστική ισχύ όπως δηλώνεται στην αρχή της σελίδας GR Alimentazione opzionale a corrente alternata Al di fuori dei paesi dell America del nord l unità deve essere impiegata con un dispositivo d alimentazione per attrezzature informatiche approvato dalla IEC la cui potenza nominale sia pari a quella indicata all inizio della pagina IT Vekselstrømforsyning ...

Page 82: ...ο εντός 5 ιντσών 12 7 εκ του θετικού ακροδέκτη της μπαταρίας GR Collegamento dell alimentazione del veicolo Se il collegamento dell alimentazione viene stabilito direttamente con la batteria è necessario installare un fusibile ad azione lenta da 5 A nel conduttore positivo a meno di 5 in 12 7 cm dal terminale positivo della batteria IT Tilkople strømforsyningen til kjøretøyet Hvis strømforsyningen...

Page 83: ...LED Indicator 10 Caps Lock Mode 10 Cleaning Display 47 Scan Aperture 50 Color Codes Wiring 42 COM1 Scanner Connection Location 5 COM2 Connector Location 5 Component Locations 5 Connection Antenna 32 COM1 33 COM2 35 External Speakers 37 Keyboard 31 Power Cable 39 USB 36 Contrast Up and Down Not applicable 12 Control Keys location 12 Control Panel Windows 6 CPU 1 CTRL ALT DEL 46 D Data entry How To ...

Page 84: ...ly 28 K Key functions Unused 9 Key Map 101 Key Chart 54 ANSI Plus 53 LDS Plus 53 TN3270 keypads 59 TN5250 keypads 59 Key Maps Hidden Keys 9 Keyboard Control Keys 12 Hidden Key Functions 9 LED Indicators 10 Keyboard Backlight 9 12 Key Sequence 7 Keypress Sequence 46 Toggling Manually 46 Windows 2000 46 Windows 98 Manual Control 46 Keyboard Connector Location 5 Keyboard data entry 51 keyboard shortc...

Page 85: ...h 18AWG conductors 42 Slot 0 Left 6 Slot 1 Right 6 Speaker Jack Location 5 Speaker Volume Control Keys 12 Speaker Beeper Location 5 Specifications Environmental 3 Standby Mode Power Management 49 Status LED 48 Status LED Indicator 10 Stylus 47 51 Stylus Data Entry 51 Successful Scan indicators 52 SVGA graphics modes 6 System Tray icons Windows 6 T Terminal Emulator List 1 Thin Film Transistor TFT ...

Page 86: ...78 Index VX4 User s Guide E EQ VX4OGWW H ARC Windows Closing a Window 46 Control Panel 6 Defaults 46 Help Screens 6 Power Management 49 System Tray icons 6 Windows online Help 6 Wiring Color Codes 42 ...

Reviews: