18
3
Trimming with the Thinning Guide
The Thinning Guide is a device that allows you to thin a chosen part of the hair rather
than trim it all at the same length. By rotating the Turning Wheel for actuating the
thinning guide a metallic blocker will come forward and block a number of teeth of the
clipper. So that when you cut hair with the Thinning Guide, some of the hair gets
between the teeth of the clipper and is cut, but most of the hair falls in the gaps between
the teeth and is not cut. This allows some of the hairs to be cut short and other hairs to
remain at the full length of the style. With some of the hairs cut short, this thins out the
hair.
1. Remove the Guide Comb.
2. To actuate the Thinning Guide, rotate the Turning Wheel to “ “.
3. Lift hair with the Barber’s Comb or fingers to desired length and cut hair with the
clipper.
Maintenance
It is important to clean out the clipper after each use.
1. Switch the clipper OFF.
2. Remove the Guide Comb and lightly shake or brush hair from the clipper and the
Guide Comb.
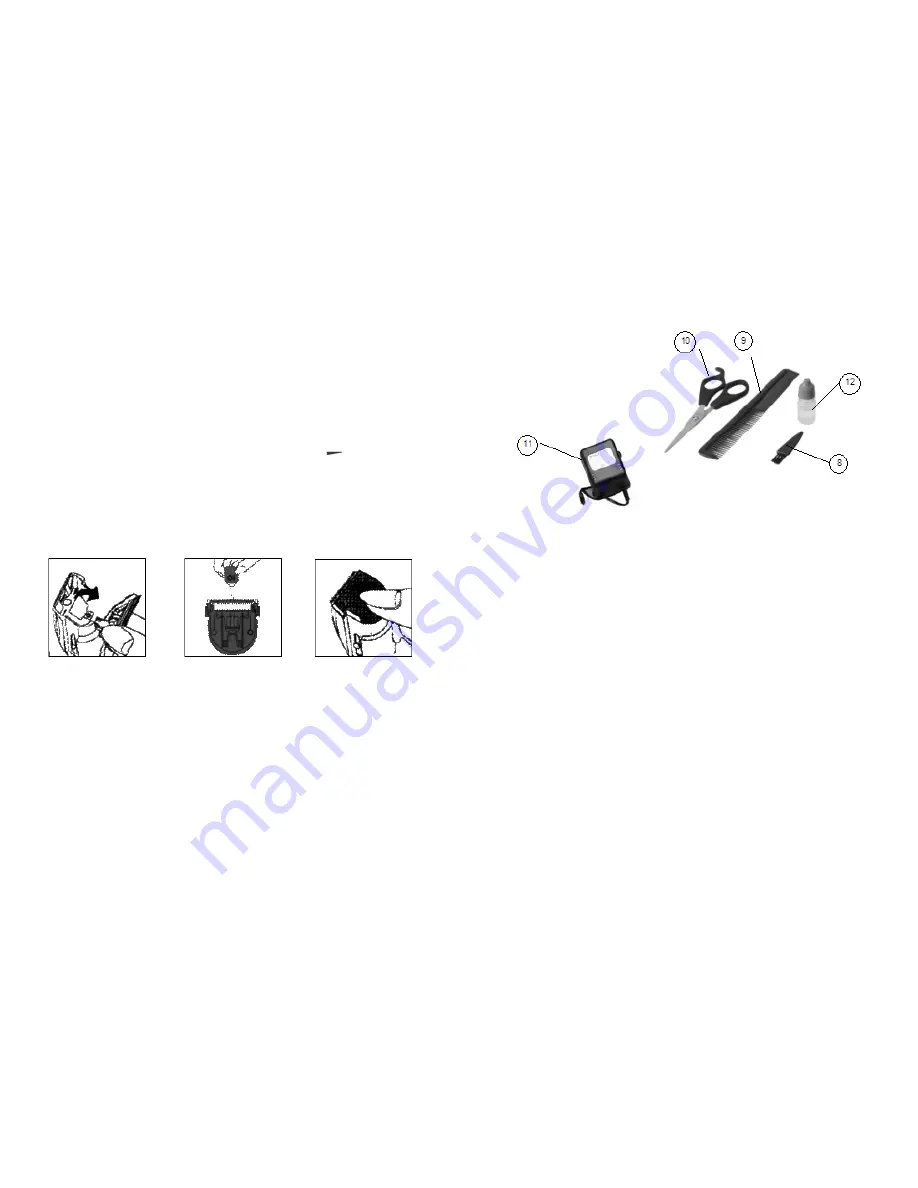
3. Remove the cutter system from the clipper by pushing it down with your thumb.
4. Clean the cutters and inside of clipper with the provided Cleaning Brush.
5. Apply 1-2 drops of the Lubrication Oil (acid-free oil / sewing machine oil) on the
Cutter System.
6. Click the Cutter System back to its original position.
Příslušenství:
8. Štěteček pro čištění
9. Hřeben
10. Nůžky
11. Napájecí adaptér
12. Mazací olej
Nabíjení
·
Pro zvýšení kapacity a životnosti akumulátoru by měl být přístroj nabíjen po
dobu 7 hodin před prvním použitím a pak zcela vybitý používáním. Následně
nabíjejte na plnou kapacitu (6 hodin). Tento proces nabití/vybití by měl být
proveden každých šest měsíců.
·
Používejte pouze dodávaný kabel.
·
(Dobíjejte) nabíjejte při teplotách mezi 15 a 35°C.
·
Nabíjení při nižších nebo vyšších teplotách nepříznivě ovlivní životnost akumulátoru.
·
Pro co nejdelší životnost akumulátoru, nenechávejte probíhat nabíjení déle než 24
hodin. Dobíjení (nabíjení) po delší než požadovanou dobu zastřihovač
nepoškozuje.
·
Jestliže nebyl zastřihovač používán déle než jeden měsíc, musí být před použitím
nabitý naplno.
·
Pro co nejefektivnější využívání akumulátoru používejte zastřihovač do úplného
vybití a pak jej znovu plně nabijte.
1. Vypněte zastřihovač (OFF).
2. Kabel napájecího adaptéru připojte k nabíjecímu stojánku. Napájecí adaptér
připojte do zásuvky 230 V/50 Hz.
3. Zastřihovač postavte do nabíjecího stojánku tak, aby indikátor nabíjení směřoval
ven.
4. Indikátor nabíjení se rozsvítí pro indikaci nabíjení zastřihovače.


