background image

CLEANING & MAINTENANCE

1. Pull Magnet Jet off from the pedicure bowl.

2. Turn the Top Plate of the Magnet Jet counter-clockwise.

3. Separate the three components of the Magnet Jet: Top Plate, Magnet, Back Plate.

4. Wash each component of the Magnet Jet in a recommended or high quality solution or cleaning agent

5. Reassemble the Magnet Jet using the following directions:

‣ Turn the Top Plate clockwise until you hear a “click-sound”

6. Remount the Magnet Jet onto the pedicure bowl by aligning the pegs so that the tab is at the top of the Magnet

Jet.

Do not place two wet ends in the same bowl when cleaning

. T

he jets

'

 strong magnets 

could cause injury (pins your fingers).
Do not attach two wet ends to each other. Doing so will cause breakage to wet ends and 

will void the warranty.
Do not run magnet jets without water. This will void your warranty.

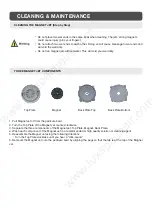
CLEANING THE MAGNET JET (Step by Step)

THREE MAGNET JET COMPONENTS

Top Plate

Back Plate Bottom

Back Plate Top

Magnet

www.luxspachairs.com 


www.luxspachair.com

Summary of Contents for LS250

Page 1: ...OWNER MANUAL MODEL LS250 w w w l u x s p a c h a i r s c o m w w w l u x s p a c h a i r c o m...

Page 2: ...ible serious injury to the person BASIC PRECAUTIONS SHOULD ALWAYS BE OBSERVED INCLUDING THE FOLLOWING Read and follow all instructions DANGER To reduce the risk of injury do not permit children to use...

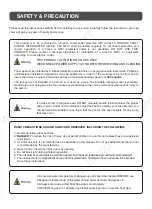
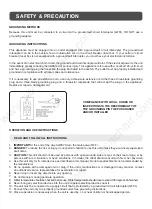
Page 3: ...ing instructions Close supervision is necessary when the unit is used by on or near children or handicapped person 1 2 3 4 5 6 7 8 9 10 11 12 SAFETY PRECAUTION Because this unit must be connected to a...

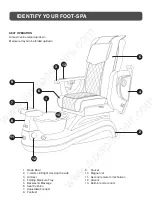
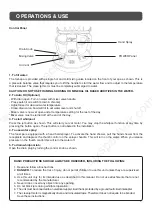
Page 4: ...e Tray Backrest Massage Seat Cushion Adjustable Footrest Footrest Faucet Magnet Jet Second remote for technician Airvent Built in remte control 1 6 7 11 12 9 10 2 8 3 13 4 5 Armest can be raised up do...

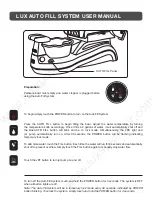
Page 5: ...ling the bowl Adjust the water temperature by turning the temperature knob accordingly Once it fills 4 2 gallons of water it will automatically shut off and the blue AUTO FILL button will blink and be...

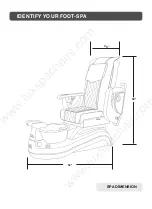
Page 6: ...IDENTIFY YOUR FOOT SPA SPA DIMENSION 33 52 58 w w w l u x s p a c h a i r s c o m w w w l u x s p a c h a i r c o m...

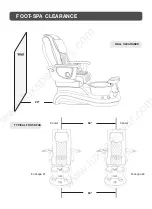
Page 7: ...FOOT SPA CLEARANCE 28 60 60 WALL CLEARANCE TYPICAL FOOT SPAS Center Foot spa 1 Foot spa 2 Center w w w l u x s p a c h a i r s c o m w w w l u x s p a c h a i r c o m...

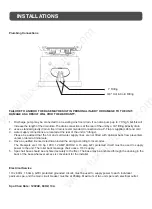
Page 8: ...4 fitting Gravity drain uses a standard gravity drain A floor drain is recommended Connection via a P Trap is supplied Hot and cold water supply connections are located at the rear of the unit 4 fitt...

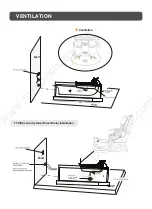
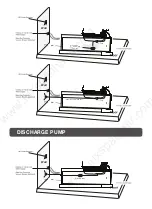
Page 9: ...Discharge Pump Exhaust fan actuation air switch 50 28 Wall Wall Gravity Sink 2 3 drain pipe to sewer line 28 TYPICAL Gravity Sink Direct Drain Installation w w w l u x s p a c h a i r s c o m w w w l...

Page 10: ...DISCHARGE PUMP Wall Gravity Sink 2 3 drain pipe to sewer line 28 Wall 28 Sewer line parallel with floor Wall 28 Discharge Pump w w w l u x s p a c h a i r s c o m w w w l u x s p a c h a i r c o m...

Page 11: ...he jet button is not labeled in the installation 4 To use water spray The foot spa is equipped with a hand held sprayer To activate the hand shower pull the hand shower from the receptacle and depress...

Page 12: ...ot water to just above the jets Add disinfectant Run whirlpool for 15 minutes drain and then wipe dry with clean soft cloth The use of oil based products can build up in the whirlpool system causing c...

Page 13: ...click sound 6 Remount the Magnet Jet onto the pedicure bowl by aligning the pegs so that the tab is at the top of the Magnet Jet Do not place two wet ends in the same bowl when cleaning The jets stron...

Page 14: ...parts due to obstruction in plumbing lines etc Staining fading or discoloration of plastic surfaces due to exposure and or the use of harmful cleaning agents or chemicals Staining fading or discolorat...

Reviews: