background image

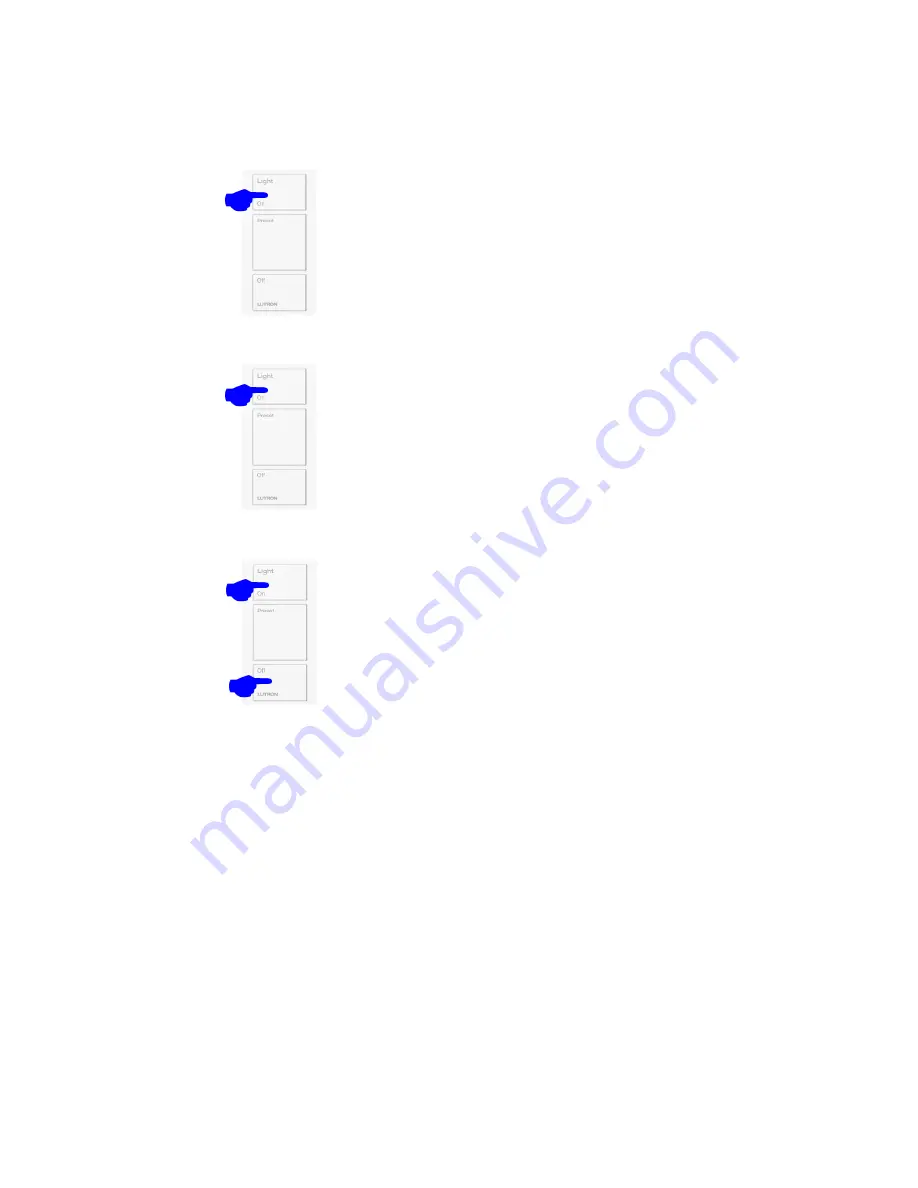
1. Triple tap and hold the On/Open button 

(top button) of the Pico. Hold the button 
for at least 15 seconds. The Main and 
Aux Repeaters will beep to let you know 
that the Pico is now in Frequency 
Changing Mode.

Now that the frequency has been matched up to the Main 
Repeater, proceed with device activation as specified in the 
RadioRA2 Programming Utility.

2. Press the On/Open (top) or Off/Close 

(bottom) buttons to cycle through the 15 RF 
frequencies. Cycle through until you hear 
the Main or Aux Repeaters beep. Once you 
hear the beep, that means that the proper 
RF channel has been identified. At this point 
stop pressing any of the buttons that change 
the sensor’s RF channel!

3. Press and hold the On/Open (top) and Off/

Close (bottom) buttons for at least 3 
seconds to exit Frequency Changing Mode. 
The Main and Aux Repeaters will beep 
once the Pico successfully exits the Mode.

2

nd

  Generation Pico Wireless Controls

PJ-xB, PJ-xBRL, PJ2-xB, PJ2-xBRL, PJN-xB, and PJN-xBRL

x = 2 for two button; 3 for three button

8

Summary of Contents for RadioRA2 RRD-H1RLD

Page 1: ...RadioRA2 One Way Transmitter Frequency Changing Procedures Rev F 11 17 2014...

Page 2: ...system that is comprised of two different subnets To communicate the new RF channel to the devices within its subnet each Main Repeater will send this information to the system devices activated to i...

Page 3: ...rs 4 Temperature Sensors 5 Wall Mount Sensors 6 1st Generation Pico Wireless Controls 7 2nd Generation Pico Wireless Controls 8 2 Table of Contents All of the following procedures must always be compl...

Page 4: ...seconds until the dome LED flashes rapidly 3 Press the Lights ON button to try the next RF channel 15 total Press the Lights OFF button to try the previous channel Press the Test button to repeat the...

Page 5: ...e association message at the currently selected channel 5 Continue to cycle through the RF channels until you hear the Main or Aux Repeater beep The beep indicates that the proper RF channel has been...

Page 6: ...ing both buttons for about 6 seconds until the LED flashes rapidly 3 Press the Test button to try the next RF channel 15 total Press the Link button to repeat the current channel 4 Continue to cycle t...

Page 7: ...3 Press the LIGHTS ON button to try the next RF channel 15 total Press the LIGHTS OFF button to try the previous RF channel Press the TEST button to repeat the current channel 4 Continue to cycle thr...

Page 8: ...es about once per second 3 Press the Open On button to try the next RF channel 15 total Press the Close Off button to try the previous channel Press the preset button to repeat the current channel 4 C...

Page 9: ...uttons to cycle through the 15 RF frequencies Cycle through until you hear the Main or Aux Repeaters beep Once you hear the beep that means that the proper RF channel has been identified At this point...

Page 10: ...mming Utility 2 Press the top or bottom buttons to cycle through the 15 RF frequencies Cycle through until you hear the Main or Aux Repeaters beep Once you hear the beep that means that the proper RF...

Reviews: