Page
46
of
60
6.3.2 Session Window
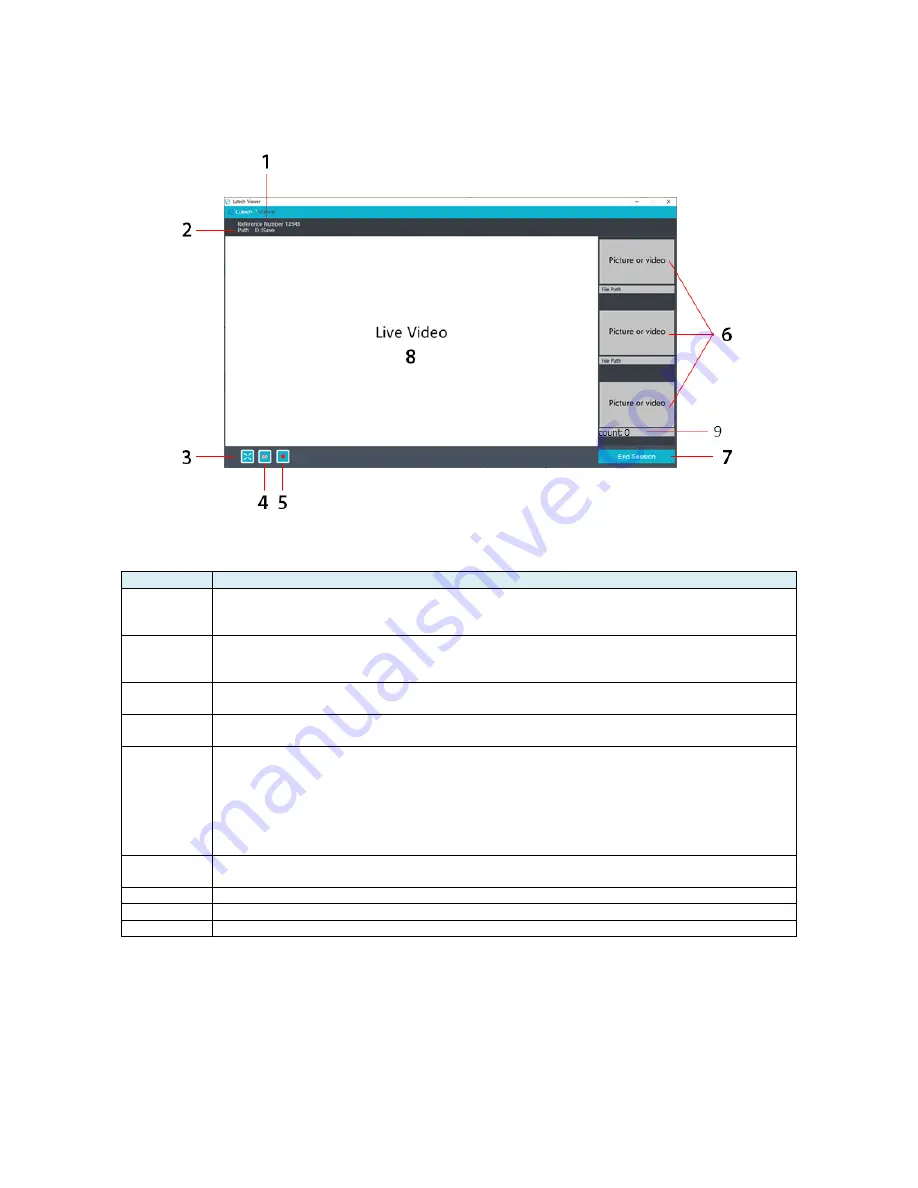
The following is the Session Window.
The Session Window consists of the following areas.
No.
Description
1
Reference Number. This area displays the reference number for the session. This
information cannot be changed from this window. To change this information, end the
session and enter the correct identifier as the Reference Number on the main screen.
2
Path. This area displays the path location for the session. This information cannot be
changed from this window. To change this information, restart the session and enter
the correct Path on the main screen.
3
Full Screen Mode button. Press this button to go into full screen mode. Prese the
ESC button to return to the Session Window.
4
Picture button. Press to take a picture of what’s currently in the live video area. All
pictures will be saved in the JPEG format in 1920 x 1080 resolution.
5
Record On/Off button. Press this button to start recording what’s in the live video
area. The red circle icon within the button will change to a gray square. Press the
gray square button to stop recording.
NOTE: The video stops recording as soon as you press the gray square stop
recording button. However, the icon may take up to 3 seconds to change back to the
red circle default button.
6
Picture/Video Log. This area shows all the pictures and videos you have taken during
this session.
7
End Session button. This ends your session.
8
Live Video area. This area displays the live video feed from the colposcope.
9
Count: X. This displays the number of photos that were taken during this session.
6.3.3 Foot Pedal
The picture and record On/Off buttons will also work with a foot pedal. Ask your Lutech Representative
about the foot pedal if you do not have access to one. The foot pedal should automatically engage with the
software once it’s plugged into the computer and offers a hands free way of taking pictures and videos
during the session. It functions the same way as the buttons located on the lower left corner of the Session
Window.


