


EN.40.C.11.2021-01-22
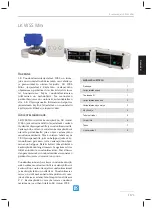
Assembly instructions | LK WSS Mini
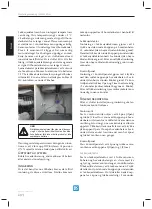
under washing machines, toilets and in the bath-
room.
Two sensors are included with each leak detec-
tor. More sensors can be added with LK Sensor
and branch cable WSS or LK Splitter Cable and
LK Extension Cable if required. See under Acces-
sories.
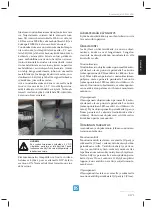
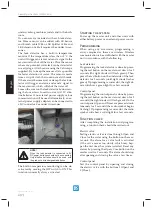
The leak detector has a built-in temperature
monitor. If the temperature is less than +5 °C the
unit will trigger an alarm and send a signal to the
master unit to shut off the water. Place the sensor
where any potential water leak can be detected at
an early stage. Attach sensor using the Velcro tape
supplied. Try to keep the sensor as fl at as possible
for faster detection of water. The sensor is made
from a strip of cloth that contains metal threads.
If the material becomes wet or damp, the leak de-
tector will trigger an alarm and send a signal to
the master unit, which will shut the water off.
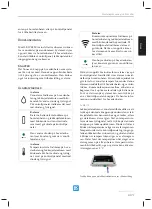
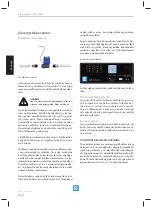
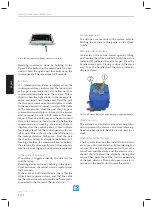
Loosen the cover on the leak detector by unscrew-
ing the four screws. Insert two size AA 1.5V alka-
line batteries if no external power supply or bus
communication will be used. Alternatively, an ex-
ternal power supply adapter can be connected to
a DC connector. See under Accessories.
NOTE!
When the leak detector is connected to 5V
DC power, batteries should not be connected.
Only alkaline batteries should be used with
the product, not rechargeable batteries.
The built-in temperature monitoring can be de-
activated by moving the DIP switch to ON. This
function is normally always activated.
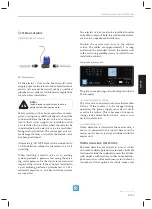
Starting the system
Power up the master unit and other units with
either battery power or an external power source.
Programming
When using any accessories, programming is
always required as these are wireless. Wireless
communication is be established with the master
unit in accordance with the following.
Leak detector
Programming the leak detector is done by press-
ing the red button on the master unit down for 2
seconds (thr right diode will fl ash green). Then
press the red button on the underside of the leak
detector for 2 seconds (until right diode fl ashes
green). If programming is successful, the right di-
ode will show a green light for a few seconds.
Control panel
Programming the control panel is done by press-
ing the red button on the master unit down for 2
seconds (the right diode will fl ash green). On the
control panel, Open and Timer are pressed simul-
taneously for 2 seconds (the radio symbol begins
fl ashing). If programming is successful, the radio
symbol will show a solid light for a few seconds.
Function check
After completing the installation and program-
ming, a function check should be carried out.
Electric valve
Testing electric valves is done through Open and
Close for the water using the button on the mas-
ter unit. The alarm for a valve fault is activated
if the valve moves too slowly, which may hap-
pen the fi rst time the system is started. Reset any
alarms by pressing the Open/Cose button on the
master unit for 5 seconds. The alarm should stop
after opening and closing the valve a few times.
Control panel
Test the control panel by opening and closing
the electric valve with the buttons I (Open) and
0 (Close).
3 (7)
English


