background image


Instruction Manual


14  


Gas leaking from LP tank valve .Failure of tank valve from mishandling or 

mechanical failure 

Turn off LP tank valve. Return LP tank to gas 
supplier 

Gas leaking between LP tank 
and regulator connection 

Improper installation, connection not tight, 
failure of rubber seal 

Turn off LP tank valve, remove regulator 
from cylinder and visually inspect rubber 
seal for damage, see LP tank test and 
connection regulator to the LP tank 

Fire coming through control 
panel 

Fire in burner tube section of burner due to 
partial blockage 

Turn off control knobs and LP tank valve. 
After fire is out and grill is cold, remove 
burner and inspect for spider nests or rust. 
see natural hazard and cleaning the burner 
assembly pages. 


Troubleshooting: Problem 

Possible cause 

Prevention/ Solution 

Grease fire or  continuous 
excessive flames above cooking 
surface 

Too much grease buildup in burner area 

flames to die down. After cooling, clean food 
particles and excess grease from inside firebox 
area, grease cup/pan/tray, and other surfaces 

Burner will not light using 
ignitor 

Gas issues 

1.Trying to light wrong burner 

2. Burner not engaged with control valve 

3. Obstruction in burner 

4.No gas flow 

5.Vapor lock at coupling nut to LP tank 

6. Coupling nut at LP tank valve not fully 
connected. 

1. See instructions on section Lighting 
instructions 

2. Make sure valve are positioned inside of 
burner tubes. 

3. Ensure burner tubes are not obstructed 
with spider webs or other matted, see 
cleaning section of use and care 

4. Make sure LP tank is not empty. 

5. Turn off knobs and disconnect coupling nut 
from LP tank.  Reconnect and retry. 

6. Turn the coupling nut approximately one-
half to three-quarters 


Summary of Contents for DOC279

Page 1: ... 25 13 10 16 17 14 24 23 27 20 22 1 1 2 1 3 3 4 1 5 1 6 2 7 2 8 1 RF 9 1 RB 10 1 LF 11 1 LB 12 2 13 2 14 2 15 2 16 1 17 2 18 1 19 1 20 1 21 1 22 1 23 2 24 2 25 2 26 2 27 4 A M5 55 16 B M5 12 34 C M4 8 4 D 2 E 4 F M4 12 2 G 2 Assembly instructions ...

Page 2: ... 55 4PCS 20 A A Fix the left front leg and left back leg to the left board with 4pcs M5 12 Fix the right front leg and right back leg to the right board with 4pcs M5 12 Connect the bottom board and the side trolley parts Connect the bottom board and the side trolley parts ...

Page 3: ...5 B M5 12 2PCS A M5 55 4PCS 6 D 2PCS E 2PCS 12 21 B 24 25 E D E D 16 A 7 F M4 12 2PCS 8 C M4 8 4PCS 27 F C 17 22 23 14 Install the wheel Attach the door handle to the door Attach the beams to the legs ...

Page 4: ...9 10 B M5 12 4PCS A M5 55 4PCS B 7 A 26 15 G 11 12 B M5 12 20PCS B 6 B B Install the door Install the firebox on trolley Install the side tables Fix the side tables ...

Page 5: ...tamers into the trolley Place the warming rack onto the trolley make sure the warming rack is flat and stable Place the cooking grills into the trolley Attach the grease cup to the grease tray The grease cup needs to be under the grease drip hole ...

Page 6: ...17 18 ...

Page 7: ...Instruction Manual WWW LIVOO FR Reference DOC279 Version 1 5 Language English Plancha gaz station 3 burners ...

Page 8: ...30 mbar 37 mbar 30 mbar 50mbar 37 mbar Injector size 0 86 mm 0 86 mm 0 76 mm 0 82 mm Injector mark 0 86 0 76 0 82 Number and code 20211125 Year 2021 To be used only outside the premises This appliance must be installed in accordance with current regulations and used in a well ventilated area Consult the instructions before use Caution accessible parts can be very hot keep away from young children ...

Page 9: ...and pets 5 Never leave the appliance unattended during use 6 Do not allow children to use or play with the appliance 7 Use the appliance only for its intended purpose 8 WARNING Do not use in closed or confined spaces Make sure it is placed in a well ventilated area 9 The appliance is intended for outdoor use only and in accordance with local regulations 10 Incorrect use or action and non complianc...

Page 10: ...stances Do not store unplugged gas cylinders or aerosol cans near this appliance Do not use within 1 5 metres of combustible material 16 No ignition products should be used with this appliance 17 Do not lean over the appliance during lighting or cooking 18 This appliance is for private use only Do not use at events or in public places 19 Do not modify the appliance This gas grill must be assembled...

Page 11: ...O NOT cook with the lid if fitted down when the valves are on high heat otherwise your appliance may be damaged 26 Allow the barbecue plancha the ashes and its accessories or parts to cool down completely before cleaning and storing it It is recommended to empty the ashes 24 hours after using the barbecue plancha 27 Always allow to cool before storing or cleaning 28 Clean the appliance and its acc...

Page 12: ...rding to the date indicated on the body of each of them or according to the national regulations in force in the country of destination 34 The gas supply pipe not supplied must be installed so that it does not come into contact with the hot surfaces of the grill during operation or during storage and travel 35 Never attempt to disconnect the pressure regulator or any gas connection while using the...

Page 13: ...children Read the safety instructions carefully before you start using your barbecue plancha Refer to the parts list and assembly diagrams to assemble your barbecue plancha Make sure that no parts or pieces are missing or damaged broken which could impair the proper functioning of the appliance The guarantee for this appliance cannot be applied for abnormal conditions of use incorrect storage cond...

Page 14: ...s Do not use wood or lava stone 1 Assembly steps Make sure your grill is assembled correctly The detailed assembly instructions below provide specific assembly procedures for each model Follow these instructions carefully to ensure proper assembly of your grill Caution While we strive to make the assembly process as easy as possible machined steel parts may have sharp corners and edges that can ca...

Page 15: ...hten it firmly Caution Before attempting to light your gas barbecue you must refer to the lighting instructions and the safety and warning points Check the hose before each use for cracks cuts or scratches If the hose is found to be defective do not attempt to use your gas barbecue under any circumstances When changing your gas cylinder make sure there are no sources of ignition nearby fire cigare...

Page 16: ...eight of the gas cylinder should not exceed 15 kg Figure 2 How to connect the gas cylinder This appliance is designed only for use with low pressure butane propane or their mixture of gases and a suitable low pressure regulator using a flexible hose The hose must be attached to the regulator and the appliance with hose clamps Gas Connector Hose Gas Cylinder Regulator Hose ...

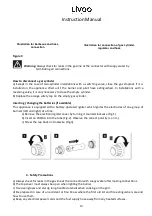
Page 17: ...he electrodes of one group of burners left and right at a time a Remove the electronic igniter cover by turning it counterclockwise Fig 1 b Insert an LR6 AA into the tube Fig 2 Observe the correct polarity and c Screw the cap back on clockwise Fig 3 4 Safety Precautions a Always check for leaks in the gas line at the connector with soapy water after making connections b The top cover must always b...

Page 18: ...p the spark to the burner ignition tube C You will hear a click from the igniter and also see an orange flame coming out of the burner ignition tube on the left side of the burner D Continue to hold the gas control knob for two seconds after the click this will allow the gas to flow completely through the burner tube E and ensure ignition When the burner is lit adjacent burners will cross light wh...

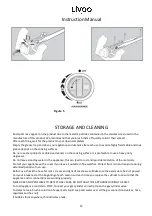
Page 19: ... can lead to rust and rapid deterioration of the materials Protect your appliance with a cover if you leave it outside in fine weather Protect from rain and moisture during extended periods of non use Before use check the hose for nicks cracks and signs of severe wear Make sure the expiry date has not passed Carry out a leak test at the beginning of each season and each time you replace the cylind...

Page 20: ... on stubborn stains then rinse with water Clean thoroughly with strong hot soapy water solution Rinse with water and allow to completely dry NEVER USE OVEN CLEANER COOKING PLATE Remove residues with a brush scraper and or sponge then wash with a soapy water solution Rinse with clean water and allow to dry completely Clean with a soft cloth and soapy water Rinse with clean water Do not use abrasive...

Page 21: ...hooting Problem Possible cause Prevention Solution Grease fire or continuous excessive flames above cooking surface Too much grease buildup in burner area flames to die down After cooling clean food particles and excess grease from inside firebox area grease cup pan tray and other surfaces Burner will not light using ignitor Gas issues 1 Trying to light wrong burner 2 Burner not engaged with contr...

Page 22: ...nition section of use and care Sudden drop in gas flow or low flame 1 Grease buildup 2 Excessive fat in meat 3 Excessive cooking temperature 1 Clean burners and inside of grill firebox 2 Trim fat from meat before grilling Flames blow out High or gusting winds Low on LP gas Excess flow valve tripped Turn front of grill to face wind or increase flame height Refill LP tank Refer to sudden drop in gas...

Page 23: ...orrect disposal of the unit Electrical and Electronic Equipment Applicable in the European Union and the rest of Europe that have adopted separate collection systems countries The European Directive 2012 19 EU on Waste Electrical and Electronic Equipment WEEE requires that old household electrical appliances must not be disposed of in the normal household waste stream Old appliances must be collec...

Page 24: ...struction Manual 17 Photo no contractual Worried about the quality of his products the manufacturer reserves the right to make modifications without advance notice LIVOO BP 61071 67452 Mundolsheim FRANCE ...

Reviews: