


6
Note:
When you have completed the software installation, do
not
proceed to the “Connecting the
Drive” or “Setting up the Maxtor OneTouch Feature” sections.
For step-by-step directions on how to back up your entire computer system using Retrospect, see
the following section.
Automated Network Backup Using Retrospect
1.
Open Retrospect.
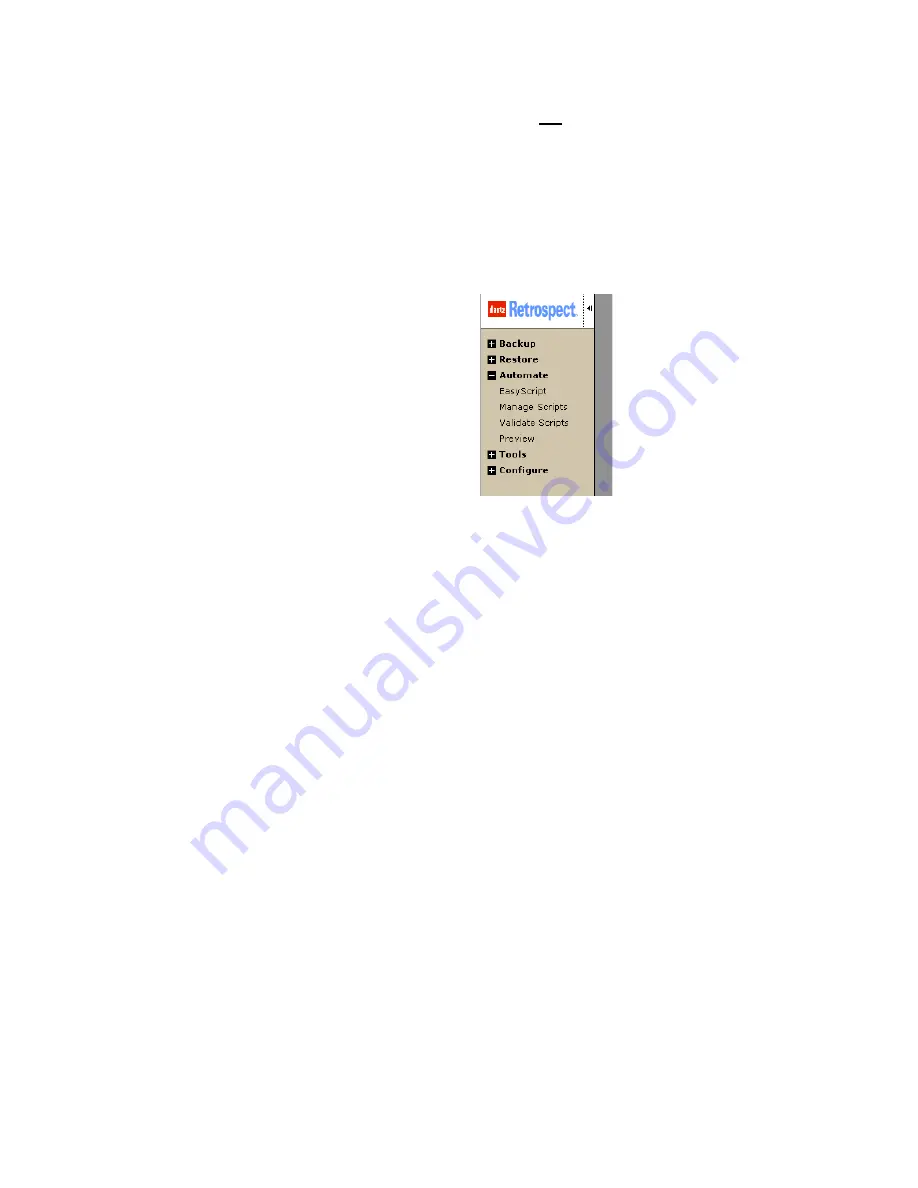
2.
On the left side of the screen, click the
+
sign
next to
Automate
and then click
EasyScript.
The EasyScript welcome window
will appear.
3.
Click
Next
.
The next window will ask you to choose your
backup media.
4.
Select
Disks
and click
Next
.
Figure 7.
EasyScript
The next window will ask you how many backup sets you want.
5.
Select
I want one Backup Set for everything
and click
Next
.
The next window will ask you how often you would like to back up.
6.
Choose either
Once a week
or
Every weekday
and click
Next
.
If you chose
Once a week
, you will choose the day and the start time.
If you chose
Every weekday
, you will choose only the start time.
7.
Make your choice(s) and click
Next
.
The Backup Summary window will appear showing the backup options you have chosen. The
Start the first backup now
checkbox is checked, which means your first backup will start when
you click
Finish
.
Note:
It is recommended that you start your first backup now, because you will choose the source
and destination of your backup, the first time you do it. If you choose not to start your first backup
now, you will need to be at your computer for the first scheduled backup to choose the source
and destination of your backup.
8.
Click
Finish
.
If you chose the “Start the first backup now” option, Retrospect will scan your drive and the
Backup Set window will appear. You will now choose the disk where your backup files will
be stored.
9.
Double-click
My Network
Places
.
The Adding Network Volume window will appear.


