C.
If required by your ISP, enter the Router’s
Host Name
and
Domain Name
in the
appropriate fields on the Setup tab. (This is usually required by cable ISPs.)
D.
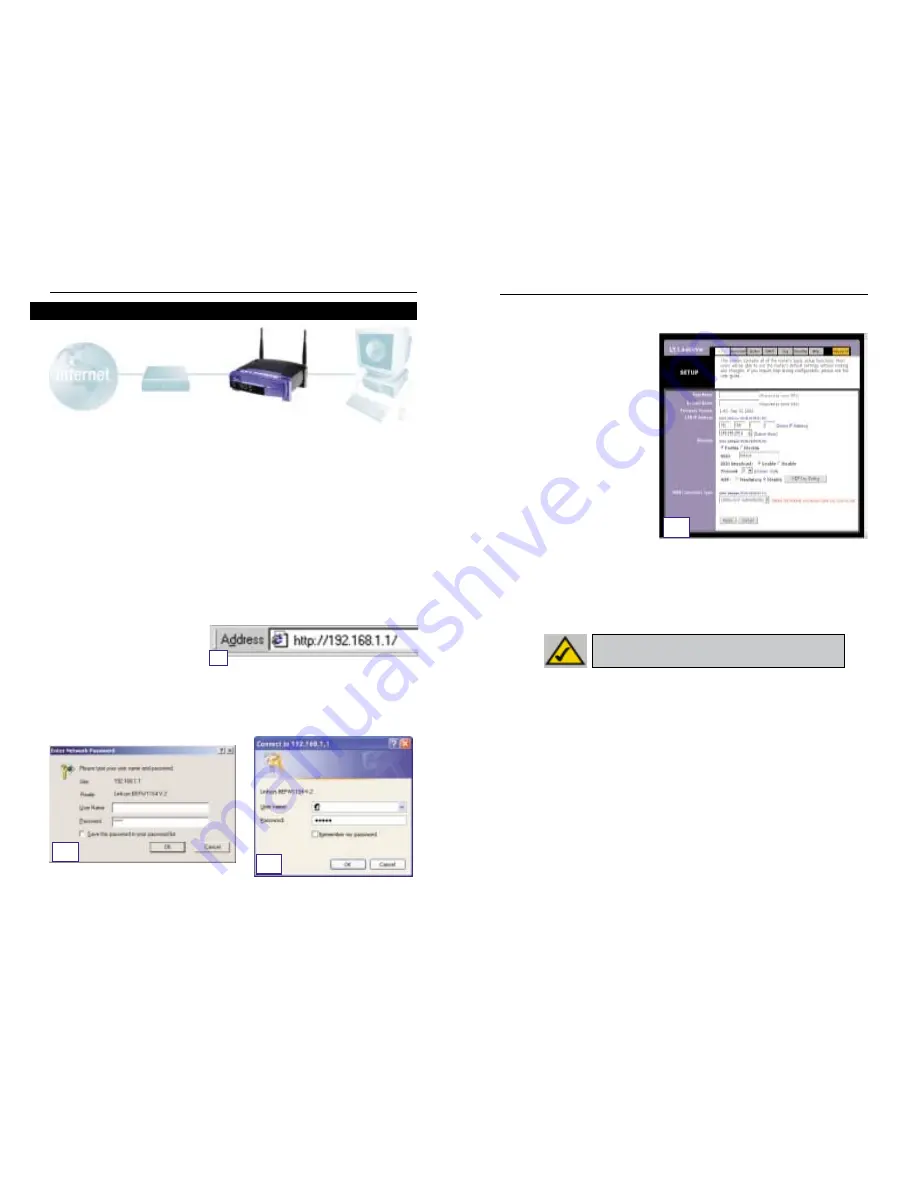
To configure the Router for
your wireless network, verify
that the Setup tab’s Wireless
fields (shown in Figure D) are
completed as follows:
Enable/Disable
: Selecting
the
Enable
radio button will
enable the Router’s wireless
feature. Wireless functions
will not be available unless
enabled.
SSID
: The SSID (or ESSID) is a
unique name for your wire-
less network. It is case sen-
sitive and must not exceed 32 characters. The default SSID is "linksys " but
you should change this to a personal wireless network name. All wireless
points in your network must use the same SSID.
Channel
: Select the appropriate channel for your network from the list provid-
ed. All wireless points in your network must use the same channel in order to
function properly.
E.
The Router supports five connection types: DHCP (obtain an IP automatically),
PPPoE, Static IP Address, RAS, and PPTP. These types are selected from the
pull-down menu beside
WAN Connection Type
. The Setup screen and avail-
able features will differ depending on what kind of connection type you select,
the instructions for which are included here:
1. Obtain an IP Automatically
If your ISP says that you are connecting through a dynamic IP address (or DHCP),
perform these steps:
a. Select
Obtain an IP automatically
as the WAN Connection Type (as previous-
ly shown in Figure D).
b. Click the
Apply
button to save the settings.
In Step 3, you will configure the Router to function in your network and gain access
to the Internet through your Internet Service Provider (ISP). Your ISP may require
the use of a Host Name and Domain Name. Further, you will set the WAN
Configuration Type on the Router’s Setup tab from the information given by your
ISP.
You will need this setup information from your ISP. If you do not have this infor-
mation, please contact your ISP before proceeding. To find out what questions you
should ask your ISP, refer to question #1 in the Help section.
The instructions from your ISP tell you how to set up your PC for Internet access.
Since you are now using the Router to share Internet access among several com-
puters, you will use this setup information for Router configuration.
A.
Open your web browser. (It’s all right if you get an error message at this point.
Continue following these instructions) Enter
192.168.1.1
into the web brows-
er’s Address field and press
the
Enter
key.
B.
An Enter Network Password window, shown in Figure B
1
, will appear.
(Windows XP users will see a Connect to 192.168.1.1 window, shown in Figure
B
2.
) Leave the User Name field empty, and enter
admin
(the default password)
in lowercase letters in the Password field. Then, click the
OK
button.
12
13
Instant Wireless™ Series
Wireless Access Point Router with 4-Port Switch
Step 3: Configure the Router
A
B
1
B
2
D
N
No
otte
e:: If you are interested in changing the Router’s WEP set-
tings, turn to the section for Configuring Wireless Security.


