background image

User Manual 


         English 


Operation 


Password Security 


When you power on the KVM Switch the default password setting is OFF and no password is 

required.  


Note

: Please don’t change passwords until you are familiar with the operation of the KVM 

Switch and its OSD menu. Whenever you set a password please make a note in a secure 

place. Otherwise, if you forget the password, you will need to send the KVM Switch back to 

LINDY for maintenance to clear the password. 


Hot Plug Support 


The KVM Switch supports a “Hot Plug” function for easy addition or removal of PCs. The user 

can arrange or maintain the PCs as follows: 


a.  A PC can be disconnected and reconnected to the same or different port of the KVM switch 

without  having  to  power  it  off  as  long  as  it  is  not  currently  connected  to  or  in  use  by  the 

console. 


b.  The mouse driver of the PC has to support the hot plugging function otherwise the computer 

may need to be rebooted when it is reconnected. 


c.  You can unplug  your mouse or keyboard from the console port and plug it back in at any 

time.  If  you  need  to  swap  to  a  different  type  of  mouse  then  you  may  need  to  reboot  the 

console and certain computers. 


d.  A SLAVE KVM switch can be added or removed at any time, but after adding or removing a 

switch  you  may  have  to  reset  all  of  the  KVM  switches.  You  DO  NOT  need  to  reboot  the 

computers. 


Please note: Some Operating Systems such as certain Unix versions are unable to 

support the “Hot Plugging” function. If you Hot Plug when using this kind of O.S., it may 

cause unpredictable operation or may shut down the computer. Before attempting to use 

the Hot Plugging feature, please make sure your O.S. and mouse software driver support 

this feature. 


Please Note

:


Your monitor will only display one PC signal at any one time. All keyboard 

and mouse commands are sent to this PC only.  


When a PC is connected to the currently selected port but it is not switched on, or 

is in sleep mode, the monitor will not display any signal. 


User Manual 


         English 

Computer / Port Selection 


You can select the computer you want to access in three different ways:  


  Front panel push button selection 

  Keyboard hotkey selection 

  On screen display menu selection


Illuminated Port LED Button and LED front Display 


Each port switch button on the front panel of the KVM Switch has two integrated LEDs. 

When the switch button is illuminated 

RED:


this port is selected 

and connected to the console. 

When the switch button is illuminated

 BLUE

, a computer is attached to this port and has 5V 

present at its PS/2 ports. This does not necessarily mean that the computer is fully powered up 

but also can be in sleep or soft power off mode with 5V still present at the PS/2 ports. If the LED 

is not lit then there is either no computer connected, or the computer is fully powered down. 


The LED front display shows 3 digits when the KVM is powered up. The first digit refers to the 

BANK number (1-8) and the other two digits refer to the port number selected /connected to the 

console (1-8/16). 


Front panel push button selection 


You can select a computer by pressing the appropriate Bank push button to switch between the 

various banks/KVM Switches you have connected and the individual Port push buttons to select 

your desired port.  


Keyboard Hotkey and OSD Selection 


You can also conveniently select the computer to be accessed/displayed by switching the ports 

through  simple  keyboard  key  sequences  referred  to  as  Hotkeys  or  by  OSD  (On  Screen 

Display) switching. 

To use either keyboard hotkey or OSD switching you have to enter into the KVM Switch 

command mode first. To do so and to send commands to the KVM switch, the SCROLL LOCK 

key must be pressed twice within 2 seconds. The Scroll Lock key can be changed to NUM or 

Caps Lock according to your requirements; this is covered later in this manual on page 11. In 

some cases for certain OS or computers it may be necessary to press the hotkey 3-4 times if 

the KVM switch does not respond to pressing the hotkey twice. 


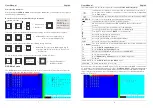
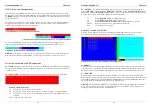
Once you have pressed Scroll 

Lock twice the OSD Menu will pop 

up on the screen and you can 

decide whether to use further 

hotkeys or the OSD based 

selection options, using the 

keyboard (Mouse input is disabled 

in OSD mode). 


The KVM switch will beep to confirm when it switches into hotkey / OSD mode. This feature may 

be enabled / disabled from the OSD menu (S command) 

Summary of Contents for 32520

Page 1: ...ch Classic 8 16 OSD User Manual English Benutzerhandbuch Deutsch Manuel Utilisateur Fran ais Manuale d uso Italiano 8 Port Model LINDY No 32520 16 Port Model LINDY No 32521 www LINDY com User Manual P...

Page 2: ...other brands of KVM switches and can be used to set up a cascaded port installation with other PS 2 KVM switches When using non LINDY KVM switches the hotkey and OSD switching features may only functi...

Page 3: ...3 to connect the computers Servers to the LINDY KVM Switch 1 Switch off all the computers to be attached 2 Connect the keyboard monitor and mouse directly to the ports of the LINDY KVM Switch labelle...

Page 4: ...ifferent ways Front panel push button selection Keyboard hotkey selection On screen display menu selection Illuminated Port LED Button and LED front Display Each port switch button on the front panel...

Page 5: ...powered off depending on its BIOS settings Indicates that the port is password protected Factory default is password OFF USER1 8 Port name of corresponding port factory default setting Indicates that...

Page 6: ...old password and the simply leave the new password empty and press enter to complete User Manual English 10 Whenever you switch between ports your KVM switch will display the newly selected OSD port...

Page 7: ...en 000 is entered the OSD port information will remain until the ESC key is pressed NOTE When entering OSD RATE and SCAN RATE please always enter three digits using the numbers on your main part of yo...

Page 8: ...der LINDY KVM Switches k nnen Sie in erheblichem Ma e Kosten ein sparen z B f r zus tzliche Monitore Tastaturen und M use Und Sie sparen erheblich an Platz und Ressourcenverbrauch f r elektrische Leis...

Page 9: ...hen Anzeige des Status der Ports LED Display zur bersichtlichen Anzeige des zur Konsole verbundenen Ports Signalton zur Best tigung von Hotkey Eingaben und Schaltvorg ngen Das 8 Port Modell verwendet...

Page 10: ...um Master durch ACHTUNG Schlie en Sie immer das Netzteil an Obwohl die angeschlossenen Rechner den KVM Switch auch ber die PS 2 Anschl sse mit Strom versorgen wird das Netzteil zur korrekten Funktion...

Page 11: ...en Hotkey mehr als nur zweimal kurz hintereinander zu dr cken bevor der KVM Switch in den Kommando Modus schaltet Das Umschalten in den Kommando Modus wird auf dem Bildschirm durch das Aufklappen des...

Page 12: ...n auf VERSION Zeigt die Firmwareversion an 1 0 Bei Aufruf der Funktionen F1 F5 des rechtsseitigen OSD Hauptmen s werden weitere Untermen s aufgerufen F1 Port Name Edit dient zum Editieren von Portname...

Page 13: ...ie F3 um nur die f r AUTOSCAN selektierten Ports mit Zeichen zu scannen ESC Verlassen des Untermen s Benutzerhandbuch Deutsch 24 F5 HOTKEY Bei diesem KVM Switch kann zwischen 3 verschiedenen Hotkeys g...

Page 14: ...oder NUM Taste mit einem Piepton reagiert und Sie aber kein Bildsignal vom ausgew hlten Rechner erhalten pr fen Sie bitte ob sich dieser m glicherweise im Standby oder Soft Power OFF Zustand befindet...

Page 15: ...lis s pour monter une installation cascad e avec d autres switchs KVM PS 2 En utilisant les switchs KVM non LINDY les s quences hotkey et OSD ne fonctionneront qu avec le switch KVM Classic OSD 8 16 a...

Page 16: ...nsi 3 c bles en 1 comme d crit la page 3 pour connecter les ordinateurs serveurs au switch KVM LINDY 1 Eteignez tous les ordinateurs connecter 2 Connectez directement le clavier l cran et la souris su...

Page 17: ...le l cran n affichera aucun signal Manuel Utilisateur Fran ais 32 S lection du port ordinateur Vous pouvez s lectionner l ordinateur sur lequel vous voulez acc der de 3 fa ons diff rentes Bouton en fa...

Page 18: ...mie d nergie suivant les param tres du BIOS Indique que le port est prot g par mot de passe d sactiv par d faut USER1 8 Nom du port correspondant param tre par d faut Indique que ce port est s lection...

Page 19: ...is entrer et confirmer le nouveau mot de passe Pour d sactiver le mot de passe entrez l ancien et laissez le champ new password vide Manuel Utilisateur Fran ais 36 Lorsque vous commutez les ports le s...

Page 20: ...rieur droit de 005 255 secondes Pressez ENTREE pour terminer le param trage et retourner dans le menu OSD Quand 000 est entr le menu OSD le retiendra jusqu ce que la touche ESC soit press e NOTE en en...

Page 21: ...iano 40 Introduzione Grazie per aver acquistato questo KVM Switch LINDY Classic 8 16 OSD Vi preghiamo di leggere attentamente questo manuale per conoscere a fondo le caratteristiche e le funzioni di q...

Page 22: ...o dello switch LED a 3 digit per la visualizzazione della porta computer selezionato Il modello ad 8 porte utilizza cavi standard per tastiera mouse e VGA quello utilizza cavi speciali con il solo con...

Page 23: ...NOTA Collegate in ogni caso l alimentatore I PC connessi possono comunque alimentare il KVM Switch ma pu non essere sufficiente in presenza di collegamenti daisy chain e pu comunque condurre ad errori...

Page 24: ...al tasto NUM o Caps Lock a seconda delle vostre esigenze L operazione di modifica descritta a pagina 50 Per certi OS o computer pu essere necessario premere gli hotkeys 3 4 volte nel caso che il KVM s...

Page 25: ...ono selezionate funzioni del men OSD a destra F1 F5 viene visualizzato il sotto men OSD corrispondente Selezionando F1 Port Name Edit il seguente sotto men viene visualizzato NOTA il KVM Switch assume...

Page 26: ...sto Switch KVM Switch consente di selezionare 3 differenti hotkey BLOCC SCORR BLOCC NUM e CAPS LOCK BLOCC SCORR quello preselezionato per modificarlo utilizzate il tasto F5 per richiamare il sotto men...

Page 27: ...non appare nulla a schermo controllate che il PC sia acceso 2 Se l immagine dello schermo non ben definita Assicuratevi di aver utilizzato cavi di elevata qualit con conduttori coassiali Potete consid...

Page 28: ...enter the recycling process Each individual EU member state has implemented the WEEE regulations into national law in slightly different ways Please follow your national law when you want to dispose o...

Reviews: