25
Please note
:
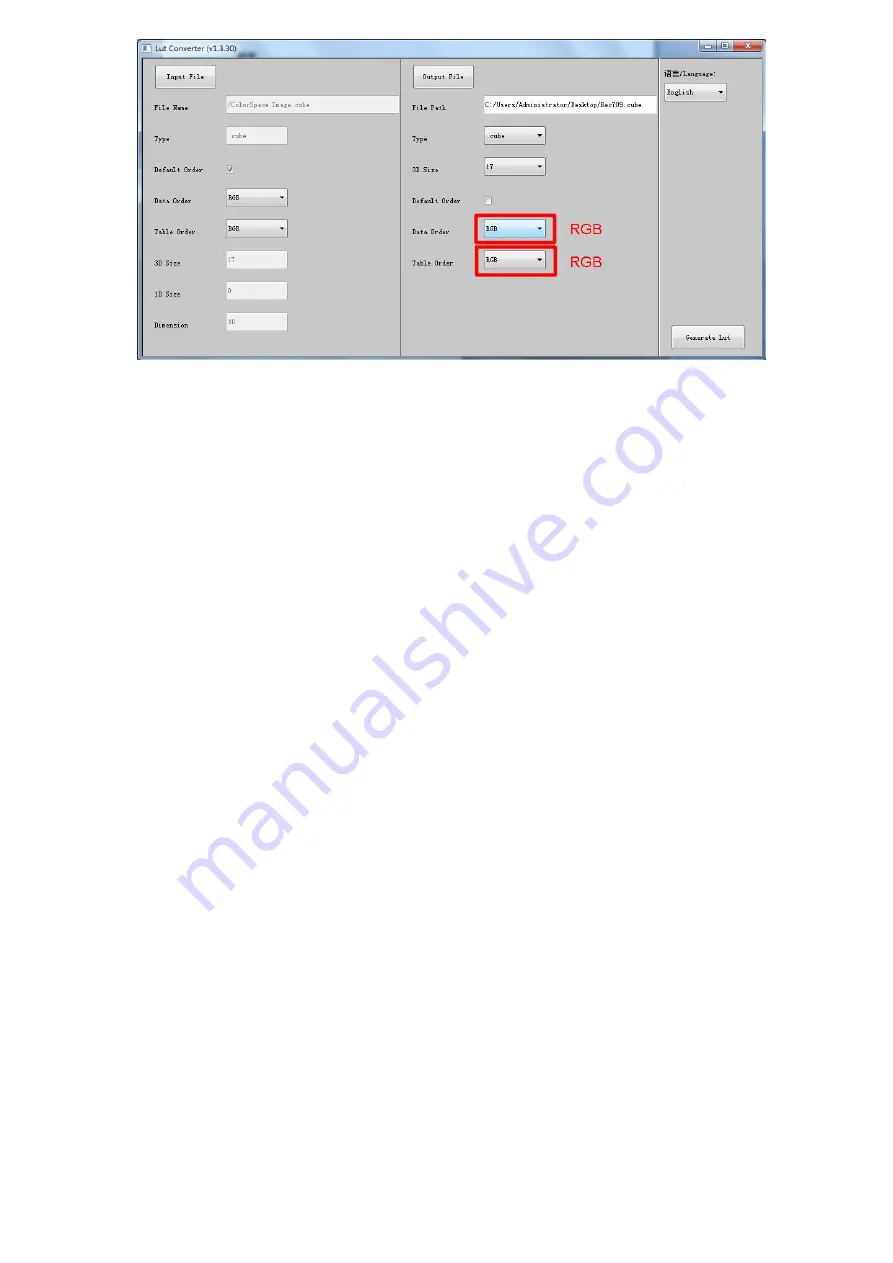
The format which shown in Red Box above should be selected to RGB.
2-5.
Click Generate Lut button to finish the transform.
3. USB Loading
The USB flash disk must be formatted before using to make sure that there
are no other files in the root directory.
Copy needed files to the root directory of the USB flash drive.
Please note that the system only supports updating one LUT table at a time.
Therefore, only a single file to be loaded can be copied to the USB flash drive. If
it needs to update more LUT tables, please delete other files in USB flash disk
and repeat the above steps.
Power on the device, insert the corresponding video signal into any video signal
interface, and switch the signal to the corresponding channel to make sure the
device displays normally.
(It does
n’t suggest that update the LUT table when there is no input signal as the
device will enter the power saving mode in such situation.)
Insert the flash disk into the USB interface on the device and wait for about 5
seconds. It will pop-up prompt box "Load Rec709.cube" after detecting the flash
disk. Operate by using press "MENU", "
<
",
"
>
",
"EXIT" on the front of device.
Click "YES" to load, and click "NO" or press "EXIT" to exit.
The device displays a black screen after confirmed the loading, and it will
update the corresponding LUT table back-stage according to the name of the
updated LUT.
The device will be restarted automatically after completed. The whole updating
process takes about 6 seconds according to the updated LUT name.
Please activate and set up the updated LUT table under the menu after restart. It
doesn’t need to be reset if the current updated LUT has been selected before
updating.
Please note it only calibrates the color for Rec709 mode and upload it to the device in the
factory. User1~User3 is grayed out and disabled in the menu. After loading the user LUT
table, the corresponding button will be shown as blue and able to be use, shown as the
following figure.


