


Software installation
After you play with the preloaded sequences we put into Visual Poi, surely you want to try some
graphics of your own, don’t you? To do so, you need to install the software which is used to prepare
your image sequences and upload them into the device.
The software comes with the included USB flash drive. It runs on both Windows PC and MAC OS X. To
download the latest version, please visit Lighttoys support page at:
www.lighttoys.cz/support/
.
The user software consists of the following:
•
Visual Poi driver (for Windows only)
•
Lighttoys Composer application
Windows PC
The first step is to install the Visual Poi driver. Connect one Visual Poi with the provided Micro USB
cable to the PC and power it ON with a long press of the main button.
On Windows 7, click the
Start
button, type “
Device manager
“ into the search bar and hit Enter. On
Windows 8 and 10, press
Windows Key + X
to open the Start menu, then select Device manager from
the list.
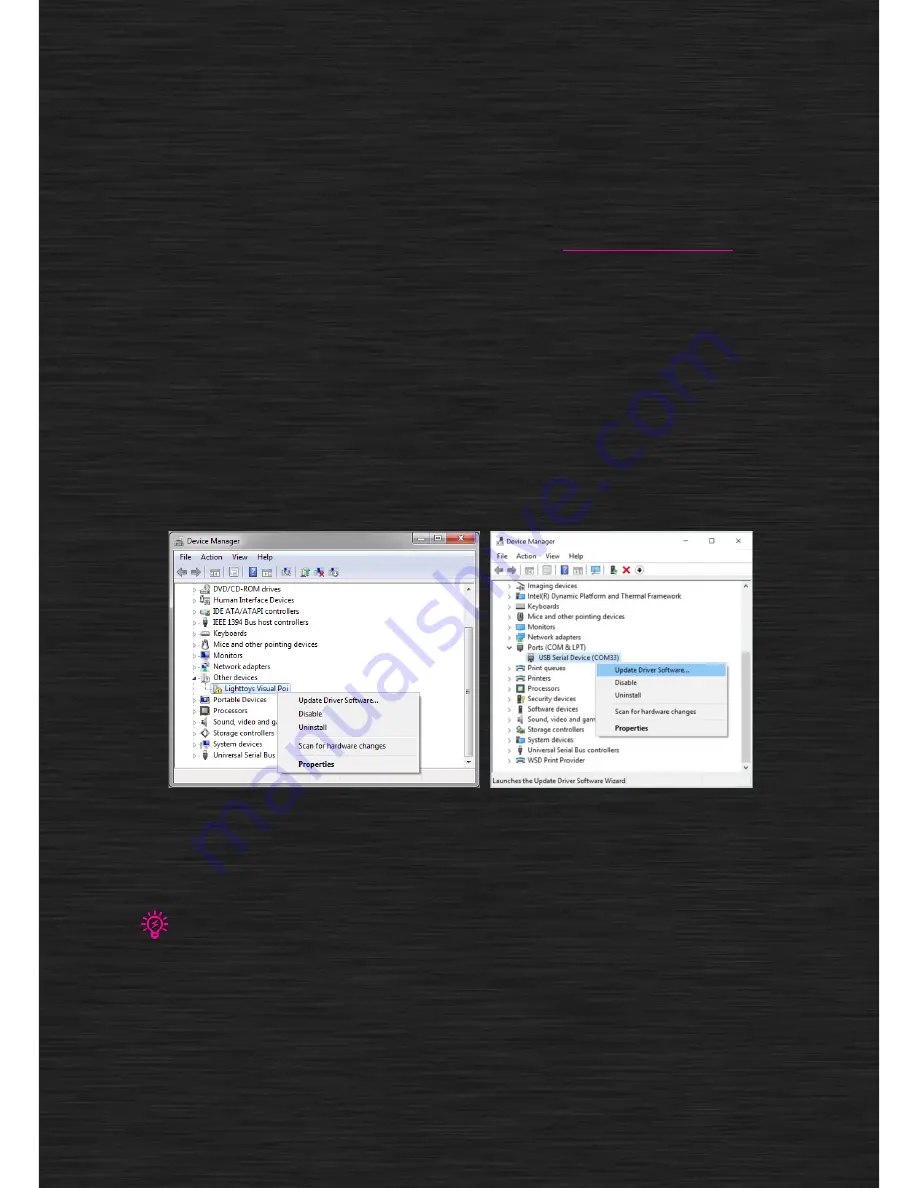
Device manager showing connected Visual Poi on Windows 7 and 10
In the new window you should see your connected Visual Poi in the list. It should be listed under
“Other devices” or “Ports (COM & LPT)“. In some rare cases, Visual Poi can also be listed under
“Portable Devices”.
If you cannot find Visual Poi listed in Device Manager like shown above, try disconnecting and reconnecting Visual Poi to your PC
and watch for any new item appearing on the list. The newly appeared item is Visual Poi device.
Right click on the item and select ”
Update Driver Software…”
. In the next window, select
“Browse
my computer for driver software”
.