13
Installation and
Operation
12
C
OMPLI
/B
RILLIANCE
II T
IME
C
LOCK
A.
Press ENTER.
B.
Use the RIGHT and LEFT arrow to select “MAIN MENU.”
C.
Press ENTER to exit and return to the main menu.
5.10
R
ETURNING TO THE MAIN MENU
To exit the CONFIGURE CLOCK mode, complete the following sequence:
MAIN MENU
A.
Press ENTER.
B.
Press the UP or DOWN buttons to select the outputs you
want to test.
C.
Press ENTER to confirm.
D.
At the end of the sequence, press ENTER to exit this
function and return to the main menu.
5.9
T
ESTING OUTPUTS
Use this function to test room changes you have programmed into the Time Clock.
TEST
OUTPUTS
TEST
EXIT OUTPUT TEST
Master Unit Programming
For the CL-TCCO to signal to the master unit(s) it is necessary to program it with the master Unit ID number. Multiple
master units can respond to commands issued from one CL-TCCO. Please consult the COMPLI LYTEMODE MASTER
Installation and Operation Manual for additional information.
NOTE: This section does not apply to the
Brilliance II Time Clock.
O
N
T
HE
C
OMPLI
M
ASTER
:
To Access
Hold down the Program button.
Press OFF
Indication on Rate Display
Rate flashes the LAN Raise/Lower Remote assignment
slot number. (See Figure A).
Description
Any COMPLI Lytemode master can be assigned Unit ID numbers one through thirty-one.
NOTE: Only twenty-six codes are available for use with the CL-TCCO.
Programming
1. Press any Channel Up to increase the Master Unit ID code.
2. Press any Channel Down to decrease the Master Unit ID code.
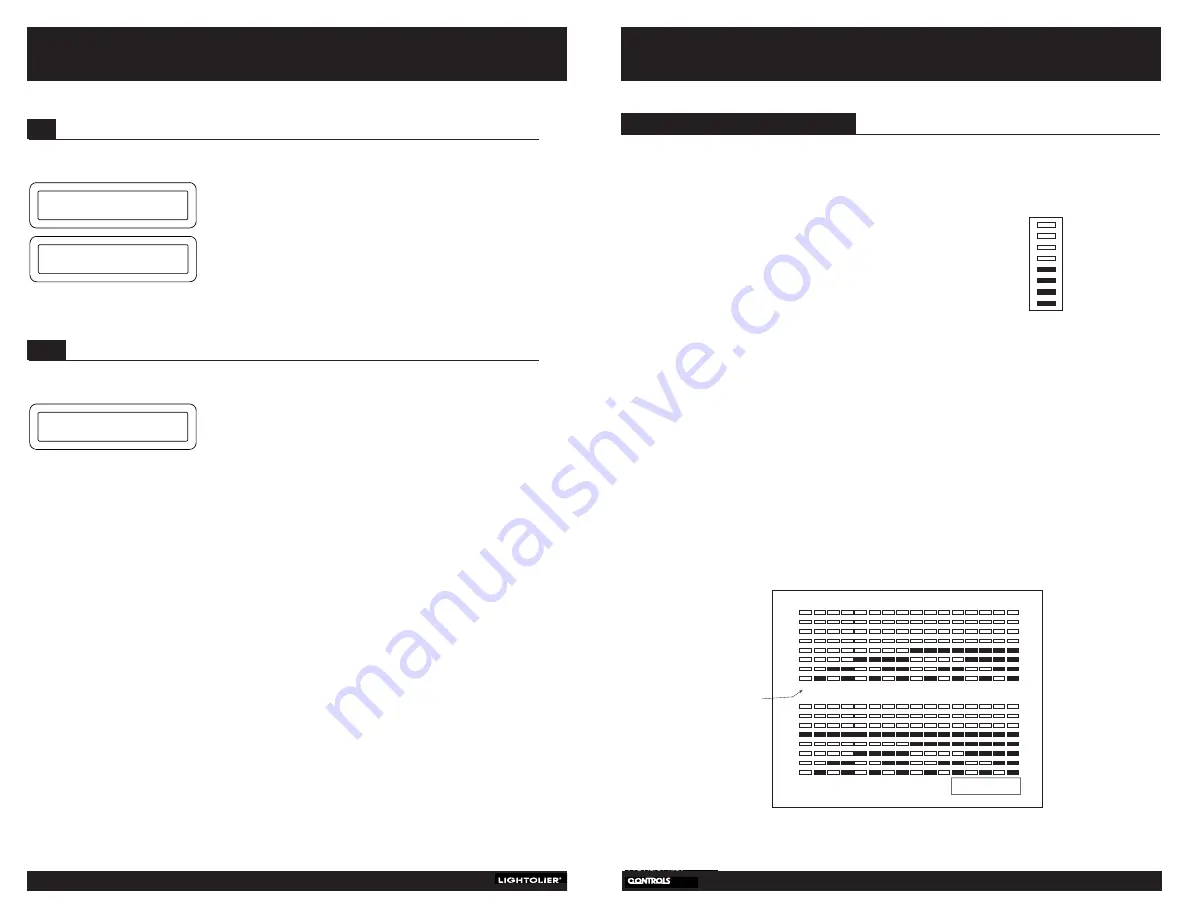
3. The Unit ID code will be displayed in all the channel bar graphs in binary format (See Figure 2).
Exit
1. Press Set to return to normal operation.
Example
Set the COMPLI Master to Unit ID 8
1. Hold down Program button and press OK.
2. Press any Channel UP three times.
3. Press Set to exit.
0
1
2
3
4
5
6
7
8
9
10
11
12
13
14
15
a
b
c
d
e
f
g
h
i
j
k
l
m
n
o
16
17
18
19
20
21
22
23
24
25
26
27
28
29
30
31
p
q
r
s
t
u
v
w
x
y
z
not available
Unit ID Displays on Bar Graph
Not on LAN
Figure 2
Figure 1
Rate
Indicator
NOTE: This section does not apply to the Brilliance II Time Clock.


