


P
REPARING
A
S
ETUP
WITH
E
THERNET
A
UTO
-C
ONFIGURING
THE
P
OCKET
M
ULTI
C
OM
Multi
Com
— User’s Manual
11
• Type-in again the
Multi
Com
IP address:
http://10.0.0.1
• The Welcome-page of your
Multi
Com
appears again.
4.
Click on the link entitled “Generate a configuration for Internet access”.
A fill-in form appears:
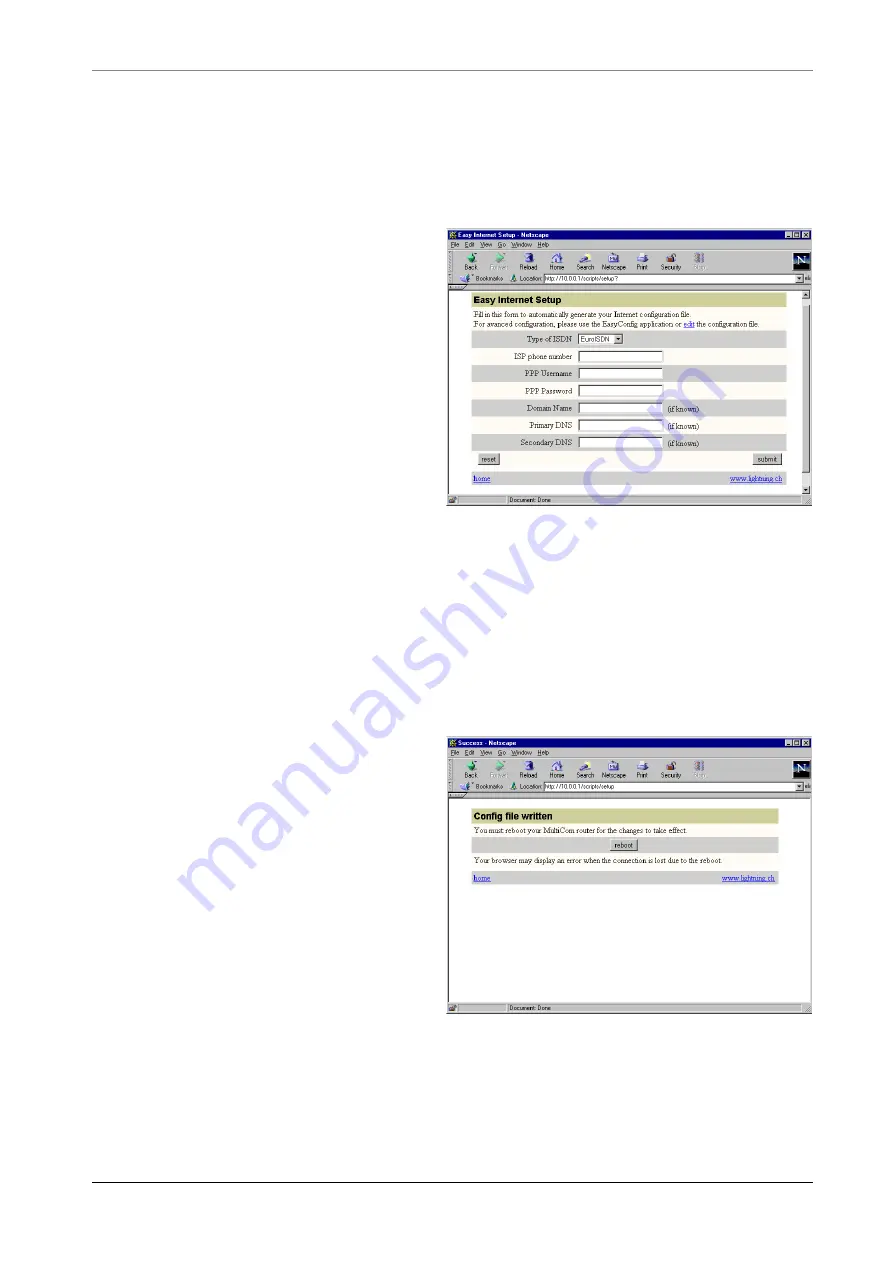
5.
Enter the following informa-
tions:
• Your ISP phone number.
• PPP Username: the username
you have chosen (or
received) from your ISP.
• PPP Password: the password
you have chosen or received.
• If you have your own
Domain-Name (for instance
“lightning.ch”) you may type it into the appropriate field.
• If you got DNS (Domain Name Server) IP-addresses information from
your ISP, you may also enter them. Otherwise, just leave these fields
empty. Most ISPs transmit these informations through the ISDN (PPP)
connexion and your Pocket MultiCom will automatically learn them from
there.
6.
click on the “submit” button…
7.
After a few seconds, a new
screen appears:
Click on “reboot” in order to
restart the Pocket MultiCom
with the new configuration. Your
browser may indicate that it
“lost the connection” to the
Pocket MultiCom.
8.
The router restarts. Ethernet, D-
Channel and Power leds light
green again after a while.
9.
Restart your PC to make sure it
gets its new DHCP parameters from the Pocket MultiCom.
10. Congratulations! Your router is configured! You can now test your access by
registering your product and surfing on the Internet using your Web navigator.