LIGHTMED TruScan Pro
–
Operator’s Manual Rev. No. 01
Page
78
of
109
4.
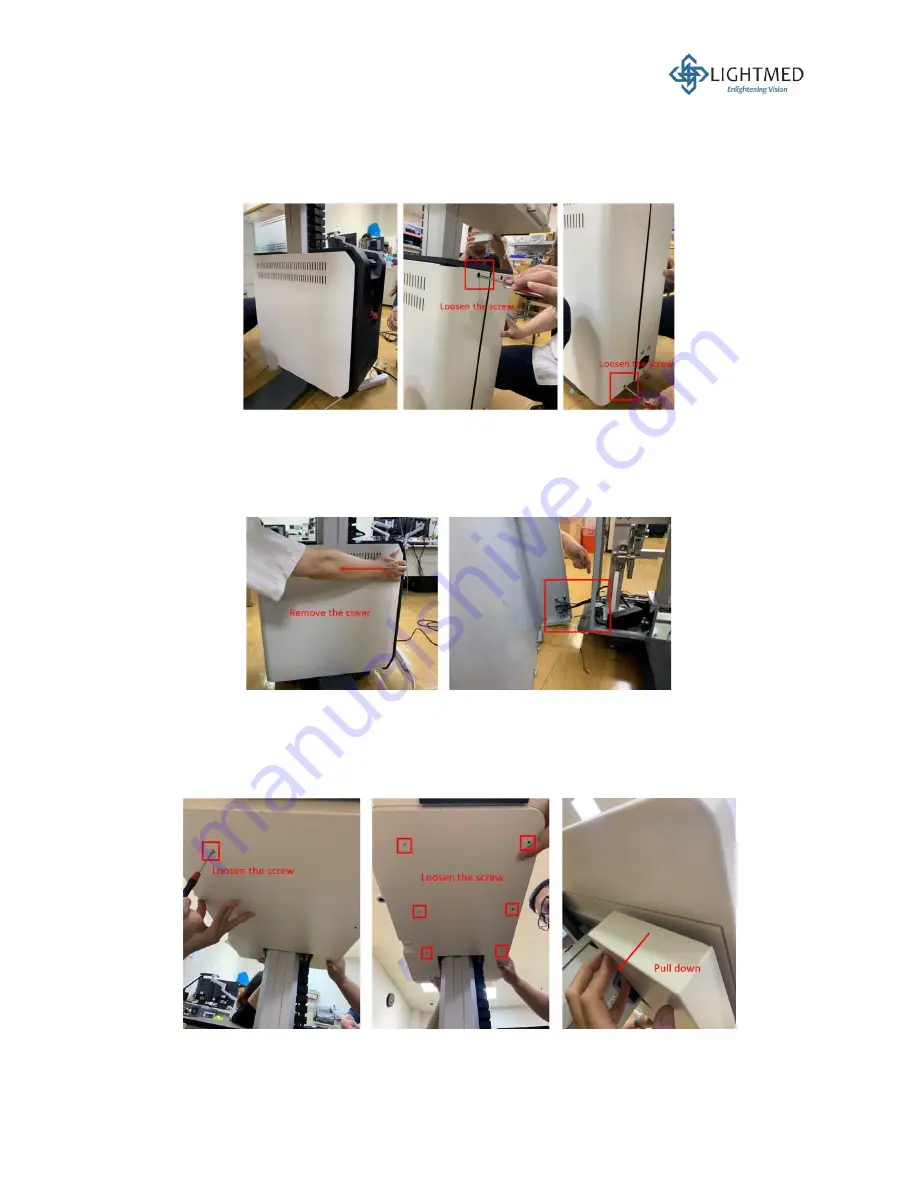
The console holder cover is split into two separated compartments: left and right, each is
secured by two spring-loaded screws
—a mechanism that holds on to the screws to prevent
the screws from being dropped inside the cover when they are loosen. Use a Phillips
screwdriver to loosen the two spring-loaded screws on the back of the left console holder
cover (Figure 18). Do not loosen the screws on the right cover.
Figure 18: Loosening two spring-loaded screws on the left console holder cover.
5.
The cover is held on by tabs that are inserted into their respective holes. Remove the left
console cover by pushing it first towards the back of the table to release the tabs from its
respective holes, and then push the cover towards the left-hand-side to remove it completely
from the table, the internal wiring components will be exposed (Figure 19).
Figure 19: Removing the cover from the table.
6.
Make sure the table is raised to approximately 10 cm higher to give yourself room to remove
the tabletop cable cover. Use a 2 mm hex wrench to release the six screws on the cable cover
underneath the tabletop. Hold on to the loosened cover as it will drop after the six screws are
released (Figure 20).
Figure 20: Removing the cable cover underneath the tabletop.


