background image


17

COMPUTER OPERATION  |

BODY FAT

1.    In STOP mode, press the BODY FAT key to start body fat measurement.
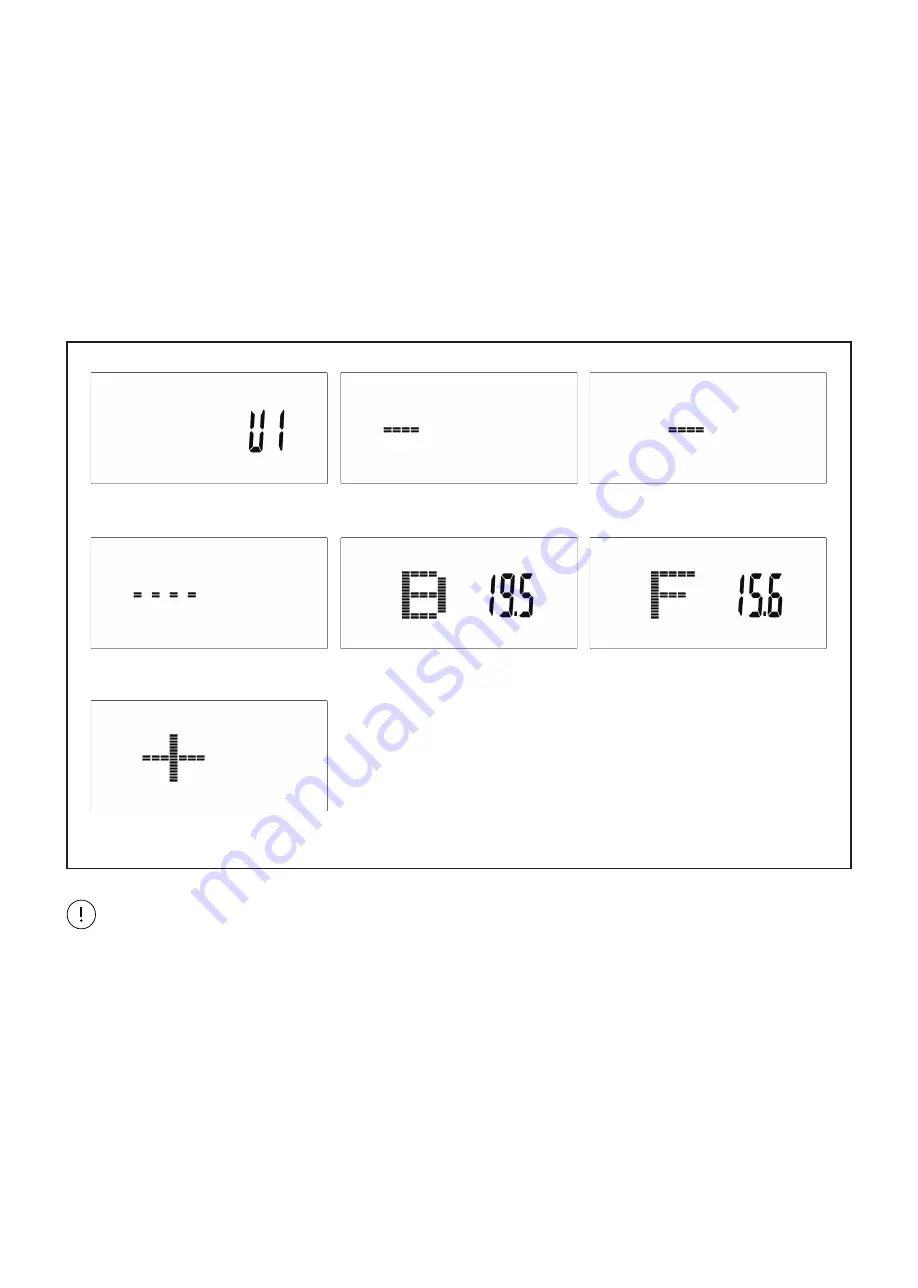
2.   Console will display UX (Drawing 19) and start measuring (Drawing 20~21).
3.   During measuring, users have to hold both hands on the hand grips. When console detect the pulse,
      LCD display as (Drawing 22) for 8 seconds until computer finish measuring.
4.   LCD will display BMI (Drawing 23), FAT % (Drawing 24) and BODY FAT advice symbol (Drawing 25).
5.   Error message:
      *The LCD displays "---- ", " ----" – means not hand the grip correctly.
      *E-1–There is no heart rate signal input detected.
     *E-4–Occurs when FAT% and BMI result is below 5 or exceeds 50.

Drawing 19

Drawing 20

Drawing 21

Drawing 22

Drawing 23

Drawing 24

Drawing 25

NOTE:

1.    After 4 minutes without pedaling or pulse input, console will enter into power saving mode. Press
      any key may wake the console up.
2.   When computer act abnormal, please plug out the adaptor and plug in again.

Summary of Contents for EXC-100

Page 1: ...d manuals are available through our website at www lifespanfitness com au Read all instructions carefully before using this product Retain this owner s manual for future reference IMPORTANT All nuts a...

Page 2: ...TABLE OF CONTENTS I Important Safety Instructions 03 II Exploded Diagram 04 III Parts List 05 IV Assembly Instructions 06 V Computer Operation 12 VI Exercise Guide 18 VII Warranty 20 TABLE OF CONTENT...

Page 3: ...h can be affected by incorrect or excessive training Consult a doctor before beginning the training program He can define the maximum setting Pulse Watts Duration of training etc to which you may trai...

Page 4: ...DED DIAGRAM II EXPLODED DIAGRAM 8 27 31 29 28 5 25 30 32 23 24 25 23 38 39 25 23 22 25 23 26 24 4 18 21 33 6 34 15 9L 13 14 15 12 19 17 3 19 17 20 16 14 13 1 10R 9R 13 14 16 2 19 11R 15 14 13 11L 7 35...

Page 5: ...D20 2 5 16 Arc Washer D10 25 2 4 17 Adjustable Pad 2 18 Mast Cover 1 19 Cross Screw ST4 2 18 4 20 Tension Cable 1 No Description Qty 21 Sensor Wire 1 22 Extension Sensor Wire 1 23 Inner Hex Screw M8...

Page 6: ...frame 1 2 Fixed the front stabilizer 2 and the rear stabilizer 3 to the main frame 1 with inner hex screw 13 spring washer 14 flat washer 15 and arc washer 16 STEP 1 ATTENTION Please follow these asse...

Page 7: ...L R respectively STEP 2 NOTE Secure the Left Pedal 9L Anticlockwise and the Right Pedal 9R Clockwise as shown Please make sure that the Pedal 9L R is fully tightly before use The pedals should be chec...

Page 8: ...ector 35 to the saddle post 6 tightly with knob 34 and flat washer 15 When loose the pop pin knob 33 and knob 34 you can adjust the saddle 7 position forward and backward up and down When you find a p...

Page 9: ...e Sensor wire 21 and extension Sensor wire 22 well 3 Lock the handlebar Post 4 onto the main Frame 1 with the inner hex screw 23 spring washer 24 and Flat washer 25 or Arc washer 26 as shown 4 Finally...

Page 10: ...of handlebar post 4 and out of the hole of computer bracket Then fix handlebar connection 5 to handlebar post 4 with the inner hex screw 23 Spring washer 24 and Flat washer 25 2 Lock the bottle bracke...

Page 11: ...EMBLY INSTRUCTIONS 1 First connect the extension sensor wire 22 handlebar pulse wire 28 with console 8 respectively 2 Then lock console 8 to handlebar post 4 tightly with cross screw 27 STEP 6 8 27 22...

Page 12: ...0 15 999 Accumulates total distance from 0 00 up to 99 99 KM or ML The user may preset target distance data by using UP DOWN button Each preset increment or decrement is 0 1KM or ML between 0 00 to 9...

Page 13: ...y status In stop mode press it for body fat measurement COMPUTER OPERATION OPERATION PROCEDURE Drawing 1 Drawing 2 Drawing 3 POWER ON Plug in power supply computer will power on and display all segmen...

Page 14: ...el by using UP or DOWN Encoder Load level display in WATT window no adjusting for 3s it will switch to display WATT Drawing 9 5 Press START STOP key to pause workout Press RESET to reverse to main men...

Page 15: ...UP or DOWN Encoder to select 55 Drawing 11 75 Drawing 12 90 Drawing 13 or TAG TARGET H R default 100 Drawing 14 When select TAG use UP or DOWN Encoder to set value 30 230 3 Use UP or DOWN Encoder to...

Page 16: ...ncoder to adjust Watt level 5 Press START STOP key to pause workout Press RESET to reverse to main menu Drawing 15 RECOVERY After exercising for a period keep holding on hand grips or wearing chest st...

Page 17: ...will display BMI Drawing 23 FAT Drawing 24 and BODY FAT advice symbol Drawing 25 5 Error message The LCD displays means not hand the grip correctly E 1 There is no heart rate signal input detected E...

Page 18: ...art and lungs and how efficient they are in delivering oxygen via your blood to your muscles is an important factor to your fitness Your muscles use this oxygen to provide enough energy for daily acti...

Page 19: ...ease the flexibility of your muscles and will help prevent post exercise problems WORKOUT GUIDELINES This is how your pulse should behave during general fitness exercise Remember to warm up and cool d...

Page 20: ...ww consumerlaw gov au Please visit our website to view our full warranty terms and conditions http www lifespanfitness com au warranty repairs WARRANTY AND SUPPORT Any claim against this warranty must...

Page 21: ......

Page 22: ......

Page 23: ......

Page 24: ...WWW LIFESPANFITNESS COM AU...

Reviews: