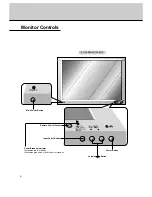


20
• Baud rate : 115200 bps (UART)
• Data length : 8 bits
• Parity : None
• Stop bit : 1 bit
• Communication code : ASCII code
* If the command interval is interrupted for more than 4
seconds, only Command 1 will be recognized.
Be careful when using the power command.
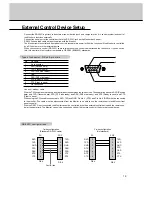
- The RS-232C input jack is used to control the Monitor’s functions using an external contro device.
Transmission
* [Command 1]
: k
* [Command 2]
: To control PDP set.
* [Set ID]
: You can adjust the set ID to choose
desired monitor ID number in special
menu.
Adjustment range is 1 ~ 99.
When selecting Set ID ‘0’, every con-
nected
PDP set is controlled.
* [DATA]
: To transmit command data.
Transmit ‘FF’ data to read status of
command.
* [Cr] :
Carriage
Return
ASCII code ‘0x0D’
* [ ]
: ASCII code ‘space (0x20)’
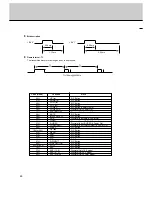
[Command1][Command2][ ][Set ID][ ][Data][Cr]
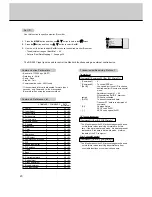
OK Acknowledgement
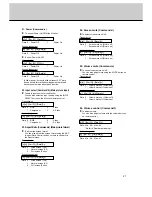
01. Power
k
a
00 ~ 01
02. Input Select
k
b
00 ~ 03
03. Aspect Ratio
k
c
00 ~ 02
04. Screen mute
k
d
00 ~ 01
05. Volume mute
k
e
00 ~ 01
06. Volume control
k
f
00 ~ 64
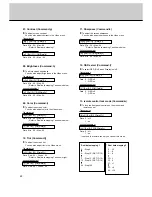
07. Contrast
k
g
00 ~ 64
08. Brightness
k
h
00 ~ 64
09. Color
k
i
00 ~ 64
10. Tint
k
j
00 ~ 64
11. Sharpness
k
k
00 ~ 64
12. OSD select
k
l
00 ~ 01
13. Remote control lock mode
k
m
00 ~ 01
14. PIP
k
n
00 ~ 01
15. Sound input select
k
p
00 ~ 01
16. PIP position
k
q
00 ~ 03
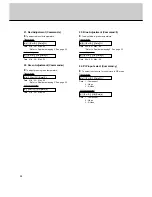
17. Treble
k
r
00 ~ 64
18. Bass
k
s
00 ~ 64
19. Balance
k
t
00 ~ 64
20. Color temperature
k
u
00 ~ 03
21. R adjustment
k
v
00 ~ 64
22. Green adjustment
k
w
00 ~ 64
23. Blue adjustment
k
$
00 ~ 64
24. PIP input source
k
y
00 ~ 03
* The Monitor transmits ACK (acknowledgement) based
on this format when receiving normal data. At this
time, if the data is data read mode, it indicates present
status data. If the data is data write mode, it returns
the data of the PC computer.
[Command2][ ][Set ID][ ][OK][Data][x]
Error Acknowledgement
* The Monitor transmits ACK (acknowledgement) based
on this format when receiving abnormal data from
non-viable functions or communication errors.
[Command2][ ][Set ID][ ][NG][Data][x]
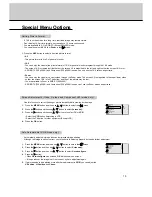
- Use this function to specify a monitor ID number.
1.
Press the MENU button and then use
D
/
E
button to select the menu.
2.
Press the
G
button and then use
D
/
E
button to select Set ID.
3.
Use the
F
/
G
button to adjust Set ID to choose the desired monitor ID number.
• The adjustment range of Set ID is 1 ~ 99.
• Refer to ‘Real Data Mapping 1’. See page 22.
Language
G
ARC
G
Screen Adj.
G
Orbiter
G
White Wash
G
PIP
G
Transparency
G
Set ID
G
1
Set ID
Set ID
Set ID
Communication Parameters
Communication Parameters
T
T
ransmission/Receiving Protocol
ransmission/Receiving Protocol
Command Reference List
Command Reference List
COMMAND 1 COMMAND 2
DATA
(Hexadecimal)
Summary of Contents for MU-40PA15
Page 29: ...29 Note ...
Page 30: ...30 Note ...


