background image

5

Select an input signal.
Press the INPUT button on the remote control to select the input signal. 

Or, press the SOURCE button on the bottom of the product.
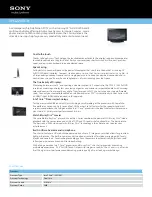
INPUT

SET

How to connect to two computers.

Connect the signal cables (

HDMI to DVI

and D-Sub) to each computer.

Press the INPUT button on the remote control to select the computer to use.

•  

Directly connect to a grounded power outlet on the wall or a power bar with a ground 

wire.

Note

Turn on power by pressing the power button on the product.

Turn on the PC. 

ON/OFF

AUTO/SET

SOURCE

Power button

Input

Input

SOURCE

AUTO/SET

When connecting with a D-Sub signal input cable.

• Select 

RGB

: 15-pin D-Sub analog signal.

When connecting with a 

HDMI to DVI 

signal input cable.

• Select 

HDMI/DVI 

HDMI to DVI

Digital signal.

B

A

Connecting to External Devices

2

1

Summary of Contents for M5201Cs

Page 1: ...nt Precautions before using the product Keep the User s Guide CD in an accessible place for future reference See the label attached on the product and give the information to your dealer when you ask for service M5201C User s Guide ...

Page 2: ...e image Press this button repetitively to set the intended screen Menu Button Check Button Volume Button Mute button There is not a function which is supported UP and Down buttons Bring up and down direction adjustment ARC button To select the image size of the screen Auto Button Automatic adjustment function Operational for the analog signal only Exit Button There is not a function which is suppo...

Page 3: ...f you press the button once the following Input Signal Window will appear Select the signal type you want using the button Input Select Button 1 Take out the battery cap 2 Insert the batteries with correct polarity 3 Close the battery cap Dispose of used batteries in the recycle bin to prevent environmental pollution Inserting batteries into remote control ...

Page 4: ...sed to connect to the speaker including a built in amplifier Amp Make sure that the connecting terminal of the PC sound card is checked before connecting If the Audio Out of PC sound card has only Speaker Out reduce the PC volume If the Audio Out of the PC sound card supports both Speaker Out and Line Out convert to Line Out using the card jumper of the program Refer to the Sound Card Manual OUT I...

Page 5: ... since an incompatible adapter is available in the market Different signaling system OUT IN VIDEO L AUDIO R VIDEO Y PB PR RGB IN RGB OUT HDMI DVI IN L AUDIO R COMPONENT IN AV OUT AV IN SPEAKER 8 R L REMOTE CONTROL IN RS 232C CONTROL SERVICE 1 2 AUDIO RGB DVI S VIDEO Rear side of the product Connecting to External Devices Connect the power cord B A B A PC When Connecting to your PC PC MAC PC Rear s...

Page 6: ...ote control to select the computer to use Directly connect to a grounded power outlet on the wall or a power bar with a ground wire Note Turn on power by pressing the power button on the product Turn on the PC ON OFF AUTO SET SOURCE Power button Input Input SOURCE AUTO SET When connecting with a D Sub signal input cable Select RGB 15 pin D Sub analog signal When connecting with a HDMI to DVI signa...

Page 7: ... one end of the signal input cable 15 pin D Sub Signal Cable to the RGB OUT connector of product 1 and connect the other end to the RGB IN connector of other products Watching RGB Outputs PC Product 2 Product 3 Product 4 15 pin D Sub Signal Cable Connecting to External Devices When multi connecting in out cascade format no loss cables are recommended We recommend that you should use cable distribu...

Page 8: ...en connecting with a BNC cable Connect the input terminal with a proper color match A BNC Cable not included Product VCR DVD Receiver Input When watching VCR DVD Select an input signal Press the INPUT button on the remote control to select the input signal Or press the SOURCE button on the bottom of the product INPUT SET SOURCE AUTO SET When the BNC cable is connected simultaneously with S Video c...

Page 9: ...ot included Product HDTV Receiver Input Input When watching HDTV DVD 480p 576p 720p 1080p 1080i 480i 576i Select an input signal Press the INPUT button on the remote control to select the input signal Or press the SOURCE button on the bottom of the product INPUT SET SOURCE AUTO SET Audio Cable not included VIDEO Y PB PR L AUDIO R COMPONENT IN 1 2 Product HDTV Receiver B A BNC Cable not included Au...

Page 10: ...080i VCR DVD Set top Box Product Select an input signal Press the INPUT button on the remote control to select the input signal Or press the SOURCE button on the bottom of the product INPUT SET SOURCE AUTO SET HDMI Signal Cable not included Connecting to External Devices RGB IN RGB OUT HDMI DVI IN AUDIO RGB DVI VCR DVD Set top Box Product D Sub Signal Cable RCA PC Audio Cable When connecting with ...

Page 11: ...L AUDIO R VIDEO AV OUT AV IN S VIDEO Video TV Watching AV Outputs BNC Cable not included Audio Cable not included BNC Cable not included Audio Cable not included Video TV Product Connecting to External Devices When multi connecting in out cascade format no loss cables are recommended We recommend that you should use cable distributor Note ...

Page 12: ...t off This Indicator lights up green when the display operates normally on mode If the display is in sleep Energy Saving mode this indicator color changes to amber Power Button Adjust the volume Adjust the up and down Use this button to show hide the OSD On Screen Display menu screen MENU Button Use this button to select an icon or adjust the setting in the OSD screen OSD Select Adjust Button Powe...

Page 13: ...posite Video Separate Video Component 1 HDTV DVD Component 2 HDTV DVD RGB 15 pin D Sub analog signal HDMI DVI Digital signal Select the input signal SOURCE Button Input SOURCE AUTO SET Auto in progress For opimal display change resolution to 1920 X 1080 IR Receiver Selecting and Adjusting the Screen When Full HD Mode is active and 1920 X1080 is selected ...

Page 14: ...the audio function Adjusts screen brightness contrast and color that you prefer Note OSD On Screen Display The OSD function enables you to adjust the screen status conveniently since it provides graphical presentation SPECIAL Adjusts the screen status according to the circumstances SCREEN TIMER Adjusts the timer function ...

Page 15: ...ment is not satisfactory you need to adjust screen position clock and phase in the OSD menu Press the MENU Button then the main menu of the OSD appears To access a control use the Buttons When the icon you want becomes highlighted press the SET Button Use the Buttons to adjust the item to the desired level Accept the changes by pressing the SET Button Exit the OSD by pressing the EXIT Button 1 2 3...

Page 16: ... image quality depending on the AV usage environment Dynamic Select this option to display with a sharp image Standard The most general and natural screen display status Mild Select this option to display with a mild image User1 2 Select this option to use the user defined settings User1 100 50 50 50 0 Contrast Brightness Colour Sharpness Tint R G Selecting a factory setting color set Warm Slightl...

Page 17: ...ff Low Cinema Function works in the following mode AV Component 480i 576i When you watch the movie this function adjusts the set to the best picture appearance Black Level Function works in the following mode AV NTSC HDMI DVI adjusts the contrast and the brightness of the screen using the black level of the screen Advanced Return PSM CSM XD Advanced to the default factory settings Reset XD is LG E...

Page 18: ...s If you want to use your external hi fi stereo system turn off the internal speakers of the set AVL Balance Speaker SSM AVL Balance 0 Speaker Surround MAX Set the Surround MAX on This function plays back the mono or stereo sound input with the dynamic surround effects It will provide rich and profound sound tone If you set the Surround MAX on user audio setting can not be adjusted Flat The most c...

Page 19: ...se button to set the minutes 00 59 Off On time The off time automatically switches the set to standby at the pre set time 1 Press the MENU button and then use button to select the TIME menu 2 Press the button and then use button to select Off time or On time 3 Press the button and then use button to set the hour 01 23 4 Press the button and then use button to set the minutes 00 59 5 Press the butt...

Page 20: ...guage Child lock ISM Method Set ID Tile Mode Power Indicator 1 Demo ISM Method Normal If image sticking is never a problem ISM is not necessary set to Normal White wash White wash removes permanent images from the screen An excessive permanent image may be impossible to clear entirely with white wash Orbiter May help prevent ghost images However it is best not to allow any fixed image to remain on...

Page 21: ...n Reset Off Natural Off 0 0 0 To set Demo It is used to enlarge the screen and also used with several products to view screen To use this function Must be displayed with various other products Must be in a function that can be connected to RS 232C or RGB Out Tile Mode Tile mode row x column r 1 2 3 4 c 1 2 3 4 4 x 4 available Configuration of an integration screen is also available as well as conf...

Page 22: ...mode product 1 2 r 2 x c 1 Selecting the options column row Tile mode product 1 9 r 3 x c 3 ID 1 ID 2 ID 3 ID 4 ID 5 ID 6 ID 7 ID 8 ID 9 column row Tile mode product 1 16 r 4 x c 4 ID 1 ID 5 ID 9 ID 13 ID 2 ID 6 ID10 ID 14 ID 3 ID 7 ID 11 ID 15 ID 4 ID 8 ID 12 ID 16 ...

Page 23: ...e vertical size of the screen taking into account the size of the bezel H Size V Size Reset Select the location of the Tile by setting an ID Tile ID Function to initialize and release Tile All Tile setting are released when selecting Tile recall and the screen returns to Full screen H Position Moving the screen position vertically V Position Moving the screen position horizontally Language Child l...

Page 24: ... focus of the display This item allows you to remove any horizontal noise and clear or sharpen the image of characters This function is suitable for analogue signal input only Phase H Position Moving the screen position vertically Manual config XGA Mode RGB PC only V Position Moving the screen position horizontally Auto config Manual config XGA Mode ARC Reset 1024x768 1280x768 1360x768 1366x768 If...

Page 25: ...4 3 You can enjoy movies the picture format of 16 9 or general TV programmes thorough 16 9 mode Programmes with 16 9 format are viewed naturally but 4 3 programmes are magnified on the left and right so that the screen is16 9 format 16 9 You can enjoy the picture format of 14 9 or general AV programmes through 14 9 mode Programmes with 14 9 are viewed naturally but 4 3 programmes are magnified on ...

Page 26: ...y The Controls Locked message appears when pressing the Menu button Controls Locked message appears Install the product driver which is provided with the product or download it from the web site http www lge com See if the plug play function is supported by referring to the video card user manual Did you install the driver Unknown Product message appears when the product is connected Note Vertical...

Page 27: ... Panel Display Setting menu D Sub analog signal Press the AUTO button in the remote control to automatically select an optimal screen status that fits into the current mode If adjustment is not satisfactory use the Clock OSD menu D Sub analog signal Press the AUTO button in the remote control to automatically select an optimal screen status that fits into the current mode If adjustment is not sati...

Page 28: ...color is unstable or mono colored Do black spots appear on the screen Screen color is abnormal See if the audio cable is connected properly Adjust the volume See if the sound is set properly Select the appropriate equalize sound Adjust the volume No sound Sound is too dull Sound is too low The audio function does not work Troubleshooting Is the sleep timer set Check the power control settings Powe...

Page 29: ...e diagonal size 132 17 cm 0 200 mm X 0 600 mm Pixel Pitch Rated Voltage AC 100 240V 50 60Hz 3 0A Power Consumption On Mode 400W Typ Sleep Mode 2W RGB 4W HDMI DVI Off Mode 2W The product specifications can change without prior notice for product improvement Width x Height x Depth 128 3 cm 50 51 inches x 76 62 cm 30 17 inches x 11 74 cm 4 62 inches W H D Net 42 36 kg 93 39 lbs Specifications ...

Page 30: ...tal Frequency RGB 30 83 kHz HDMI DVI 30 83 kHz Vertical Frequency 56 85 Hz Synchronization Type Separate Composite Digital 15 pin D Sub type HDMI digital S Video Composite Video Component RS 232C Operational Condition Temperature 5 C 35 C Humidity 10 80 Storage Condition Temperature 20 C 60 C Humidity 5 95 Video Signal Input Connector Environmental Conditions The product specifications can change ...

Page 31: ... 18 19 20 1024 x 768 1024 x 768 1280 x 720 1280 x 768 1360 x 768 1366 x 768 1280 x 1024 1280 x 1024 1680 x 1050 1920 x 1080 60 123 68 68 44 772 47 7 47 72 47 7 63 981 79 98 65 290 67 50 75 029 85 59 855 60 59 799 60 60 02 75 02 59 954 60 Power Indicator Mode Product On Mode Sleep Mode Off Mode Green Amber Specifications DTV Mode Component RGB DTV 480i o x x 576i o x x 480p o o o 576p o o o 720p o ...

Page 32: ... that can be purchased separately at most computer stores VESA wall mounting Connected to another object stand type and wall mounted type This product accepts a VESA compliant mounting interface pad This has to be purchased separately if required For further information refer to the VESA Wall Mounting Instruction Guide ...

Page 33: ...NTROL SERVICE RS 232C RS 232C Cable not included monitor 1 PC monitor 2 monitor 3 monitor 4 7 Wire Configurations Standard RS 232C cable RXD TXD GND DTR DSR RTS CTS TXD RXD GND DSR DTR CTS RTS PC Monitor 2 3 5 4 6 7 8 3 2 5 6 4 8 7 D Sub 9 D Sub 9 Female Female 3 Wire Configurations Not Standard RXD TXD GND DTR DSR RTS CTS TXD RXD GND DTR DSR RTS CTS PC Monitor 2 3 5 4 6 7 8 3 2 5 6 4 7 8 D Sub 9 ...

Page 34: ...olor k i 00H 64H 10 Tint k j 00H 64H 11 Sharpness k k 00H 64H 12 OSD Select k l 00H 01H 13 Remote Lock key Lock k m 00H 01H 14 Balance k t 00H 64H 15 Color Temperature k u 00H 03H 16 Abnomal state k z FFH 17 ISM mode j p 00H 08H 18 Auto configuration j u 01H 19 Key m c Key Code 20 Tile Mode d d 00H 44H 21 Tile H Size d g 00H 64H 22 Tile V Size d h 00H 64H 23 Tile ID Set d i 00H 10H 24 Natural Mode...

Page 35: ...uct RS 232C A3 Transmission Command1 Command2 Set ID Data Cr Command 1 First command j k m d Command 2 Second command Set ID Set up the Set ID number of product range 1 99 by setting 0 server can control all products In case of operating with more than 2 sets using set ID as 0 at the same time it should not be checked the ack message Because all sets will send the ack message so it s impossible th...

Page 36: ...ID OK Data x Data 0 Power Off 1 Power On 02 Input Select Command b Main Picture Input To select input source for the Set You can also select an input source using the SOURCE button on the remote control Transmission k b Set ID Data Cr Data 2 AV 6 RGB DTV 4 Component 1 7 RGB PC 5 Component 2 8 HDMI DTV 9 HDMI PC Acknowledgement b Set ID OK Data x Data 2 AV 6 RGB DTV 4 Component 1 7 RGB PC 5 Compone...

Page 37: ...Data 1 Normal Screen 4 3 5 Zoom2 2 Wide Screen 16 9 6 Original 3 Horizon Spectacle 7 14 9 4 Zoom1 8 Full Europe version only 9 1 1 PC Acknowledgement c Set ID OK Data x 04 Screen Mute Command d To select screen mute on off Transmission k d Set ID Data Cr Data 0 Screen mute off Picture on 1 Screen mute on Picture off Acknowledgement d Set ID OK Data x Controlling the Multiple Product RS 232C A5 Tra...

Page 38: ...ement e Set ID OK Data x Data 0 Volume Mute On Volume Off 1 Volume Mute Off Volume On 06 Volume Control Command f To adjust Volume Transmission k f Set ID Data Cr Data Min 00H Max 64H Hexadecimal code Acknowledgement f Set ID OK Data x Data Min 00H Max 64H Refer to Real data mapping page A7 Controlling the Multiple Product RS 232C A6 Transmission Receiving Protocol ...

Page 39: ...eal data mapping as shown below Acknowledgement g Set ID OK Data x Real data mapping 0 Step 0 A Step 10 F Step 15 10 Step 16 64 Step 100 08 Brightness Command h To adjust screen brightness You can also adjust the brightness in the Picture menu Transmission k h Set ID Data Cr Data Min 00H Max 64H Refer to Real data mapping as shown below Acknowledgement h Set ID OK Data x Real data mapping 0 Step A...

Page 40: ... Max 64H Hexadecimal code Refer to Real data mapping page A7 Acknowledgement i Set ID OK Data x Data Min 00H Max 64H 10 Tint Command j Video only To adjust the screen tint You can also adjust the tint in the Picture menu Transmission k j Set ID Data Cr Data Red 00H Green 64H Hexadecimal code Refer to Real data mapping page A7 Acknowledgement j Set ID OK Data x Data Red 00H Green 64H Tint Real data...

Page 41: ...D OK Data x Data Min 00H Max 64H 12 OSD Select Command l To control OSD on off to the set Transmission k l Set ID Data Cr Data 0 OSD Off 1 OSD On Acknowledgement l Set ID OK Data x Data 0 OSD Off 1 OSD On 13 Remote Lock Key Lock Command m To control Remote Lock on off to the set This function when controlling RS 232C locks the remote control and the local keys Transmission k m Set ID Data Cr Data ...

Page 42: ... Cr Data Min 00H Max 64H Hexadecimal code Refer to Real data mapping page A7 Acknowledgement t Set ID OK Data x Data Min 00H Max 64H Balance L50 R50 15 Color Temperature Command u To adjust the screen color temperature Transmission k u Set ID Data Cr Data 0 Normal 1 Cool 2 Warm 3 User Acknowledgement u Set ID OK Data x Data 0 Normal 1 Cool 2 Warm 3 User ...

Page 43: ...er on 2 Turn the monitor off by remote control 3 Turn the monitor off by sleep time function 4 Turn the monitor off by RS 232C function 6 AC down 8 Turn the monitor off by off time function 9 Turn the monitor off by auto off function Acknowledgement z Set ID OK Data x 17 ISM mode Command j p Used to select the afterimage preventing function Transmission j p Set ID Data Cr Data 1 Inversion 2 Orbite...

Page 44: ... image shaking automatically it works only in RGB PC mode Transmission j u Set ID Data Cr Data 1 To set Acknowledgement u Set ID OK Data x Transmission Receiving Protocol 19 Key Command m c To send IR remote key code Transmission m c Set ID Data Cr Data Key code Refer to page A18 Acknowledgement c Set ID OK Data x ...

Page 45: ...d Change a Tile Mode Transmission d d Set ID Data x The data can not be set to 0X or X0 except 00 Acknowledgement d 00 OK NG Data x Transmission Receiving Protocol Data Description 00 Tile mode is off 12 1 x 2 mode column x row 13 1 x 3 mode 14 1 x 4 mode 44 4 x 4 mode ...

Page 46: ...he Horizontal size Transmission d g Set ID Data x Data Min 00H Max 64H Acknowledgement g Set ID OK NG Data x 22 Tile V Size Command d h To set the Vertical size Transmission d h Set ID Data x Data Min 00H Max 64H Acknowledgement h Set ID OK NG Data x Transmission Receiving Protocol ...

Page 47: ...emode Command d j The image is omitted by the distance between the screens to be naturally shown Transmission d j Set ID Data x Data 0 Natural Off 1 Natural On ff Read Status Acknowledgement j Set ID OK NG Data x Transmission Receiving Protocol 25 Elapsed time return Command d l To read the elapsed time Transmission d l Set ID Data x The data is always FF in Hex Acknowledgement l Set ID OK NG Data...

Page 48: ...n Set ID Data x The data is always FF in Hex Acknowledgement n Set ID OK NG Data x The data is 1 byte long in Hexadecimal 27 Lamp fault Check Command d p To check lamp fault Transmission d p Set ID Data x The data is always FF in Hex Acknowledgement p Set ID OK NG Data x Data 0 Lamp Fault 1 Lamp OK Transmission Receiving Protocol ...

Page 49: ...ratio T1 Tc 1 3 Configuration of frame 1st frame T1 Lead code Low custom code High custom code Data code Data code C0 C1 C2 C3 C4 C5 C6 C7 C0 C1 C2 C3 C4 C5 C6 C7 D0 D1 D2 D3 D4 D5 D6 D7 D0 D1 D2 D3 D4 D5 D6 D7 Tc Tf Repeat frame Repeat code Lead code Repeat code 9ms Bit description Bit 0 Bit 1 2 25ms 9ms 0 55ms 0 56ms 1 12ms 0 56ms 2 24ms Frame interval Tf The waveform is transmitted as long as a...

Page 50: ...er On Off Discrete IR Code Only Power On Discrete IR Code Only Power On R C Button R C Button R C Button R C Button R C Button R C Button R C Button R C Button R C Button R C Button R C Button R C Button R C Button R C Button R C Button R C Button R C Button R C Button Discrete IR Code Input AV Selection Discrete IR Code Input COMPONENT1 Selection Discrete IR Code Input COMPONENT2 Selection Discre...

Reviews: