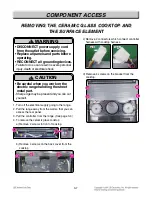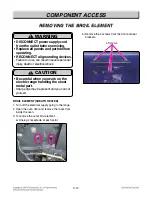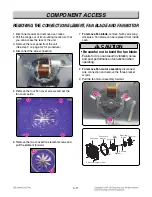
REMOVING THE OVEN LIGHT & SOCKET ASSEMBL
REMOVING THE OVEN LIGHT & SOCKET ASSEMBL
Y
Y
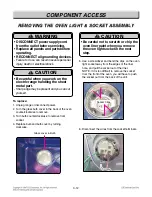
To replace:
1. Unplug range or disconnect power.
2. Turn the glass bulb cover in the back of the oven
counterclockwise to remove.
3. Turn bulb counterclockwise to remove from
socket.
4. Replace bulb and bulb cover by turning
clockwise.
5. Use a screwdriver and bend the clips on the oven
light socket away from the edges of the liner
hole, and pull the socket out of the liner.
NOTE: If it is too difficult to remove the socket
from the front of the oven, you will have to push
the socket out from the back of the unit.
6. Disconnect the wires from the socket terminals.
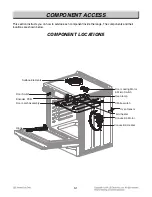
Glass cover & Bulb
Socket Clips
Socket Clips
Socket Clips
Socket Clips
Socket Clips
Socket Clips
Socket Clips
Socket Clips
Socket Clips
Socket Clips
Socket Clips
Socket Clips
Socket Clips
Socket Clips
Socket Clips
Socket Clips
Socket Clips
Socket Clips
Socket Clips
Socket Clips
Socket Clips
Socket Clips
Socket Clips
Socket Clips
Socket Clips
Socket Clips
Socket Clips
Socket Clips
Socket Clips
Socket Clips
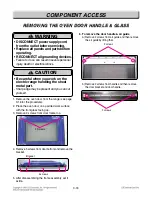
CAUTION
• Be careful not to scratch or chip the
oven liner paint when you remove
the oven light socket in the next
step.
!
WARNING
• DISCONNECT power supply cord
from the outlet before servicing.
• Replace all panels and parts before
operating.
• RECONNECT all grounding devices.
- Failure to do so can result in severe personal
injury, death or electrical shock.
!
CAUTION
• Be careful when you work on the
electric range handling the sheet
metal part.
- Sharp edge may be present and you can cut
yourself.
!
3-12
COMPONENT ACCESS
Summary of Contents for LSE4613BD
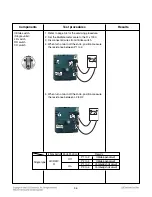
Page 49: ...5 3 OVEN LIGHT CR COOK TOP ELEMENT For Model LSE4613ST LSE4613BD LR RR COOK TOP ELEMENT ...
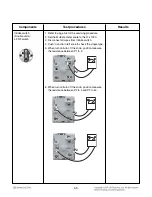
Page 50: ...5 4 RF COOK TOP ELEMENT LF COOK TOP ELEMENT For Model LSE4613ST LSE4613BD ...
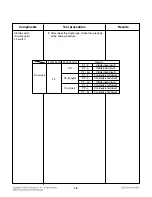
Page 51: ...5 5 WARM PROOF EASY CLEAN BROIL ...
Page 82: ...EXPLODED VIEW EV INTRODUCTION 9504 9501 9506 Customer Model Product Code SVC Model MODEL ...
Page 85: ... EV COOKTOP PARTS 3056 3215 3006 3016 330M 330H 3205 3022 3204 330S 330S 301C ...
Page 88: ......

