34
Ch4. Symptom-to-part index
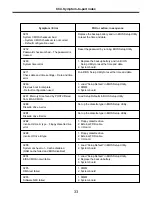
FRU or action, in sequence
Symptom / Error
1. Load Setup Defaults in BIOS Setup Utility.
2. System board.
061A
Parallel port configuration error
1. Load Setup Defaults in BIOS Setup Utility.
2. System board.
0619
Parallel port configuration changed
1. Load Setup Defaults in BIOS Setup Utility.
2. System board.
0618
Floppy configuration error
1. Load Setup Defaults in BIOS Setup Utility.
2. System board.
0617
Floppy configuration changed
1. Load Setup Defaults in BIOS Setup Utility.
2. System board.
0616
Com B configuration error
1. Load Setup Defaults in BIOS Setup Utility.
2. System board.
0615
Com B configuration changed
1. Load Setup Defaults in BIOS Setup Utility.
2. System board.
0614
Com A configuration error
1. Load Setup Defaults in BIOS Setup Utility.
2. System board.
0613
Com A configuration changed
1. Load Setup Defaults in BIOS Setup Utility.
2. System board.
0612
IDE configuration error
1. Load Setup Defaults in BIOS Setup Utility.
2. System board.
0611
IDE configuration changed
1. DIMM
2. System board
02F7
Fail – Safe timer NMI failed
Summary of Contents for LM60
Page 1: ...0 Service Manual LW60 70 LG Electronics ...
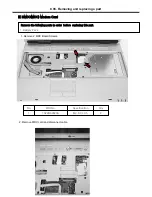
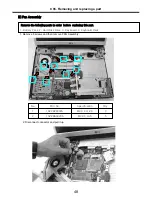
Page 48: ...47 Ch5 Removing and replacing a part 3 Disconnect cable 4 Disassemble the KBD Deck Assy ...
Page 54: ...53 Ch5 Removing and replacing a part ...
Page 56: ...55 Ch5 Removing and replacing a part 3 Disconnect connector and remove Speaker ...
Page 59: ...58 Ch5 Removing and replacing a part 3 Remove Main Board ...
Page 61: ...60 Ch5 Removing and replacing a part 2 Remove LCD Hook ...
Page 64: ...63 Ch5 Removing and replacing a part 6 Remove LCD panel ...
Page 66: ...65 Ch5 Removing and replacing a part ...
Page 67: ...66 Ch5 Removing and replacing a part 8 Remove WLAN Antenna ...
Page 77: ...76 Ch5 Removing and replacing a part 3 Disconnect cable 4 Disassemble the KBD Deck Assy ...
Page 82: ...81 Ch5 Removing and replacing a part ...
Page 84: ...83 Ch5 Removing and replacing a part 3 Disconnect connector and remove Speaker ...
Page 87: ...86 Ch5 Removing and replacing a part 2 Disconnect connector and remove Woofer ...
Page 91: ...90 Ch5 Removing and replacing a part 2 Remove LCD Hook ...
Page 94: ...93 Ch5 Removing and replacing a part 6 Remove LCD panel ...
Page 96: ...95 Ch5 Removing and replacing a part ...
Page 97: ...96 Ch5 Removing and replacing a part 8 Remove WLAN Antenna ...
Page 107: ...HWL29 HWL31 HWL10 HWL07 HWL03 15 4 HWL08 HWL34 HWL09 HWL27 HWL30 HWL31 HWL12 HWL11 ...
Page 108: ...HWL22 HWL29 HWL30 HWL23 HWL18 17 1 ...
Page 109: ...3 15 4 17 1 E XPLODE D VIE W HWL15 15 4 HWL14 15 4 HWL13 15 4 HWL33 HWM20 ...
Page 111: ...NRUB1 HWL32 HWL02 15 4 HWL17 17 1 ...
Page 114: ...HWM23 HWD01 17 1 HWD01 15 4 HWM30 HWM29 HWM31 HWM23 HWM33 ...
Page 115: ...HWD03 15 4 HWD04 17 1 HWD02 ...
Page 116: ...HWM10 15 4 HWM12 17 1 HWC09 HWM04 HWM06 HWM11 HWM05 HWM07 HWM22 HWM23 ...


