background image


Printing your document in reverse order

36

Printing your document in reverse order

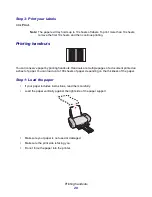
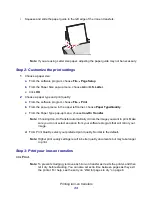
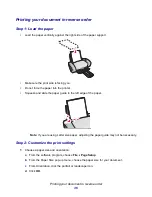
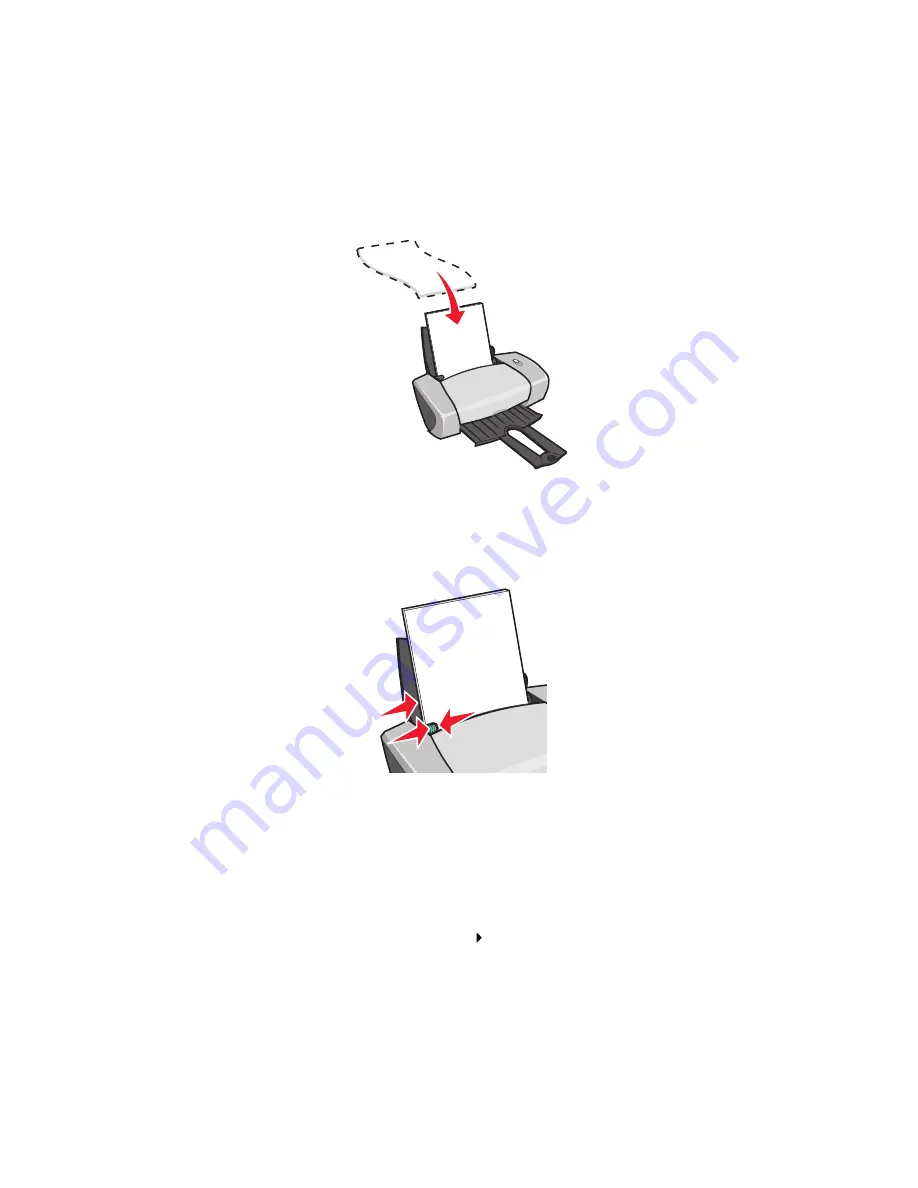
Step 1: Load the paper

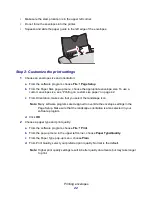
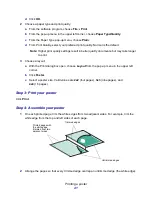
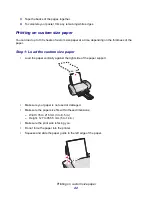
Load the paper vertically against the right side of the paper support. 

Make sure the print side is facing you.

Do not force the paper into the printer.

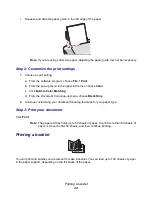
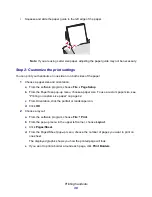
Squeeze and slide the paper guide to the left edge of the paper. 

Note: If you are using Letter size paper, adjusting the paper guide may not be necessary.

Step 2: Customize the print settings

1

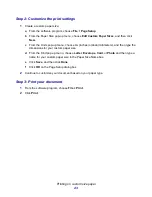
Choose a paper size and orientation:

a

From the software program, choose File

 Page Setup.

b

From the Paper Size pop-up menu, choose the paper size for your document.

c

From Orientation, click the portrait or landscape icon.

d

Click OK.

Summary of Contents for Z600

Page 1: ... problems Printer overview Learn about the printer parts and the printer software Printing ideas How to print several projects on various types of paper Maintenance Caring for your cartridges and ordering supplies General troubleshooting Error messages print quality problems paper jams and much more User s Guide for Mac OS 9 ...

Page 2: ... incurring any obligation to you You can purchase additional copies of publications related to this product by calling 1 800 553 9727 In the United Kingdom and Eire call 44 0 8704 440 044 In other countries contact your point of purchase References in this publication to products programs or services do not imply that the manufacturer intends to make these available in all countries in which it op...

Page 3: ...19 Printing envelopes 21 Printing color images in black and white 23 Printing a booklet 24 Printing labels 27 Printing handouts 29 Printing iron on transfers 32 Printing transparencies 34 Printing your document in reverse order 36 Printing a banner 37 Printing a poster 39 Printing on custom size paper 42 Chapter 3 Maintenance 44 Replacing the print cartridges 44 Specify cartridge settings in the p...

Page 4: ...ation problems 52 Chapter 5 General troubleshooting 55 Solving network printing problems if the printer is connected to a network adapter 55 Understanding error messages and flashing lights 56 Resolving unsuccessful or slow printing 57 Recovering when your computer stops responding 59 Clearing paper misfeeds or jams 60 Solving print quality problems 61 Solving specialty media problems 64 Notices 6...

Page 5: ...Printer overview 5 1 Printer overview Understanding the printer parts Paper support Front cover Paper exit tray Button Paper guide USB cable connector Power supply connector ...

Page 6: ...up and Print dialog boxes are set to these default settings Use this When you want to Button Turn the printer on or off Eject paper from the printer Cancel print jobs Check the printer status For more information see Understanding error messages and flashing lights on page 56 Front cover Install or change print cartridges Clear a paper jam Paper exit tray Stack paper after printing Paper guide Mak...

Page 7: ... the Page Setup dialog box From the pop up menu in the upper left corner choose Make selections from When you want to General Paper Size Choose a paper size or create a custom paper size Scaling Change the scaling value of your document Valid values are between 25 and 400 Orientation Choose between portrait and landscape Watermark Watermark Choose a watermark design Density Adjust from light to he...

Page 8: ...pecify the number of copies to print from 1 to 999 Collated Sort multiple copy jobs Pages Print all of the pages in a document or print a range of pages Wait for pages to dry Add more time between pages as they exit the printer Select this option when you want to keep documents from smearing Paper Type Quality Paper Type Choose Plain default Coated Transparency Iron On Transfer or Glossy Photo Pap...

Page 9: ...nding edge side flip or top flip Color ColorSync Color Matching Choose your printer s profile from a list of saved color profiles and settings obtained from ColorSync Set the document intent Choose from Automatic Photographic or Business Graphics Built In Color Matching Choose the appropriate type of color for your document Background Printing Print in Foreground Print when you have limited system...

Page 10: ...idges Obtain information on ordering supplies Clean print nozzles Obtain software version information Select a printer Configure a network printer Click Select When you want to Cartridges tab Install Change Cartridge Specify cartridge settings in the printer software when installing or changing the cartridges For more information see Remove the used cartridges on page 44 Align Cartridges Align the...

Page 11: ...from the Lexmark Web site For more information see Ordering supplies on page 50 Offers Access the Lexmark Web site for offers Note United States and Canada only About tab Obtain printer software version information Advanced menu Select Printer Select a printer and make it the default printer Find the IP address for the selected printer Add a printer located on a remote subnet You can add a single ...

Page 12: ...ing on the thickness of the paper Step 1 Load the paper Load the paper vertically against the right side of the paper support Do not force the paper into the printer Squeeze and slide the paper guide to the left side of the paper Note If you are using Letter size paper adjusting the paper guide may not be necessary ...

Page 13: ...ting photos You can load up to 50 sheets of photo or glossy paper or 100 sheets of coated paper depending on the thickness of the paper You may want to print your photos on plain paper before loading photo paper and changing your settings This ensures that you do not waste photo paper perfecting the image you want to print To print on photo cards see Printing cards on page 19 Step 1 Load the photo...

Page 14: ... c From Orientation click the portrait or landscape icon d Click OK 2 Choose a paper type print quality and color setting a From the software program choose File Print b From the pop up menu in the upper left corner choose Paper Type Quality c From the Paper Type pop up menu choose Glossy Photo Paper d From Print Quality click Better or Best Note Higher print quality settings result in better qual...

Page 15: ...elp see the entry on Wait for pages to dry on page 8 Printing on premium paper You can load up to 100 pages of premium paper depending on the thickness of the paper Step 1 Load the premium paper If your paper includes instructions read them carefully Load the paper vertically against the right side of the paper support Make sure your paper is not used or damaged Make sure the print side is facing ...

Page 16: ... on page 42 c From Orientation click the portrait or landscape icon d Click OK 2 Choose a paper type and print quality a From the software program choose File Print b From the pop up menu in the upper left corner choose Paper Type Quality c From the Paper Type pop up menu choose Coated d From Print Quality select your preferred print quality Normal is the default Note Higher print quality settings...

Page 17: ...ickness of the paper For the best print quality use thick paper Step 1 Load the paper Load the paper vertically against the right side of the paper support Make sure the print side is facing you Do not force the paper into the printer Squeeze and slide the paper guide to the left edge of the paper Note If you are using Letter size paper adjusting the paper guide may not be necessary ...

Page 18: ...choose File Print b From the pop up menu in the upper left corner choose Paper Type Quality c From the Paper Type pop up menu choose Plain d From Print Quality select your preferred print quality Normal is the default Note Higher print quality settings result in better quality documents but may take longer to print e From the pop up menu in the upper left corner choose Layout f Click Print on Both...

Page 19: ...acing away from you and the arrows pointing down into the paper support 4 Click Continue The even numbered pages print Note The paper exit tray holds up to 50 sheets of paper To print more than 50 pages remove the first 50 sheets and then continue printing Printing cards You can load up to 25 greeting cards index cards photo cards or postcards into the paper support depending on the thickness of t...

Page 20: ... printer Squeeze and slide the paper guide to the left edge of the cards Note If you are using Letter size paper adjusting the paper guide may not be necessary Step 2 Customize the print settings 1 Choose a paper size and orientation a From the software program choose File Page Setup b From the Paper Size pop up menu choose a card size c From Orientation click the portrait or landscape icon d Clic...

Page 21: ...ents but may take longer to print Step 3 Print your cards Click Print Note You can remove each card as it exits the printer and let it dry before stacking or you can set extra time between pages as they exit the printer For help see the entry on Wait for pages to dry on page 8 Printing envelopes You can load up to 10 envelopes depending on the thickness of the envelopes Step 1 Load the envelopes L...

Page 22: ...aper on page 42 c From Orientation make sure that you select the landscape icon Note Many software programs are designed to override the envelope settings in the Page Setup Make sure that the landscape orientation is also selected in your software program d Click OK 2 Choose a paper type and print quality a From the software program choose File Print b From the pop up menu in the upper left corner...

Page 23: ... then continue printing Printing color images in black and white You can print color images in black ink Note This setting is only available if there is a black print cartridge installed Step 1 Load the paper Load the paper vertically against the right side of the paper support Make sure your paper is not used or damaged Make sure the print side is facing you Do not force the paper into the printe...

Page 24: ...e Color c Click Built In Color Matching d From the Document Color pop up menu choose Black Only 2 Continue customizing your document following the steps for your paper type Step 3 Print your document Click Print Note The paper exit tray holds up to 50 sheets of paper To print more than 50 sheets of paper remove the first 50 sheets and then continue printing Printing a booklet You can print and bun...

Page 25: ... left edge of the paper Note If you are using Letter size paper adjusting the paper guide may not be necessary Step 2 Customize the print settings 1 Choose a paper size and orientation a From the software program choose File Page Setup b From Paper Size pop up menu choose a paper size To use a custom paper size see Printing on custom size paper on page 42 c From Orientation make sure that you sele...

Page 26: ...Booklet f From the Booklet pop up menu choose the appropriate number of sheets to bundle 2 4 8 16 or 32 Note A bundle is the group of pages that are folded in half and stacked before binding When printing with thick paper choose a smaller number of sheets to bundle for easier binding Step 3 Print your booklet 1 Click Print After the first half of your booklet prints your printer software prompts y...

Page 27: ...of the first bundle 3 Continue to stack the bundles on top of each other until your booklet is complete 4 Bind the bundles to complete your booklet Printing labels You can load up to 25 sheets of labels depending on the thickness of the sheets Step 1 Load the labels Use labels designed for inkjet printers If your labels include instructions read them carefully Load the labels vertically against th...

Page 28: ...From the software program choose File Page Setup b From the Paper Size menu choose A4 or U S Letter c From Orientation make sure that you select portrait orientation d Click OK 2 Choose a paper type and print quality a From the software program choose File Print b From the pop up menu in the upper left corner choose Paper Type Quality c From the Paper Type pop up menu choose Plain d From Print Qua...

Page 29: ...by printing handouts Handouts are multiple pages of a document printed on a sheet of paper You can load up to 100 sheets of paper depending on the thickness of the paper Step 1 Load the paper If your paper includes instructions read them carefully Load the paper vertically against the right side of the paper support Make sure your paper is not used or damaged Make sure the print side is facing you...

Page 30: ...up b From the Paper Size pop up menu choose a paper size To use a custom paper size see Printing on custom size paper on page 42 c From Orientation click the portrait or landscape icon d Click OK 2 Choose a layout a From the software program choose File Print b From the pop up menu in the upper left corner choose Layout c Click Pages Sheet d From the Pages Sheet pop up menu choose the number of pa...

Page 31: ...of your handouts turn like the pages of a magazine c Continue with the next step to print your handouts Step 3 Print your handouts 1 Click Print If you formatted your handouts to print on one side of each page you are finished If you formatted your handouts to print on both sides of each page continue with the next step 2 After the first half of your handouts prints your printer software prompts y...

Page 32: ...e you want to print When the image prints to your satisfaction load the iron on transfers Note For best results load iron on transfers one at a time Step 1 Load the iron on transfers If your iron on transfers include instructions read them carefully Load the iron on transfers vertically against the right side of the paper support Make sure your iron on transfers are not used or damaged Make sure t...

Page 33: ...aper Type Quality c From the Paper Type pop up menu choose Iron On Transfer Note Choosing Iron On Transfer automatically mirrors the image you want to print Make sure you do not select an option from your software program that will mirror your image d From Print Quality select your preferred print quality Normal is the default Note Higher print quality settings result in better quality documents b...

Page 34: ...ies include instructions read them carefully Load the transparencies vertically against the right side of the paper support Make sure your transparencies are not used or damaged Make sure the rough print side of the transparencies is facing you If the transparencies have a removable strip make sure each strip is facing away and down toward the printer Do not force the transparencies into the print...

Page 35: ...pper left corner choose Paper Type Quality c From the Paper Type menu choose Transparency d From Print Quality select your preferred print quality Normal is the default Note Higher print quality settings result in better quality documents but may take longer to print Step 3 Print your transparencies Click Print Note To prevent smudging remove each transparency as it exits the printer and then let ...

Page 36: ...er into the printer Squeeze and slide the paper guide to the left edge of the paper Note If you are using Letter size paper adjusting the paper guide may not be necessary Step 2 Customize the print settings 1 Choose a paper size and orientation a From the software program choose File Page Setup b From the Paper Size pop up menu choose the paper size for your document c From Orientation click the p...

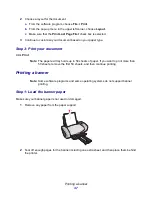
Page 37: ...your document Click Print Note The paper exit tray holds up to 50 sheets of paper If you want to print more than 50 sheets remove the first 50 sheets and then continue printing Printing a banner Note Some software programs and some operating systems do not support banner printing Step 1 Load the banner paper Make sure your banner paper is not used or damaged 1 Remove any paper from the paper suppo...

Page 38: ...eze and slide the paper guide to the left edge of the banner paper Step 2 Customize the print settings 1 Choose a paper size and orientation a From the software program choose File Page Setup b From the Paper Size pop up menu choose Banner A4 or Banner Letter Note If you do not choose the correct paper size the banner paper may cause a paper jam For help see Printer has a paper jam on page 61 c Fr...

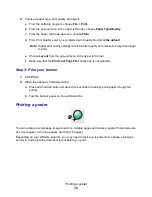
Page 39: ...op up menu in the upper left corner f Make sure that the Print Last Page First check box is not selected Step 3 Print your banner 1 Click Print 2 When the banner is finished printing a Press and hold the button for about five seconds to feed any extra paper through the printer b Tear the banner paper on the perforated line Printing a poster You can enlarge a single page image to print on multiple ...

Page 40: ...eft edge of the paper Note If you are using Letter size paper adjusting the paper guide may not be necessary Step 2 Customize the print settings 1 Choose a paper size and orientation a From the software program choose File Page Setup b From the Paper Size pop up menu choose a paper size Note Make sure that Banner and Envelope are not selected as these are not compatible with Poster c From Orientat...

Page 41: ...o print 3 Choose a layout a With the Print dialog box open choose Layout from the pop up menu in the upper left corner b Click Poster c Select a poster size Valid values are 2x2 four pages 3x3 nine pages and 4x4 16 pages Step 3 Print your poster Click Print Step 4 Assemble your poster 1 On each printed page trim the white edges from two adjacent sides For example trim the white edge from the top a...

Page 42: ...he thickness of the paper Step 1 Load the custom size paper Load the paper vertically against the right side of the paper support Make sure your paper is not used or damaged Make sure the paper size fits within these dimensions Width 76 to 216 mm 3 to 8 5 in Height 127 to 355 6 mm 5 to 14 in Make sure the print side is facing you Do not force the paper into the printer Squeeze and slide the paper ...

Page 43: ...menu choose in inches or mm millimeters and then type the dimensions for your custom paper size d From the Kind pop up menu choose Letter Envelope Card or Photo and then type a name for your custom paper size in the Paper Size Name box e Click Save and then click Done f Click OK on the Page Setup dialog box 2 Continue to customize your document based on your paper type Step 3 Print your document 1...

Page 44: ...with just a color cartridge or just a black cartridge For information about ordering supplies see page 50 Remove the used cartridges 1 Make sure the power light is on 2 Raise the front cover The cartridge carrier moves to the loading position unless the printer is busy Item Part number Black cartridge 16 or 17 Color cartridge 26 or 27 ...

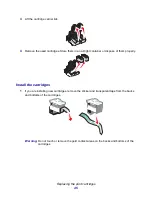
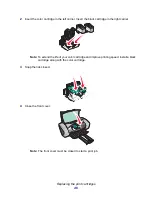
Page 45: ...e them in an airtight container or dispose of them properly Install the cartridges 1 If you are installing new cartridges remove the sticker and transparent tape from the backs and bottoms of the cartridges Warning Do not touch or remove the gold contact areas on the backs and bottoms of the cartridges ...

Page 46: ... Insert the black cartridge in the right carrier Note To extend the life of your color cartridge and improve printing speed install a black cartridge along with the color cartridge 3 Snap the lids closed 4 Close the front cover Note The front cover must be closed to start a print job ...

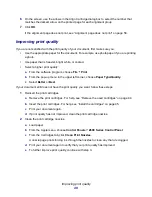
Page 47: ... has been used before or No it is new if the cartridge has not been used before Note If an old cartridge is incorrectly identified as new cartridge ink levels in the Control Panel may be incorrect 6 Click OK Aligning the print cartridges Typically you only align print cartridges after installing or replacing a cartridge However you may also need to align cartridges when Characters are improperly f...

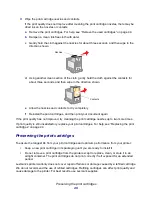
Page 48: ...menu in the upper left corner choose Paper Type Quality c Select Better or Best If your document still does not have the print quality you want follow these steps 1 Reinsert the print cartridges a Remove the print cartridges For help see Remove the used cartridges on page 44 b Insert the print cartridges For help see Install the cartridges on page 45 c Print your document again d If print quality ...

Page 49: ... If the print quality has not improved try cleaning the print cartridge nozzles up to two more times If print quality is still unsatisfactory replace your print cartridges For help see Replacing the print cartridges on page 44 Preserving the print cartridges To ensure the longest life from your print cartridges and optimum performance from your printer Keep a new print cartridge in its packaging u...

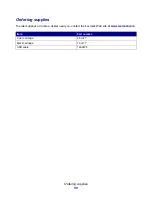
Page 50: ... supplies 50 Ordering supplies To order supplies or locate a dealer near you contact the Lexmark Web site at www lexmark com Item Part number Color cartridge 26 or 27 Black cartridge 16 or 17 USB cable 12A2405 ...

Page 51: ... Lexmark adapter Is the printer light blinking If it is see Understanding error messages and flashing lights on page 56 Did you remove the sticker and transparent tape from the backs and bottoms of both print cartridges Did you install the print cartridges correctly For help see Install the cartridges on page 45 Is the paper loaded correctly Make sure you do not push the paper too far into the pri...

Page 52: ...ter to be the default printer 1 From your desktop click the Z600 Series printer icon 2 From the Printing menu choose Set Default Printer Is your printer directly connected to your computer If it is connected through an external device such as a USB hub switch box scanner or fax machine follow these corrective steps 1 Disconnect your printer from any external devices 2 Connect your printer directly...

Page 53: ...Printer menu appears 2 Double click the Z600 Series Uninstaller 3 Click Uninstall 4 Follow the steps on your screen to complete uninstallation 5 Click OK when you get the notification that uninstallation is successful 6 Restart the computer before reinstalling the printer software Installing the printer software You can install the printer software using the printer software CD that comes with you...

Page 54: ...s and Canada only 9 Click Finished when you are done 10 The Z600 Series printer icon is automatically created on your desktop You are now ready to start using your Lexmark Z600 Series printer Using the World Wide Web 1 Make sure Stuffit Expander is loaded on your system 2 From the Lexmark Web site www lexmark com select the appropriate driver for your operating system 3 Click the binhex hqx file t...

Page 55: ...our printer is on a remote subnet If none of these conditions apply continue with Troubleshooting your network printer on page 56 Entering an IP address To enter an IP address and set up your network printer 1 Open the Z600 Series Control Panel 2 From the Advanced menu choose Network Printer Configuration For information about See page Solving network printing problems if the printer is connected ...

Page 56: ...est page does not print on page 58 Understanding error messages and flashing lights Use this section to understand printer software error messages on your computer screen and blinking lights on your printer For information about lights on a Lexmark adapter refer to the adapter documentation Paper Jam message For help clearing a paper jam see Printer has a paper jam on page 61 Click To A printer fr...

Page 57: ...n page 61 Resolving unsuccessful or slow printing The following topics can help you correct unsuccessful or slow printing Printer is plugged in but does not print Make sure The printer is on and the printer cable is securely attached at both ends If your printer is connected to a network make sure the Lexmark adapter is on and all indicator lights are on For help refer to the adapter documentation...

Page 58: ...med see Clearing paper misfeeds or jams on page 60 Make sure the printer is not held or paused To check the printer status 1 From your desktop double click the Z600 Series printer icon 2 Make sure the Hold button is not selected 3 Try printing your test page again If it still does not print see Solving printer software installation problems on page 52 Solving network printing problems if the print...

Page 59: ...d in the order the printer receives them Decrease the print quality setting to Normal or Quick Print Note Higher print quality settings result in better quality documents but may take longer to print Recovering when your computer stops responding If your computer locks up while your document is printing turn off the printer and the computer When you turn them back on the printer may attempt to sta...

Page 60: ...ckness of the paper you can load up to 100 sheets of paper 50 transparencies 25 labels or cards or 10 envelopes You do not force the paper into the printer The paper guide is against the left edge of the paper The paper guide does not cause the paper to bow The printer is on a flat level surface The printer settings you have chosen are correct for the type of document you are printing For help see...

Page 61: ...you cannot reach the paper raise the front cover pull the paper out and then close the front cover c Turn the printer on Note Do not force the paper into the printer Solving print quality problems If print quality is unsatisfactory you may need to adjust your margin settings choose a higher print quality align the print cartridges or clean the nozzles The following topics can help you improve prin...

Page 62: ... pages to dry on page 8 The next page exiting the printer may be smearing the ink Remove each page as it exits the printer and then let it dry completely before stacking Try cleaning the print cartridge nozzles Follow the steps in Improving print quality on page 48 Printed pages have alternating bands of light and dark print intermittent printing Click Better or Best print quality Print the docume...

Page 63: ...rintout differ from the colors on the screen A cartridge may be low on ink For help see Replacing the print cartridges on page 44 Use a different paper brand Each paper brand accepts ink differently and prints with color variations Disconnect the printer from any extra devices such as scanners fax machines or hubs Connect it directly to the computer For ColorSync color matching choose a profile an...

Page 64: ...r print quality Choose photo paper as the paper type Solving specialty media problems The following topics can help solve problems with specialty paper Glossy photo papers or transparencies stick together Use glossy photo paper or transparency designed for inkjet printers Make sure you loaded the paper correctly with print side facing you and selected the appropriate settings in the printer softwa...

Page 65: ...Solving specialty media problems 65 Select a higher print quality such as Better or Best Try cleaning the print cartridge nozzles Follow the steps in Improving print quality on page 48 ...

Page 66: ...this equipment Unauthorized changes or modifications could void the user s authority to operate this equipment Note To assure compliance with FCC regulations on electromagnetic interference for a Class B computing device use a properly shielded and grounded cable such as Lexmark part number 1329605 for parallel attach or 12A2405 for USB attach Use of a substitute cable not properly shielded and gr...

Page 67: ...67 Japanese VCCI notice ...

Page 68: ...our printer coated paper Treated paper designed for high quality printed images collate A printer software option that lets you automatically print one complete copy of a multiple page document before the next copy begins and so on ColorSync The industry standard color management technology that ensures color accuracy from capture to print or online display It delivers powerful control over color ...

Page 69: ...rk local subnet See LAN local area network long edge binding A printer software option that arranges duplexed pages so they can be bound along the long side of the pages manual alignment A printer software feature that lets you select print cartridge alignment values margin The blank area between printed text or graphics and the edges of a page mirror A printer software option that lets you revers...

Page 70: ...oto paper Treated paper designed for photographs plain paper Paper designed for printing text documents portrait orientation Page orientation in which text runs parallel with the short edge of the paper poster An image printed on multiple sheets of paper that when assembled produce an enlarged version of the original image premium paper Coated paper designed for reports or documents with graphics ...

Page 71: ...is sometimes referred to as a local subnet top flip A printer software option that arranges duplexed pages so they turn like the pages of a legal pad transparency A see through sheet of print media that can be displayed on an overhead projector unconfigured printer A printer connected to a network that has not yet been assigned an IP address USB cable A lightweight flexible cable that lets your pr...

Page 72: ... 33 labels 28 n up See handouts Page Setup dialog box 7 photo cards 20 photo paper 14 plain paper 12 postcards 20 premium paper 16 Print dialog box 8 printing color images in black and white 24 printing in reverse order 36 printing last page first See printing in reverse order printing on both sides of the paper 18 transparencies 35 T shirt transfers See iron on transfers D dark or smudged print 6...

Page 73: ...postcards 19 power supply connector 6 premium paper 15 print cartridge aligning 47 installing 45 ordering 50 part numbers 50 preserving 49 removing 44 replacing 44 Print dialog box 8 print in reverse order 36 print last page first See print in reverse order print on both sides of the paper 17 print quality improving 48 print quality troubleshooting 61 printer cable troubleshooting 51 printer drive...

Page 74: ... 18 transparencies 35 T shirt transfers See iron on transfers settings default 6 software printer Control Panel 10 default settings 6 installing 53 Page Setup dialog box 7 Print dialog box 8 understanding 6 uninstalling 53 specialty paper solving problems with 64 supplies ordering 50 T test page does not print 58 test page printing 58 transfers iron on 32 transparencies 34 Troubleshooting 51 troub...

Page 75: ...d design are trademarks of Lexmark International Inc registered in the United States and or other countries Color Jetprinter is a trademark of Lexmark International Inc 2003 Lexmark International Inc 740 West New Circle Road Lexington Kentucky 40550 ...

Reviews: