operating clearances 360
Standard network software error [54] 121
Standard parallel port disabled [56] 121
Standard USB port disabled [56] 121
storing
streaked vertical lines appear on prints 62
supported paper sizes 34
supported paper types and weights 35
symptoms
T
theory of operation
ACM 368
duplex printing 367
electrophotographic process 372
input tray 365
main drive gearbox 368
MPF 366
other key components 370
POR sequence 365
printer control 365
sensors 369
simplex printing 366
tips
card stock 32
on using envelopes 33
on using labels 33
transparencies 34
tips on using envelopes 33
toner rubs off 76
toner specks appear on prints 77
Too many flash options installed [58] 122
Too many trays attached [58] 122
tools, required 37
transparencies
troubleshooting
initial check 39
troubleshooting, print quality
blank pages 43
clipped pages or images 72
compressed images appear on prints 74
fine lines are not printed correctly 71
folded or wrinkled paper 58
gray background on prints 41
horizontal light bands 63
incorrect margins on prints 75
paper curl 56
print is too dark 52
print is too light 54
repeating defects 59
skewed print 60
solid black pages 49
streaked vertical lines appear on prints 62
toner rubs off 76
toner specks appear on prints 77
vertical dark bands 65
vertical dark streaks with print missing 66
vertical light bands 64
white streaks and voided areas 69
troubleshooting, service checks
network service check 169
U
unacceptable paper 30
Unformatted flash detected [53] 122
Unsupported option in slot [x] [55] 122
Unsupported USB hub, please remove 113
updating the printer firmware
using a flash drive 209
using a network computer 209
V
vertical dark bands 65
vertical dark streaks with print missing 66
vertical mount contact connector 218
W
white streaks and voided areas 69
Z
zero insertion force (ZIF) connectors 211
4514-6xx
Index
385
Summary of Contents for M3150
Page 12: ...Part name index 393 4514 6xx Table of contents 12 ...
Page 20: ...4514 6xx 20 ...
Page 38: ...4514 6xx 38 ...
Page 172: ...4514 6xx 172 ...
Page 246: ...3 Remove two screws A and then remove the cooling fan mount A 4514 6xx Parts removal 246 ...
Page 256: ...5 Remove the four screws B and then remove the right front mount B 4514 6xx Parts removal 256 ...
Page 260: ...b Set the spring over the plunger 4514 6xx Parts removal 260 ...
Page 277: ...3 Squeeze the latches B to release the left and right links B 4514 6xx Parts removal 277 ...
Page 300: ...3 Place the printer on its rear side 4 Release the sensor flag A 4514 6xx Parts removal 300 ...
Page 301: ...5 Remove the screw B 6 Remove the sensor flag bracket C 4514 6xx Parts removal 301 ...
Page 323: ...3 Swing the right cover backward to remove 4 Remove the screw D 4514 6xx Parts removal 323 ...
Page 333: ...4514 6xx 333 ...
Page 335: ...Assembly 1 Covers 4514 6xx Parts catalog 335 ...
Page 338: ...4514 6xx Parts catalog 338 ...
Page 339: ...Assembly 2 Electronics 1 1 2 3 4 5 7 9 10 11 6 8 12 4514 6xx Parts catalog 339 ...
Page 342: ...4514 6xx Parts catalog 342 ...
Page 343: ...Assembly 3 Electronics 2 4 3 2 1 5 6 8 9 7 4514 6xx Parts catalog 343 ...
Page 345: ...4514 6xx Parts catalog 345 ...
Page 346: ...Assembly 4 Frame 10 11 12 13 14 9 1 5 6 7 8 4 4 2 3 4514 6xx Parts catalog 346 ...
Page 349: ...Assembly 5 Option trays 3 4 5 6 1 2 4514 6xx Parts catalog 349 ...
Page 354: ...4514 6xx Parts catalog 354 ...
Page 356: ...4514 6xx Parts catalog 356 ...
Page 364: ...4514 6xx 364 ...
Page 376: ...4514 6xx 376 ...
Page 386: ...4514 6xx Index 386 ...
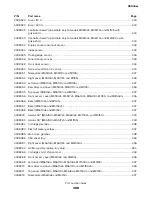
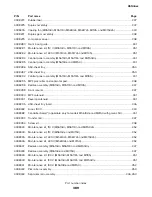
Page 392: ...4514 6xx Part number index 392 ...
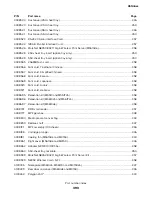
Page 398: ...4514 6xx Part name index 398 ...


