Lexmark 1410007 - X 3550 Color Inkjet User Manual Download Page 102

PerfectFinish is a trademark of Lexmark International, Inc.

All other trademarks are the property of their respective owners.

Conventions

Note: 

Note

 identifies something that could help you.

Warning: 

Warning

 identifies something that could damage your product hardware or software.

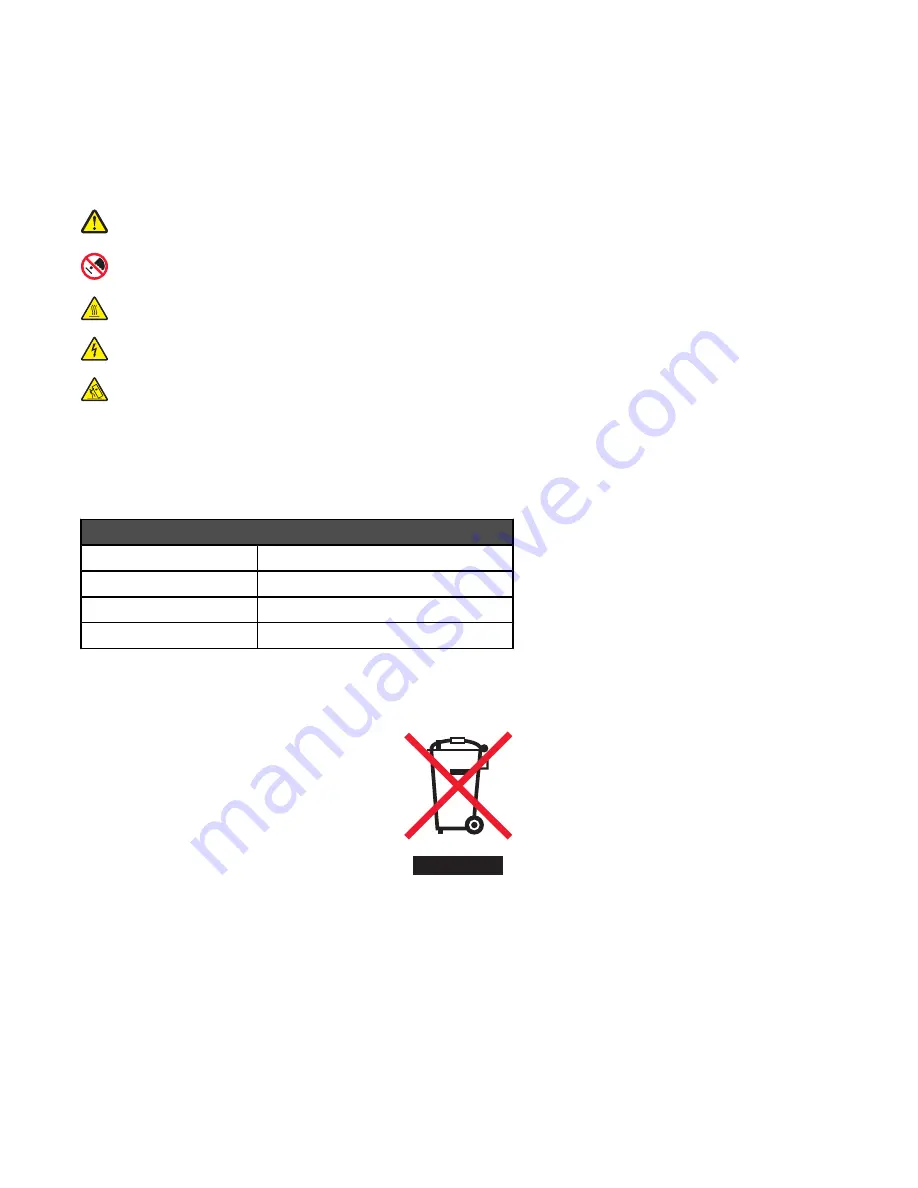
CAUTION: 

CAUTION

 identifies something that could cause you harm.

CAUTION: 

This type of 

CAUTION

 indicates that you should 

not touch

 the marked area.

CAUTION: 

This type of 

CAUTION

 indicates a 

hot surface

.

CAUTION: 

This type of 

CAUTION

 indicates a 

shock hazard

.

CAUTION: 

This type of 

CAUTION

 indicates a 

tipping hazard

.

The following notices are applicable if your printer has a wireless network card installed

Noise emission levels

The following measurements were made in accordance with ISO 7779 and reported in conformance with ISO 9296.

Note: 

Some modes may not apply to your product.

1-meter average sound pressure, dBA

Printing

50

Scanning

40

Copying

50

Ready

38

Values are subject to change. See 

www.lexmark.com

 for current values.

Waste from Electrical and Electronic Equipment (WEEE) directive

The WEEE logo signifies specific recycling programs and procedures for electronic products in countries of the European Union. We
encourage the recycling of our products. If you have further questions about recycling options, visit the Lexmark Web site at

www.lexmark.com

 for your local sales office phone number.


102

Summary of Contents for 1410007 - X 3550 Color Inkjet

Page 1: ...diamond design are trademarks of Lexmark International Inc registered in the United States and or other countries All other trademarks are the property of their respective owners 2007 Lexmark Interna...

Page 2: ...d and approved to meet strict global safety standards with the use of specific Lexmark components The safety features of some parts may not always be obvious Lexmark is not responsible for the use of...

Page 3: ...9 Using the Scan menu 20 Using the Photo Card menu 21 Using the PictBridge menu 22 Using the Settings menu 23 Saving settings 25 Learning about the software 27 Using the printer software 27 Using the...

Page 4: ...all photos from a CD or flash drive using the computer 47 Transferring selected photos from a CD or flash drive using the computer 48 Transferring photos from a memory card to a flash drive 48 Printi...

Page 5: ...Scanning documents or images for e mailing 66 Removing wavy patterns from scanned photos magazines or newspapers 66 Customizing scan settings using the computer 67 Faxing 68 Sending a fax using the s...

Page 6: ...86 Copier does not respond 86 Scanner unit does not close 86 Poor copy quality 87 Partial document or photo copies 88 Scan troubleshooting 88 Scanner does not respond 88 Scan was not successful 89 Sc...

Page 7: ...mage files detected 98 Only one photo enhancement may be chosen at a time 98 Only one photo size selection can be chosen at a time 98 Photo size error Photo must fit on page 99 PictBridge communicatio...

Page 8: ...8...

Page 9: ...g with photos Scanning if supported by your printer Making copies if supported by your printer Faxing if supported by your printer Maintaining the printer Connecting the printer to a network if suppor...

Page 10: ...nday Friday 8 00 AM 8 00 PM ET Note Support numbers and times may change without notice For the most recent phone numbers available see the printed warranty statement that shipped with your printer Te...

Page 11: ...nty included with this printer or set forth at www lexmark com 1 Click CUSTOMER SUPPORT 2 Click Warranty Information 3 From the Statement of Limited Warranty section click Inkjet All In One Printers 4...

Page 12: ...erent from the one shown 4 Installation software CD for Windows Installation software for the printer Help User s Guide in electronic format 5 Installation software CD for Macintosh Installation softw...

Page 13: ...ou received one or more additional language control panels with the printer 1 Lift and remove the control panel if one is installed 2 Choose the correct control panel for your language 3 Align the cli...

Page 14: ...k If your printer does not have an internal wireless print server already installed you can purchase one separately Use the following instructions to install the internal wireless print server 1 Turn...

Page 15: ...the internal wireless print server to work on your wireless network Finding your MAC address In order to complete the network configuration of your printer you may need the media access control MAC ad...

Page 16: ...nable to communicate with the wireless network Green indicates that the printer is connected to a wireless network 3 PictBridge port Connect a PictBridge enabled digital camera or a flash drive to the...

Page 17: ...Note Only the 4500 Series comes with an internal wireless print server installed 4 USB port Connect the printer to a computer using a USB cable 5 Power supply with port Connect the printer to a power...

Page 18: ...ker Adjust the brightness of a copy or photo 7 Display the Copy Scan or Photo Card menu depending on which mode is selected 3 2 1 4 5 Press To 1 Return to the previous screen Delete a letter or number...

Page 19: ...want to change a setting press Start Color or Start Black 3 If you want to change a setting press 4 Press or repeatedly until the menu item you want appears 5 Press 6 Press or repeatedly until the su...

Page 20: ...ation on saving temporary and other settings see Saving settings on page 25 Using the Scan menu To access and navigate the Scan menu 1 From the control panel press Scan Mode The scan default screen ap...

Page 21: ...rt Black Menu item Action Proof Sheet Print and then scan a proof sheet for all photos on the memory card for the most recent 20 photos by date Print Photos Print photos directly from a memory card or...

Page 22: ...Size appears 15 Press 16 Press or repeatedly until the setting you want appears 17 Press Using the PictBridge menu The PictBridge default settings menu lets you select printer settings if you did not...

Page 23: ...he size of printed photos Note If you did not specify the photo size beforehand in your digital camera the default photo sizes are 4 x 6 if Letter is your default Paper Size 10 x 15 cm if A4 is your d...

Page 24: ...see Aligning print cartridges on page 72 Print Test Page to print a test page Paper Setup Select the size and type of paper loaded Device Setup Select Language to change the language setting Country...

Page 25: ...epeat Image N Up Original Size Original Type Scan Mode Quality Original Size Resize Photo Card The following Photo Card settings will not time out after two minutes of inactivity or turning off the po...

Page 26: ...c Press d Press or repeatedly until Set Defaults appears e Press f Press or repeatedly until Use Current appears g Press 26...

Page 27: ...rint settings for the document you are printing The Toolbar Create printer friendly versions of active Web pages Using the Lexmark Imaging Studio To open the Lexmark Imaging Studio Welcome screen use...

Page 28: ...otos as a multiple page poster From the bottom left corner of the Welcome screen Click To Setup and diagnose printer Check ink levels Order print cartridges Find maintenance information Select other S...

Page 29: ...basic features Print scan copy and fax Print projects such as photos envelopes cards banners iron on transfers and transparencies Find the electronic User s Guide for more information View ink levels...

Page 30: ...nge the settings in Printing Preferences based on the type of project you want to create You can open Printing Preferences from almost any program 1 With a document open click File Print 2 From the Pr...

Page 31: ...Using the Options menu Use the Options menu to make changes to the Quality Options Layout Options and Printing Status Options settings For more information on these settings open the tab dialog from t...

Page 32: ...tos Preview Preview a Web page before printing Resetting printer software settings to defaults Windows 2000 or Windows XP users only 1 Click Start Settings Printers or Printers and Faxes 2 Right click...

Page 33: ...4 Click the Save Settings menu 5 From the Restore section select Factory Settings Defaults Note Factory default settings cannot be deleted 33...

Page 34: ...the paper guides to rest against the edges of the paper 1 2 Note To avoid paper jams make sure the paper does not buckle when you adjust the paper guides Loading various paper types Load up to Make s...

Page 35: ...adhesive on the labels does not extend to within 1 mm of the edge of the label You use full label sheets Partial sheets with areas exposed by missing labels may cause labels to peel off during printin...

Page 36: ...postcards The print side of the cards faces you The cards are loaded in the center of the paper support The paper guides rest against the edges of the cards Note Photo cards require more drying time...

Page 37: ...e top cover The leading edge of the banner paper feeds into the printer first The paper is loaded in the center of the paper support The paper guides rest against the edges of the paper Loading origin...

Page 38: ...3 Place the original document or item facedown on the scanner glass in the upper left corner 4 Close the top cover to avoid dark edges on the scanned image 38...

Page 39: ...Use printer sensor to let the printer select the paper type for you Note To manually select a paper type select Use my choice 7 From the drop down menu select a glossy or heavyweight matte paper 8 Cli...

Page 40: ...printing appears next to Photos 3 If no number appears next to Photos a From the Lexmark logo drop down menu select Options b Select the Advanced tab c Select a lower minimum photo size d Click OK Th...

Page 41: ...ge First check box 7 Click OK 8 Click OK or Print Printing the last page first reverse page order 1 Load paper 2 With a document open click File Print 3 Click Properties Preferences Options or Setup 4...

Page 42: ...ware application click File Print 3 Click Properties Preferences Options or Setup 4 Select a Quality Speed setting Select Photo for photos and greeting cards and Normal for other types of cards 5 Sele...

Page 43: ...ront of the printer If there are only Microsoft Office files stored on the memory card or flash drive the printer automatically switches to File Print mode Only Microsoft Office files that have file n...

Page 44: ...Retrieving and managing photos Inserting a memory card 1 Insert a memory card Insert the card with the brand name label facing to the left If there is an arrow on the card make sure it points toward t...

Page 45: ...memory card a message appears on the display prompting you to remove the memory card that is not in use Inserting a flash drive 1 Insert the flash drive into the PictBridge port on the front of the p...

Page 46: ...ransfer For more information see Inserting a memory card on page 44 or Inserting a flash drive on page 45 2 Press or repeatedly until Save Photos appears 3 Press 4 If needed press or repeatedly until...

Page 47: ...k box and enter a name 9 Click Next 10 If you want to erase the photos from the memory card click Yes Note Make sure all the photos have been copied before you select Yes to erase 11 Click Done Remove...

Page 48: ...to save the photos in a folder other than the default folder a Click Browse b Select the folder you want c Click OK 9 If you want to assign a prefix to all of the photos you just transferred click th...

Page 49: ...ormation see Inserting a memory card on page 44 or Inserting a flash drive on page 45 3 Press or repeatedly until Proof Sheet appears 4 Press 5 Press or repeatedly until Print Proof Sheet appears 6 Pr...

Page 50: ...ess or repeatedly until Print All Photos appears 6 Press Start Color or Start Black The print settings used on the print job are displayed sequentially on the second line of the display 7 Press Start...

Page 51: ...n the print job are displayed sequentially on the second line of the display 10 Press Start Color or Start Black again Printing photos using color effects You can use the control panel to apply color...

Page 52: ...g paper on page 34 2 Insert a memory card For more information see Inserting a memory card on page 44 3 Press or repeatedly until Print Photos appears 4 Press 5 Press or repeatedly until Print DPOF ap...

Page 53: ...e camera 3 Follow the instructions in the camera documentation to select and print photos Note If the printer is turned off while the camera is connected you must disconnect and then reconnect the cam...

Page 54: ...wn list select the paper size 10 To select multiple prints of a photo or to select photo sizes other than 4 x 6 in 10 x 15 cm select the options you want in the table Use the drop down list in the las...

Page 55: ...greeting card click E mail your Photo Greeting Card from the Share tab 14 From the Send Quality and Speed area of the screen select the image size 15 Click Create E mail to create an e mail message wi...

Page 56: ...m the Printing Creative Tasks area of the Welcome screen click Poster 4 If you are scanning a photo a Place the photo facedown on the scanner glass b Click File Add Photo from Scanner 5 If you are not...

Page 57: ...sting copy quality Quality specifies the resolution used for the copy job Resolution involves a dots per inch dpi count the higher the dpi count the higher the resolution and copy quality 1 Load paper...

Page 58: ...appears 12 Press 13 Press or repeatedly until the size you want appears 14 Press 15 Press or repeatedly until Paper Type appears 16 Press 17 Press or repeatedly until the type of paper loaded into th...

Page 59: ...you are copying photos use photo or heavyweight matte paper with the glossy or printable side facing you If you are not sure which side is the printable side see the instructions that came with the p...

Page 60: ...to or heavyweight matte paper with the glossy or printable side facing you If you are not sure which side is the printable side see the instructions that came with the paper 2 Load an original documen...

Page 61: ...s 2 From the desktop double click the Lexmark Imaging Studio icon 3 From the left pane of the Welcome screen click Copy 4 Select the Document option 5 Click Start 6 From the Copies drop down list sele...

Page 62: ...e photo appears in the right pane 6 From the Quality drop down list select the copy quality 7 From the Paper Size in Printer drop down list select the paper size 8 To select multiple prints of a photo...

Page 63: ...eed to click Scan from the Scan dialog on the computer screen 7 If you want to save the scanned image from the software application click File Save As 8 Enter the file name format and location where y...

Page 64: ...now edit the document Scanning text for editing Use the Optical Character Recognition OCR software feature to turn scanned images into text you can edit with a word processing application 1 Make sure...

Page 65: ...d a photo facedown on the scanner glass 2 From the desktop double click the Lexmark Imaging Studio icon 3 Click View Print Photo Library 4 From the Photo Library Add tab click Add New Scan 5 Select th...

Page 66: ...ate E mail to have your images attached to an e mail message Removing wavy patterns from scanned photos magazines or newspapers Descreening helps to remove wavy moire patterns from images scanned from...

Page 67: ...d Setting Options Color Depth Select Color Grey or Black and White Scan Resolution Dots Per Inch Select a scan resolution value from the drop down list Size You can auto crop the scanned item Move the...

Page 68: ...3 From the left pane of the Welcome screen click Fax 4 Select the Document option 5 Click Start 6 Enter the recipient information and then click Next Note A fax number can include up to 64 numbers co...

Page 69: ...Ringing and Answering tab 5 From the Automatically answer incoming calls as a fax area select On from the Auto Answer drop down list 6 To turn the Auto Answer feature on and off at scheduled times se...

Page 70: ...the cartridge carrier lever to raise the cartridge carrier lid 4 Remove the used print cartridge Note If you are removing both cartridges repeat step 3 and step 4 for the second cartridge Installing p...

Page 71: ...t carrier Insert the color cartridge in the right carrier 4 Close the lids 5 Close the scanner unit making sure to keep your hands out from underneath the scanner unit The control panel display will p...

Page 72: ...step 3 3 Remove and reinsert the cartridges For more information see Removing a used print cartridge on page 70 and Installing print cartridges on page 70 If print quality has not improved continue to...

Page 73: ...loth with water 3 Gently hold the cloth against the nozzles for about three seconds and then wipe in the direction shown 4 Using another clean section of the dampened cloth gently hold the cloth again...

Page 74: ...ee cloth with water 2 Gently wipe the scanner glass clean Note Make sure all ink or corrective fluid on a document is dry before placing the document on the scanner glass Ordering supplies Ordering pr...

Page 75: ...nstalled installing the Lexmark N2050 in the printer lets you print and scan on a wireless network For more information go to www lexmark com Paper Paper size Lexmark Premium Photo Paper Letter A4 4 x...

Page 76: ...you are printing from a computer click Learn more on the message select the check box and click Close Lexmark s warranty does not cover damage caused by non Lexmark ink or print cartridges Refilling...

Page 77: ...amera using PictBridge on page 80 Incorrect language appears on the display These are possible solutions Try one of the following Change the language selection during initial setup After you select a...

Page 78: ...llowing operating systems are supported Windows 2000 Windows XP Windows Vista and Mac OS X Note Windows 2000 users should use Service Pack 3 or later Check your system requirements Check that your com...

Page 79: ...irus programs 3 Double click the My Computer icon In Windows XP click Start to access the My Computer icon 4 Double click the CD ROM drive icon 5 If necessary double click setup exe 6 Follow the instr...

Page 80: ...you must select the print queue device for each file you want to print Reconnect power supply 1 Press to turn the printer off 2 Disconnect the power cord from the wall outlet 3 Gently remove the powe...

Page 81: ...hoto Size Error when your chosen photo size does not match the paper size that is set This typically happens when you are trying to print from your PictBridge enabled digital camera You may have left...

Page 82: ...best results use Lexmark photo papers Use a paper that is a heavier weight or bright white Select a higher print quality 1 Depending on your print job press Copy Mode Scan Mode or Photo Card 2 Press 3...

Page 83: ...vels and install new print cartridges if necessary Review steps to improve print quality See Improving print quality on page 82 Remove sheets as they are printed To avoid ink smudging when you are wor...

Page 84: ...derless Select the Borderless resize feature when copying 1 Press 2 Press or repeatedly until Resize appears 3 Press 4 Press or repeatedly until Borderless appears 5 Press 6 Press Start Color or Start...

Page 85: ...see Removing and reinstalling the software on page 100 Partial document or photo prints These are possible solutions Try one or more of the following Check document placement Make sure the document o...

Page 86: ...t only when you are printing on photo or heavyweight matte paper All other paper types print best at a lower Quality Speed setting Use the Quick Print or Normal setting to print most text documents Co...

Page 87: ...proving print quality on page 72 Adjust the brightness of the copy 1 Load the document facedown on the scanner glass 2 From the control panel press Copy Mode 3 Press Lighter Darker 4 Press or repeated...

Page 88: ...page 90 Scanner does not respond These are possible solutions Try one or more of the following Check messages If an error message is displayed see Error messages on page 94 Check power If the light is...

Page 89: ...e other software Close all programs not being used Change the scanning resolution to a lower value 1 Load an original document facedown on the scanner glass 2 From the desktop double click the Lexmark...

Page 90: ...ns These are possible solutions Try one or more of the following Check document placement Make sure the document or photo is loaded facedown on the scanner glass in the upper left corner Check paper s...

Page 91: ...de see the instructions that came with the paper See Loading various paper types on page 34 for information about Maximum loading amounts per paper type Specific loading instructions for supported pap...

Page 92: ...Set As Default Printer you must select the print queue device for each file you want to print Banner paper jams There are possible solutions Try one or more of the following Clear banner paper jams 1...

Page 93: ...ve inserted the memory card in the correct slot For more information see Inserting a memory card on page 44 Check memory card type Make sure that the type of memory card you are using can be used in t...

Page 94: ...tridge or cartridges if necessary To order supplies see Ordering supplies on page 74 2 Press to continue Cartridge Error 1102 1203 1204 or 120F 1 Remove the print cartridges and close the cartridge ca...

Page 95: ...any obstructions 1 Raise the scanner unit 2 Remove any objects blocking the path of the print cartridge carrier 3 Make sure the cartridge carrier lids are closed 4 Close the scanner unit 5 Press Remov...

Page 96: ...Firmly plug the square end of the USB cable into the USB port on the back of the printer 3 Firmly plug the rectangular end of the USB cable into the USB port of the computer The USB port is marked wi...

Page 97: ...t the power cord to the electrical outlet 4 If the button is not lit press 5 Reinsert the print cartridge 6 If the error Does not reappear the problem has been corrected Reappears replace the print ca...

Page 98: ...et information The photo proof sheet you printed and scanned is no longer valid You may have removed the memory card or flash drive from the printer or turned off the printer before scanning the photo...

Page 99: ...s removed from card by host Some of the photos on the photo proof sheet were deleted from the memory card through the computer You must print a new photo proof sheet For more information see Printing...

Page 100: ...2 Select Uninstall 3 Follow the instructions on the computer screen to remove the printer software 4 Restart the computer before reinstalling the printer software 5 Click Cancel on all New Hardware Fo...

Page 101: ...manufacturer intends to make these available in all countries in which it operates Any reference to a product program or service is not intended to state or imply that only that product program or ser...

Page 102: ...The following notices are applicable if your printer has a wireless network card installed Noise emission levels The following measurements were made in accordance with ISO 7779 and reported in confor...

Page 103: ...l outlet but the power switch is turned off 0 3 The power consumption levels listed in the previous table represent time averaged measurements Instantaneous power draws may be substantially higher tha...

Page 104: ...cartridge when replacement is required After this single use the license to use the print cartridge terminates and the used cartridge must be returned only to Lexmark for remanufacturing refilling or...

Page 105: ...menu 21 PictBridge menu 22 saving settings 25 Scan menu 20 Settings menu 23 using 17 copier does not respond 86 Copy button 27 Copy menu 19 copy quality adjusting 57 copy troubleshooting copier does n...

Page 106: ...finding about printer 9 ink levels seem incorrect 85 ink levels seem to go down quickly 86 ink levels checking 28 ink ordering 28 inserting flash drives 45 memory cards 44 PictBridge enabled digital c...

Page 107: ...rt 17 print cartridge carrier 17 scanner glass 16 scanner unit 17 top cover 16 USB port 17 Wi Fi indicator 16 Photo Card menu 21 photo cards loading 36 Photo Greeting Cards button 27 photo ink low 94...

Page 108: ...problem reading memory card error 99 proof sheet using 49 publications finding 9 Q Quality Copies tab 30 R receiving a fax automatically 69 recycling Lexmark products 76 WEEE statement 102 reducing an...

Page 109: ...be chosen at a time 98 photo ink low 94 photo size error 99 PictBridge communications error 99 please remove the camera card 99 problem reading memory card 99 right cartridge error 97 right cartridge...

Reviews: