31
ENGLISH
You can play your files on TV by connecting an HDMI cable (not
included).
1. Connect the camcorder to the TV using an HDMI cable (not
included)
2. Turn on the HDTV and set it “HDMI” mode.
3. Switch on the camcorder.
4. Set the camcorder to Playback mode to review your pictures and
videos.
5. Use the camcorder screen to select the photo or video you want
to view.
CONNECTING THE CAMCORDER TO AN HDTV
1. Connect your camcorder to your computer with the USB cable
supplied.
2. Press and hold the Shutter button (7) for a few seconds and then
press and hold the Power button (3) for a few seconds until “PC CAM”
icon appears on the computer screen.
3. Click on “My Computer” and double click on the “USB video tool”.
The camcorder will now work as a webcam.
USING YOUR CAMCORDER AS A WEBCAM
1. There are two ways to connect the content of your camcorder to
your computer:
a. Connect the USB cable supplied to the PC and the camcorder.
b. Remove the camcorder’s micro SD card and put it into a card reader
and insert the card reader into your computer.
2. “Mass storage” will appear on the camcorder’s screen.
3. Now open either Quick Time Player (you may have to download
this software from the internet if you do not already have it) or your
computer’s photo software and you can import your pictures or videos
and edit as you normally would using this software.
4. Open “My Computer” or “Windows Explorer” on your computer.
5. A “Removable Disk” will appear. Double click on it to view the
contents.
6. Double click on the “DCIM” folder to view your photos and videos.
7. Now you can copy and save your photos and video files to your
computer.
CONNECTING YOUR CAMCORDER TO A PC
DOWNLOADING YOUR PHOTOS AND YOUR VIDEOS
Using “MAGIX Photo Manager 10”:
1. Connect the supplied USB cable to the camera and the computer’s
USB port.
2.Turn on the camera. “Mass storage” appears on the screen when
connection to the computer has been successfully completed.
3. Double click on the shortcut “MAGIX Photo Manager 10”. The
pictures taken with the camera automatically appear on the home
screen.
4. Press “Import” button on the main menu (up left).
5. You can copy and paste the pictures into any directory you choose.
Publishing your photos on social networking sites:
1. Using “Magix Photo Manager 10”, select the photo that you wish to
publish on Facebook or Flickr.
2. The selected image appears in an orange frame.
3. In the menu bar, click the “Online” tab and select “Upload media to
other web services” and then either “Upload media to Flickr” or “Upload
media to Facebook”.
4. The “Upload” window will be displayed on screen. Fill in the various
fields (file name, description, key words, etc.).
5. Click “Upload” to confirm.
6. Depending on your upload destination, you will either open the
Facebook or the Flickr home page.
7. Next follow in the instructions displayed on the screen to finish
uploading.
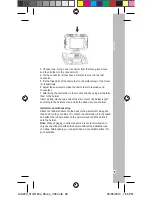
You can play your files on TV by connecting an AV cable (not included).
1. Connect the camcorder to the TV using an AV cable (not included)
2. Turn on the TV and set it “AV” mode.
Note:
Take care to properly match the colour.
3. Switch on the camcorder.
4. Set the camcorder to “record mode” (i.e. Camera or Video mode) to
preview the subject that you want to record on the TV screen.
5. Set the camcorder to Playback mode to review your pictures and
videos.
Notes:
• Use the supplied AV cable (not included) to connect your camcorder
to the TV.
• For a better image quality, set the TV system to PAL or NTSC (“TV
Mode” in the “Setup” menu).
• If the image does not display in the center of the TV screen, adjust
the TV settings (refer to the TV instruction manual).
• The batteries are also used when the camcorder is connected to
the TV.
CONNECTING THE CAMCORDER TO A TV
DJA200_01IM1264_26Jun_V02.indb 31
26/06/2014 1:56 PM

