27
ENGLISH
Capture mode and Video mode have the same “Setup” menu.
1. Turn the camcorder on.
2. Select the desired mode (Capture or Video). To switch between
modes, touch the Settings icon
and select the mode you want.
3. Touch the [MENU] icon and then touch the Setup icon
to
enter the “Setup” menu. If the [MENU] icon is not displayed, touch the
Settings icon and it will appear.
4. Use your finger to scroll up or down through the options and touch
your desired option to select it.
5. Touch the Back icon “LEFT” to go back to the previous screen or
touch it repeatedly to go back to the main display.
The following settings are available in the “Setup” menu:
1. Date
Sets the camcorder date and time. Use your finger to scroll up and
down each column to set hours, minutes, seconds, date, month and
year. Line up your selected number in the row that appears as follows:
00:00:00 00/00/0000 . Once done, press “ok” to exit.
2. Auto Power Off
Sets the camcorder “Auto Power Off”: 1 Minute, 3 Minutes, 5 Minutes,
Off.
3. Beep
Sets the beep sound when you press a button: On, Off.
4. Language
Changes the language of the camcorder’s menus. Seven languages
are available: English, French, Spanish, Portuguese, German, Dutch
and Italian.
5. Frequency
A higher frequency increases the camcorder shutter speed so the
effect of light fluctuations from sources such as fluorescent lamps are
reduced: 50Hz, 60Hz.
6. TV Mode
To view playback on a TV, set your camcorder to either PAL or NTSC
depending on your region.
7. Format
Formats the micro SD memory card: Cancel, OK.
8. Default Setting
Resets the camcorder to the factory’s default settings: Cancel, OK.
SETUP MENU (Capture and Video mode)
BIKE MOUNT (Assembly)
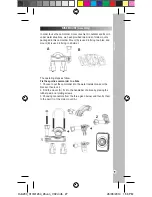
The operating steps as follow.
Fix the sportive camcorder to a bike
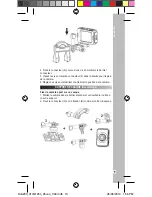
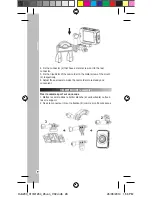
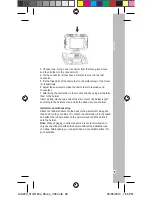
1. Choose to put the camcorder into the water resistant case or the
bracket, then lock it.
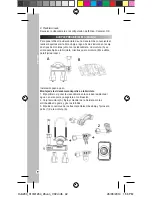
2. Find the mount (A), fix it to the handlebar of a bike by placing the
rubber pad, and rotating screws.
3. Choosing connectors from the three given below, and then fix them
to the part (1) of the main mount (A).
In order to use the camcorder more convenient in outdoor sports or in
under water situations, we have provided two kinds of main mounts
packaged in this camcorder. Mount (A) is used in fixing to a bike, and
mount (B) is used in fixing to a helmet.
A
B
1
2
+
+
DJA200_01IM1264_26Jun_V02.indb 27
26/06/2014 1:56 PM

