Remove the solid-state drive
Make sure the following FRU (or CRU) have been removed.
“Remove the lower case” on page 26
“Remove the battery pack” on page 27
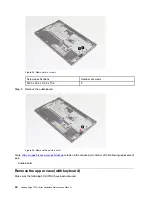
Step 1. Remove one screw.
Figure 17. Remove one screw
Screw specifications
Number of screw
M2 x L2 x D4.5 x T0.8
1
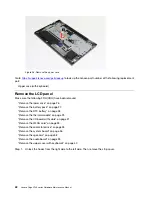
Step 2. Pull the solid-state drive out of the slot.
Figure 18. Pull the solid-state drive out of the slot
.
35
Summary of Contents for Yoga C740 Series
Page 1: ...Lenovo Yoga C740 series Hardware Maintenance Manual ...
Page 2: ...First Edition August 2019 Copyright Lenovo 2019 ...
Page 4: ...ii Lenovo Yoga C740 series Hardware Maintenance Manual ...
Page 6: ...iv Lenovo Yoga C740 series Hardware Maintenance Manual ...
Page 11: ...DANGER DANGER DANGER DANGER DANGER Chapter 1 Safety information 5 ...
Page 12: ...6 Lenovo Yoga C740 series Hardware Maintenance Manual ...
Page 13: ...PERIGO PERIGO PERIGO Chapter 1 Safety information 7 ...
Page 14: ...PERIGO PERIGO PERIGO PERIGO PERIGO 8 Lenovo Yoga C740 series Hardware Maintenance Manual ...
Page 15: ...DANGER DANGER DANGER DANGER Chapter 1 Safety information 9 ...
Page 16: ...DANGER DANGER DANGER DANGER VORSICHT 10 Lenovo Yoga C740 series Hardware Maintenance Manual ...
Page 17: ...VORSICHT VORSICHT VORSICHT VORSICHT Chapter 1 Safety information 11 ...
Page 18: ...VORSICHT VORSICHT VORSICHT 12 Lenovo Yoga C740 series Hardware Maintenance Manual ...
Page 19: ...Chapter 1 Safety information 13 ...
Page 20: ...14 Lenovo Yoga C740 series Hardware Maintenance Manual ...
Page 21: ...Chapter 1 Safety information 15 ...
Page 22: ...16 Lenovo Yoga C740 series Hardware Maintenance Manual ...
Page 23: ...Chapter 1 Safety information 17 ...
Page 24: ...18 Lenovo Yoga C740 series Hardware Maintenance Manual ...
Page 25: ...Chapter 1 Safety information 19 ...
Page 26: ...20 Lenovo Yoga C740 series Hardware Maintenance Manual ...
Page 56: ...50 Lenovo Yoga C740 series Hardware Maintenance Manual ...
Page 58: ......
Page 59: ......
Page 60: ......

