


Replacing the Orchid Tilt Stand
Attention:
Do not open your computer or attempt any repair before reading and understanding the “Read
this first: Important safety information” on page iii.
To replace the Orchid Tilt Stand, do the following:
1. Remove any media from the drives and turn off all connected devices and the computer. Then,
disconnect all power cords from electrical outlets and disconnect all cables that are connected to the
computer.
2. Place a soft, clean towel or cloth on the desk or surface. Hold the sides of your computer and gently lay
it down so that the screen is against the surface and the slide cover is facing up.
3. Remove the slide cover. See “Removing the slide cover” on page 49.
4. Remove the bottom cover. See “Replacing the bottom cover” on page 50.
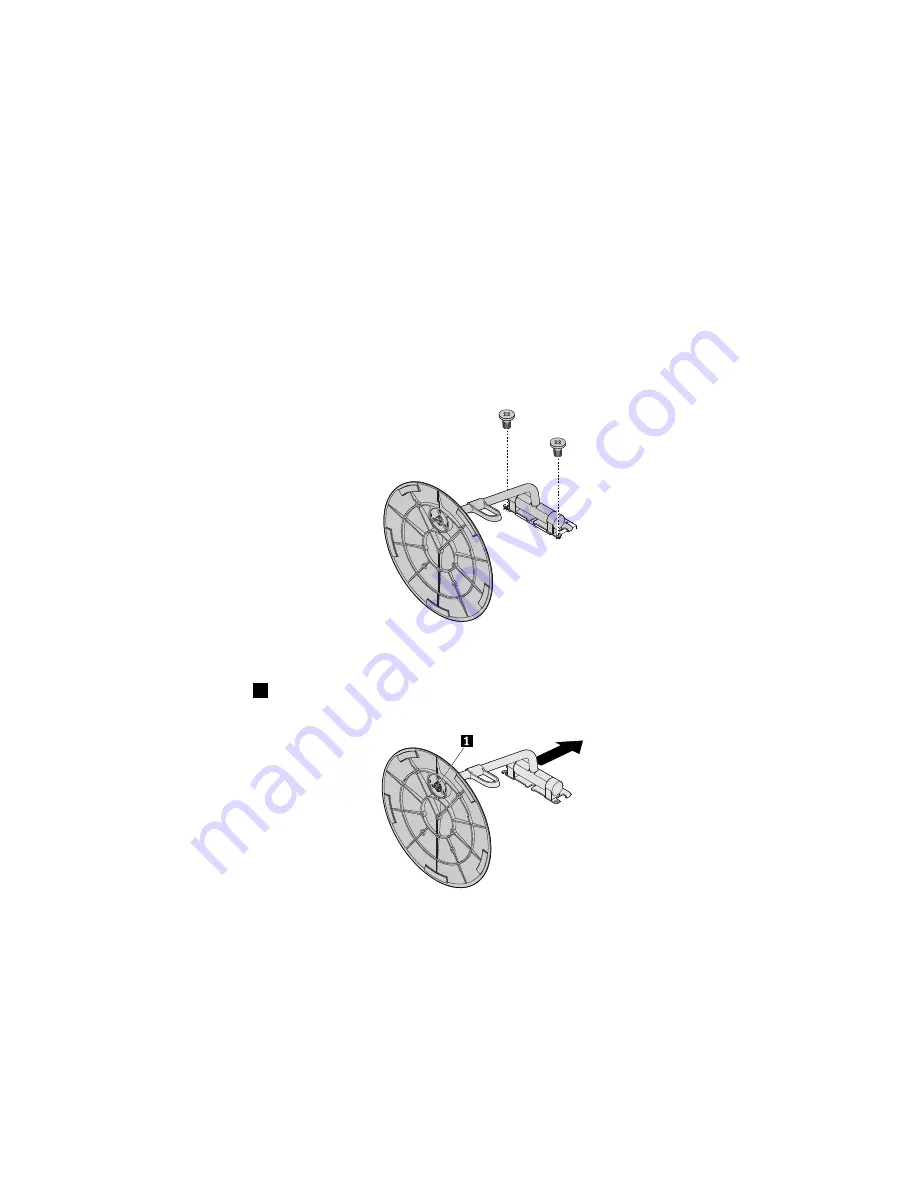
5. Remove the two screws that secure the Orchid Tilt Stand to remove it from the computer.
Figure 16. Removing the Orchid Tilt Stand
6. Rotate the screw
1
that secures the Orchid Tilt Stand base to remove it from the Orchid Tilt Stand.
Figure 17. Removing the Orchid Tilt Stand base
Chapter 7
.
Installing or replacing hardware
53
Summary of Contents for thinkcentre x1
Page 1: ...ThinkCentre X1 User Guide Machine Types 10HT 10HU 10JX 10JY 10JW 10K0 10KE and 10KF ...
Page 10: ...viii ThinkCentre X1 User Guide ...
Page 26: ...16 ThinkCentre X1 User Guide ...
Page 34: ...24 ThinkCentre X1 User Guide ...
Page 44: ...34 ThinkCentre X1 User Guide ...
Page 66: ...56 ThinkCentre X1 User Guide ...
Page 70: ...60 ThinkCentre X1 User Guide ...
Page 74: ...64 ThinkCentre X1 User Guide ...
Page 78: ...68 ThinkCentre X1 User Guide ...
Page 80: ...China RoHS 70 ThinkCentre X1 User Guide ...
Page 81: ...Appendix D China Energy Label Copyright Lenovo 2016 71 ...
Page 82: ...72 ThinkCentre X1 User Guide ...
Page 84: ...74 ThinkCentre X1 User Guide ...
Page 87: ......
Page 88: ......