


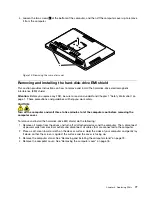


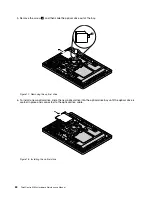


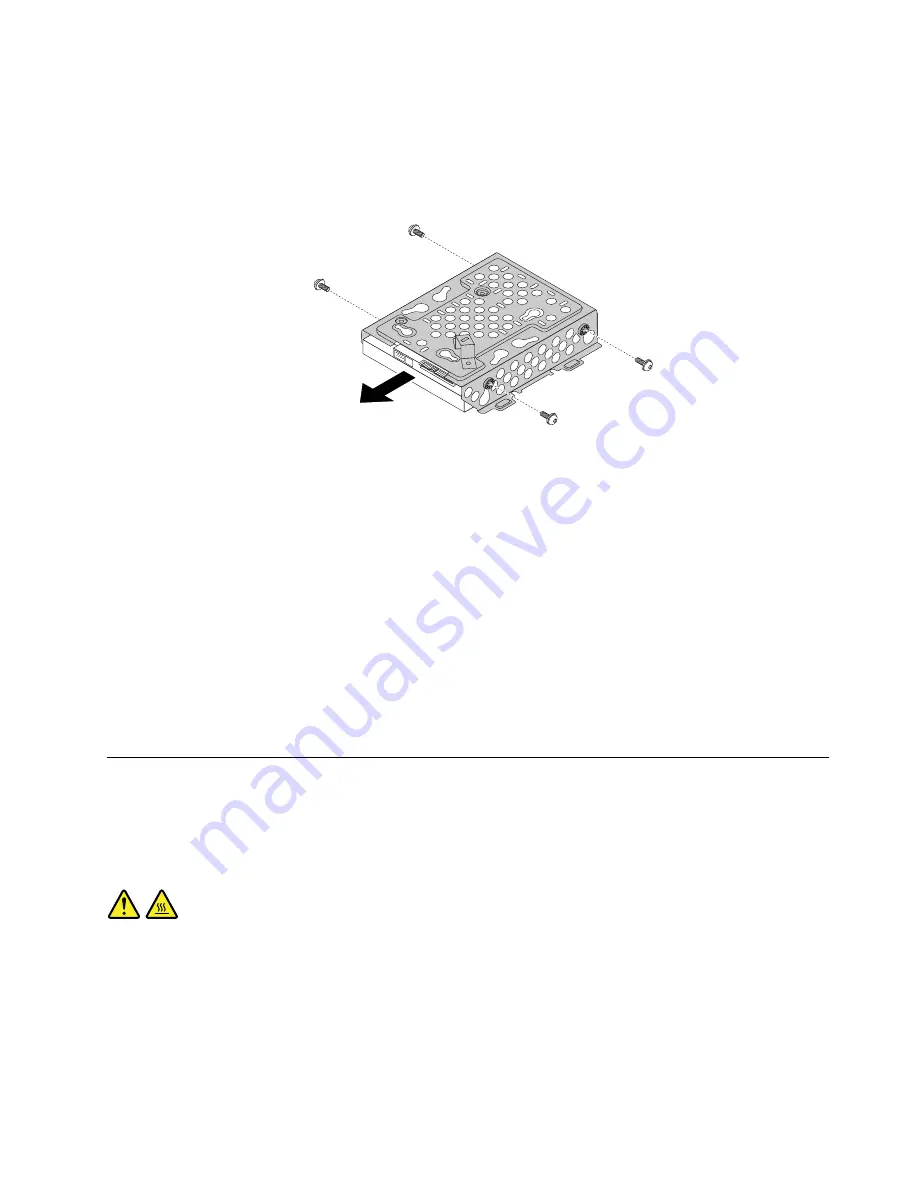
8. Remove the four screws that secure the hard disk drive to the bracket, and then remove the hard disk
drive from the bracket. Do not touch the circuit board on the bottom of the hard disk drive.
Figure 14. Removing the hard disk drive from the bracket
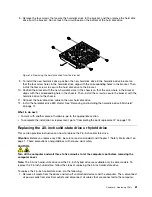
9. To install the new hard disk drive, position the new hard disk drive in the hard-disk-drive bracket so
that the four screw holes in the hard disk drive align with the corresponding holes in the bracket. Then,
install the four screws to secure the hard disk drive to the bracket.
10. Position the bracket with the new hard disk drive in the chassis so that the screw hole in the bracket
aligns with the corresponding hole in the chassis. Then, install the screw to secure the bracket with the
hard disk drive to the chassis.
11. Connect the hard-disk-drive cable to the new hard disk drive.
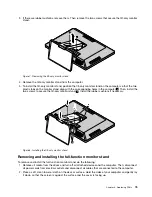
12. Install the hard-disk-drive EMI shield. See “Removing and installing the hard-disk-drive EMI shield”
on page 77.
What to do next:
• To work with another piece of hardware, go to the appropriate section.
• To complete the installation or replacement, go to “Completing the parts replacement” on page 119.
Replacing the 2.5-inch solid-state drive or hybrid drive
This section provides instructions on how to replace the 2.5-inch solid-state drive.
Attention:
Before you replace any FRU, be sure to read and understand Chapter 1 “Safety information” on
page 1. These precautions and guidelines will help you work safely.
CAUTION:
Turn off the computer and wait three to five minutes to let the computer cool before removing the
computer cover.
Note:
The 2.5-inch solid-state drive and the 2.5-inch hybrid drive are available only in some models. To
replace the 2.5-inch hybrid drive, follow the steps of replacing the 2.5-inch solid-state drive.
To replace the 2.5-inch solid-state drive, do the following:
1. Remove all media from the drives and turn off all attached devices and the computer. Then, disconnect
all power cords from electrical outlets and disconnect all cables that are connected to the computer.
Chapter 8
.
Replacing FRUs
81
Summary of Contents for ThinkCentre M83z
Page 1: ...ThinkCentre M83z Hardware Maintenance Manual Machine Types 10C2 and 10C3 ...
Page 6: ......
Page 13: ...Chapter 1 Safety information 7 ...
Page 17: ...Chapter 1 Safety information 11 ...
Page 18: ...1 2 12 ThinkCentre M83z Hardware Maintenance Manual ...
Page 19: ...1 2 Chapter 1 Safety information 13 ...
Page 24: ...1 2 18 ThinkCentre M83z Hardware Maintenance Manual ...
Page 25: ...1 2 Chapter 1 Safety information 19 ...
Page 28: ...22 ThinkCentre M83z Hardware Maintenance Manual ...
Page 32: ...26 ThinkCentre M83z Hardware Maintenance Manual ...
Page 58: ...52 ThinkCentre M83z Hardware Maintenance Manual ...
Page 64: ...58 ThinkCentre M83z Hardware Maintenance Manual ...
Page 70: ...64 ThinkCentre M83z Hardware Maintenance Manual ...
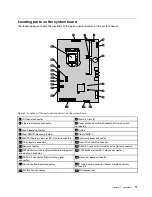
Page 75: ...Figure 3 Locating major FRUs and CRUs Chapter 7 Locations 69 ...
Page 78: ...72 ThinkCentre M83z Hardware Maintenance Manual ...
Page 126: ...120 ThinkCentre M83z Hardware Maintenance Manual ...
Page 136: ...130 ThinkCentre M83z Hardware Maintenance Manual ...
Page 137: ......
Page 138: ......


