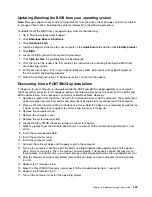
Updating (flashing) the BIOS from a disc
This section provides instructions on how to update (flash) the BIOS from a disc on the Windows 8.1 (64-bit)
operating system and on other operating systems.
Note:
You can download a self-starting bootable disc image (known as an ISO image) with the system
program updates to create a system-program-update disc. Go to http://www.lenovo.com/support.
To update (flash) the BIOS from a disc on the Windows 8.1 (64-bit) operating system, do the following:
1. Start the Setup Utility program. See “Starting the Setup Utility program” on page 53.
2. From the Setup Utility program main menu, select
Exit
➙
OS Optimized Default
➙
Disabled
.
3. Select
Yes
in the window displayed and press Enter to confirm your selection.
4. Press F10 to save changes and exit the Setup Utility program. See “Exiting the Setup Utility program”
on page 57.
5. Repeatedly press and release F12 when turning on the computer. When the Startup Device Menu
window opens, release F12.
6. From the Startup Device Menu window, select the desired optical drive as the startup device. Then,
insert the disc into this optical drive and press Enter. The update begins.
7. When prompted to change the serial number, it is suggested that you do not make this change by
pressing N. However, if you do want to change the serial number, press Y, and then type in the serial
number and press Enter.
8. When prompted to change the machine type and model, it is suggested that you do not make this
change by pressing N. However, if you do want to change the machine type and model, press Y, and
then type in the machine type and model and press Enter.
9. Follow the instructions on the screen to complete the update. After the update is completed, remove the
disc from the optical drive.
10. Restart your computer and start the Setup Utility program. See “Starting the Setup Utility program”
on page 53.
11. From the Setup Utility program main menu, select
Exit
➙
OS Optimized Default
➙
Enabled
.
12. Select
Yes
in the window displayed and press Enter to confirm your selection.
13. Press F10 to save changes and exit the Setup Utility program. See “Exiting the Setup Utility program”
on page 57.
To update (flash) the BIOS from a disc on other operating systems, do the following:
1. Turn off your computer.
2. Repeatedly press and release F12 when turning on the computer. When the Startup Device Menu
window opens, release F12.
3. From the Startup Device Menu window, select the desired optical drive as the startup device. Then,
insert the disc into this optical drive and press Enter. The update begins.
4. When prompted to change the serial number, it is suggested that you do not make this change by
pressing N. However, if you do want to change the serial number, press Y, and then type in the serial
number and press Enter.
5. When prompted to change the machine type and model, it is suggested that you do not make this
change by pressing N. However, if you do want to change the machine type and model, press Y, and
then type in the machine type and model and press Enter.
6. Follow the instructions on the screen to complete the update. After the update is completed, remove the
disc from the optical drive.
122
ThinkCentre M83z Hardware Maintenance Manual
Summary of Contents for ThinkCentre M83z
Page 1: ...ThinkCentre M83z Hardware Maintenance Manual Machine Types 10C2 and 10C3 ...
Page 6: ......
Page 13: ...Chapter 1 Safety information 7 ...
Page 17: ...Chapter 1 Safety information 11 ...
Page 18: ...1 2 12 ThinkCentre M83z Hardware Maintenance Manual ...
Page 19: ...1 2 Chapter 1 Safety information 13 ...
Page 24: ...1 2 18 ThinkCentre M83z Hardware Maintenance Manual ...
Page 25: ...1 2 Chapter 1 Safety information 19 ...
Page 28: ...22 ThinkCentre M83z Hardware Maintenance Manual ...
Page 32: ...26 ThinkCentre M83z Hardware Maintenance Manual ...
Page 58: ...52 ThinkCentre M83z Hardware Maintenance Manual ...
Page 64: ...58 ThinkCentre M83z Hardware Maintenance Manual ...
Page 70: ...64 ThinkCentre M83z Hardware Maintenance Manual ...
Page 75: ...Figure 3 Locating major FRUs and CRUs Chapter 7 Locations 69 ...
Page 78: ...72 ThinkCentre M83z Hardware Maintenance Manual ...
Page 126: ...120 ThinkCentre M83z Hardware Maintenance Manual ...
Page 136: ...130 ThinkCentre M83z Hardware Maintenance Manual ...
Page 137: ......
Page 138: ......

