


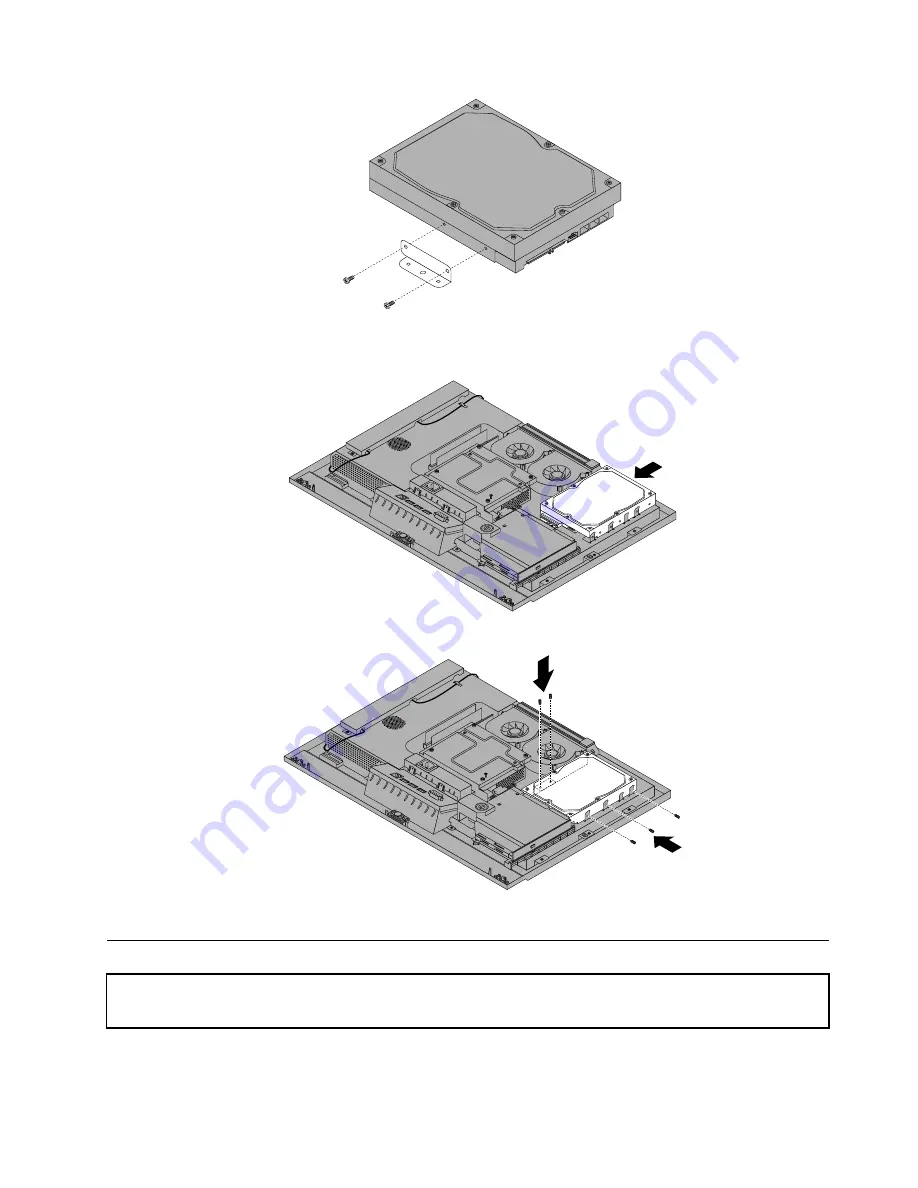
6. Align the hard disk drive in the drive bay and connect the hard disk drive to the cable connector.
7. Gently push the hard disk drive assembly into the bay until the hard disk drive stops.
8. Install the five screws to secure the hard disk drive to the chassis.
9. Go to “Completing the FRU installation” on page 107.
Replacing the optical drive
Attention:
Do not open your computer or attempt any repair before reading and understanding the “Important Safety
Information” on page 1.
This section provides instructions on how to replace the optical drive.
Chapter 9
.
Replacing FRUs
79
Summary of Contents for ThinkCentre M62z
Page 1: ...ThinkCentre Hardware Maintenance Manual Machine Types 5106 5110 5114 and 5150 ...
Page 2: ......
Page 3: ...ThinkCentre Hardware Maintenance Manual Machine Types 5106 5110 5114 and 5150 ...
Page 8: ...2 ThinkCentre Hardware Maintenance Manual ...
Page 15: ...Chapter 2 Safety information 9 ...
Page 19: ...Chapter 2 Safety information 13 ...
Page 20: ...1 2 14 ThinkCentre Hardware Maintenance Manual ...
Page 21: ...Chapter 2 Safety information 15 ...
Page 27: ...Chapter 2 Safety information 21 ...
Page 31: ...Chapter 2 Safety information 25 ...
Page 38: ...32 ThinkCentre Hardware Maintenance Manual ...
Page 64: ...58 ThinkCentre Hardware Maintenance Manual ...
Page 70: ...64 ThinkCentre Hardware Maintenance Manual ...
Page 76: ...70 ThinkCentre Hardware Maintenance Manual ...
Page 116: ...110 ThinkCentre Hardware Maintenance Manual ...
Page 120: ...114 ThinkCentre Hardware Maintenance Manual ...
Page 125: ......
Page 126: ......


