
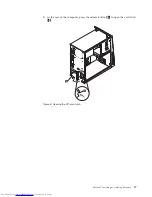


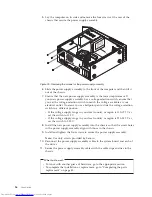


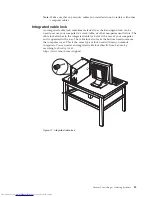
5.
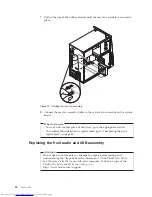
Press the blue release tab
1
down, slide the hard disk drive cage
2
to the
rear of the computer, and then pivot it outward.
6.
Remove the hard disk drive cage from the chassis by sliding it outward.
7.
Pull on the blue handle
3
to release and remove the hard disk drive from
the drive cage.
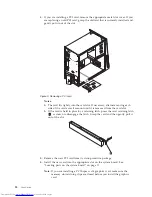
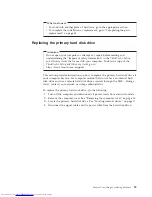
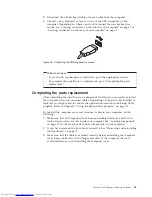
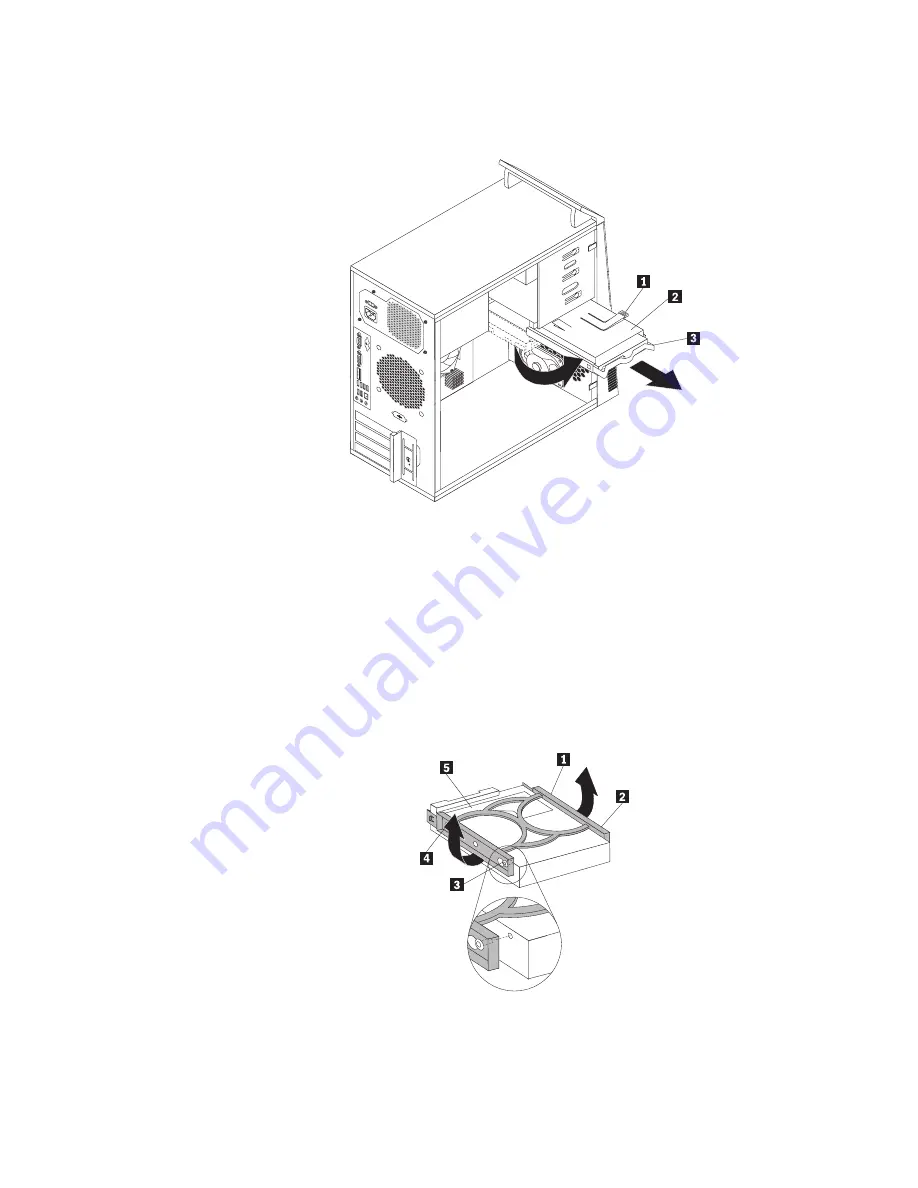
8.
Flex the sides of the blue bracket to remove the hard disk drive from the
bracket.
9.
To install a new hard disk drive into the blue bracket, flex the bracket and
align pin
1
, pin
2
, pin
3
, and pin
4
on the bracket with the
corresponding holes in the hard disk drive. Do not touch the circuit board
5
on the bottom of the hard disk drive.
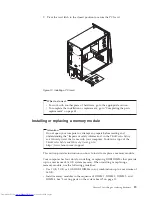
10.
Slide the new hard disk drive into the drive cage until it snaps into position.
Figure 22. Removing the primary hard disk drive
Figure 23. Installing the hard disk drive into the bracket
30
User Guide
Summary of Contents for ThinkCentre 3349
Page 2: ......
Page 3: ...ThinkCentre User Guide ...
Page 6: ...European conformance CE mark 76 Trademarks 76 Index 77 iv User Guide ...
Page 8: ...vi User Guide ...
Page 56: ...48 User Guide ...
Page 72: ...64 User Guide ...
Page 82: ...74 User Guide ...
Page 88: ...80 User Guide ...
Page 89: ......
Page 90: ...Part Number 71Y7146 Printed in USA 1P P N 71Y7146 ...