


2. Remove the computer cover. See “Removing the computer cover” on page 13.
3. Remove the front bezel. See “Removing and reinstalling the front bezel” on page 14.
4. Locate the hard disk drive that you want to replace.
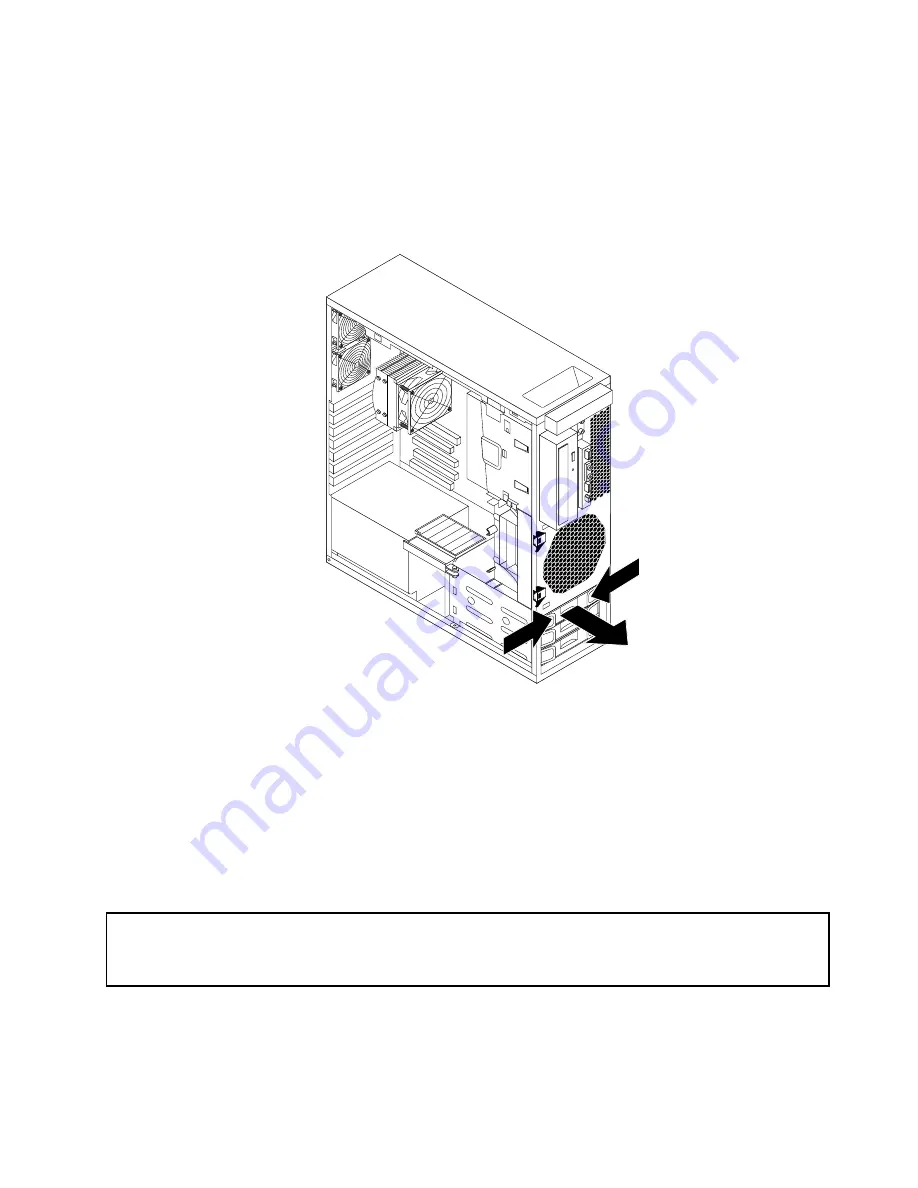
5. Disconnect the signal cable and the power cable from the rear of the hard disk drive. Press the two
tabs of the hard disk drive bracket toward each other, and then pull the bracket outward to remove the
hard disk drive with the bracket from the chassis.
Figure 23. Removing the hard disk drive
6. Remove the failing hard disk drive from the bracket by flexing the bracket.
7. To install a new hard disk drive, go to “Installing a new hard disk drive” on page 23.
What to do next:
• To work with another piece of hardware, go to the appropriate section.
• To complete the installation or replacement, go to “Completing the parts replacement” on page 37.
Replacing the optical drive
Attention:
Do not open your computer or attempt any repair before reading and understanding the “Important safety
information” in the
ThinkStation Safety and Warranty Guide
that came with your computer. To obtain a copy of the
ThinkStation Safety and Warranty Guide
, go to:
http://support.lenovo.com
This section provides instructions on how to replace the optical drive.
To replace the optical drive, do the following:
Chapter 2
.
Installing or replacing hardware
27
Summary of Contents for THINK STATION 4262
Page 1: ...ThinkStation User Guide Machine Types 4262 4263 4264 4265 4266 4269 4271 and 4272 ...
Page 6: ...iv ThinkStation User Guide ...
Page 18: ...16 SATA connectors 4 33 Microprocessor 1 17 Battery 12 ThinkStation User Guide ...
Page 54: ...48 ThinkStation User Guide ...
Page 66: ...60 ThinkStation User Guide ...
Page 84: ...78 ThinkStation User Guide ...
Page 85: ......