
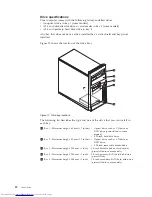
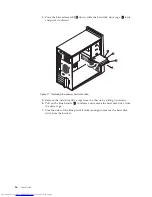


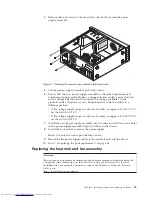
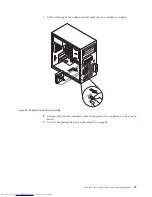

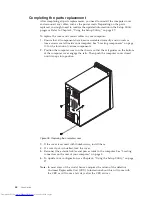


4.
Remove
the
four
screws
at
the
rear
of
the
chassis
that
secure
the
power
supply
assembly.
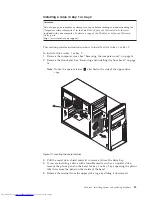
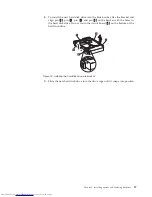
5.
Lift
the
power
supply
assembly
out
of
the
chassis.
6.
Ensure
that
the
new
power
supply
assembly
is
the
correct
replacement.
If
your
power
supply
assembly
has
a
voltage-selection
switch,
ensure
that
you
set
the
voltage-selection
switch
to
match
the
voltage
available
at
your
electrical
outlet.
If
necessary,
use
a
ballpoint
pen
to
slide
the
switch
to
a
different
position.
v
If
the
voltage
supply
range
in
your
local
country
or
region
is
100–127
V
AC,
set
the
switch
to
115
V.
v
If
the
voltage
supply
range
in
your
local
country
or
region
is
200–240
V
AC,
set
the
switch
to
230
V.
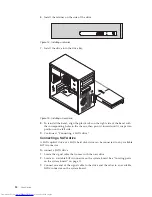
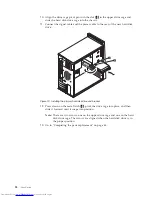
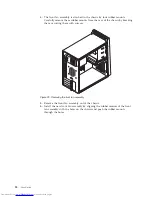
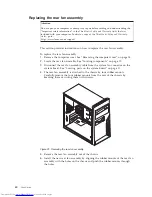
7.
Install
the
new
power
supply
assembly
into
the
chassis
so
that
the
screw
holes
in
the
power
supply
assembly
align
with
those
in
the
chassis.
8.
Install
the
four
screws
to
secure
the
power
supply.
Note:
Use
only
the
screws
provided
by
Lenovo.
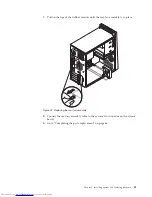
9.
Reconnect
the
power
supply
cables
to
the
system
board
and
the
drives.
10.
Go
to
“Completing
the
parts
replacement”
on
page
44.
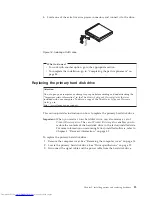
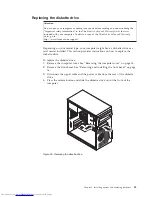
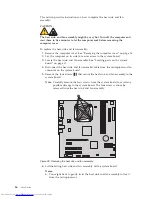
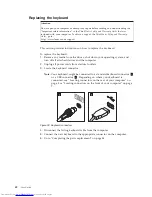
Replacing
the
heat
sink
and
fan
assembly
Attention
Do
not
open
your
computer
or
attempt
any
repair
before
reading
and
understanding
the
“Important
safety
information”
in
the
ThinkCentre
Safety
and
Warranty
Guide
that
was
included
with
your
computer.
To
obtain
a
copy
of
the
ThinkCentre
Safety
and
Warranty
Guide
,
go
to:
http://www.lenovo.com/support
Figure
27.
Removing
the
power
supply
assembly
retaining
screws
Chapter
2.
Installing
options
and
replacing
hardware
35
Summary of Contents for 7268D1U
Page 1: ......
Page 2: ......
Page 3: ...ThinkCentre User Guide ...
Page 6: ...iv User Guide ...
Page 8: ...vi User Guide ...
Page 20: ...12 User Guide ...
Page 56: ...48 User Guide ...
Page 64: ...56 User Guide ...
Page 72: ...64 User Guide ...
Page 78: ...11 Reconnect the mouse cable to the computer 12 Turn your computer back on 70 User Guide ...
Page 88: ...80 User Guide ...
Page 89: ......
Page 90: ...Part Number 53Y6337 Printed in USA 1P P N 53Y6337 ...


