1. Prepare your computer. See “Preparing your computer and removing the computer cover” on page 61.
2. Locate the secondary storage drive. See “Computer components” on page 5.
3. To remove the secondary storage drive, do the following:
a. Disconnect the signal cable and the power cable from the storage drive.
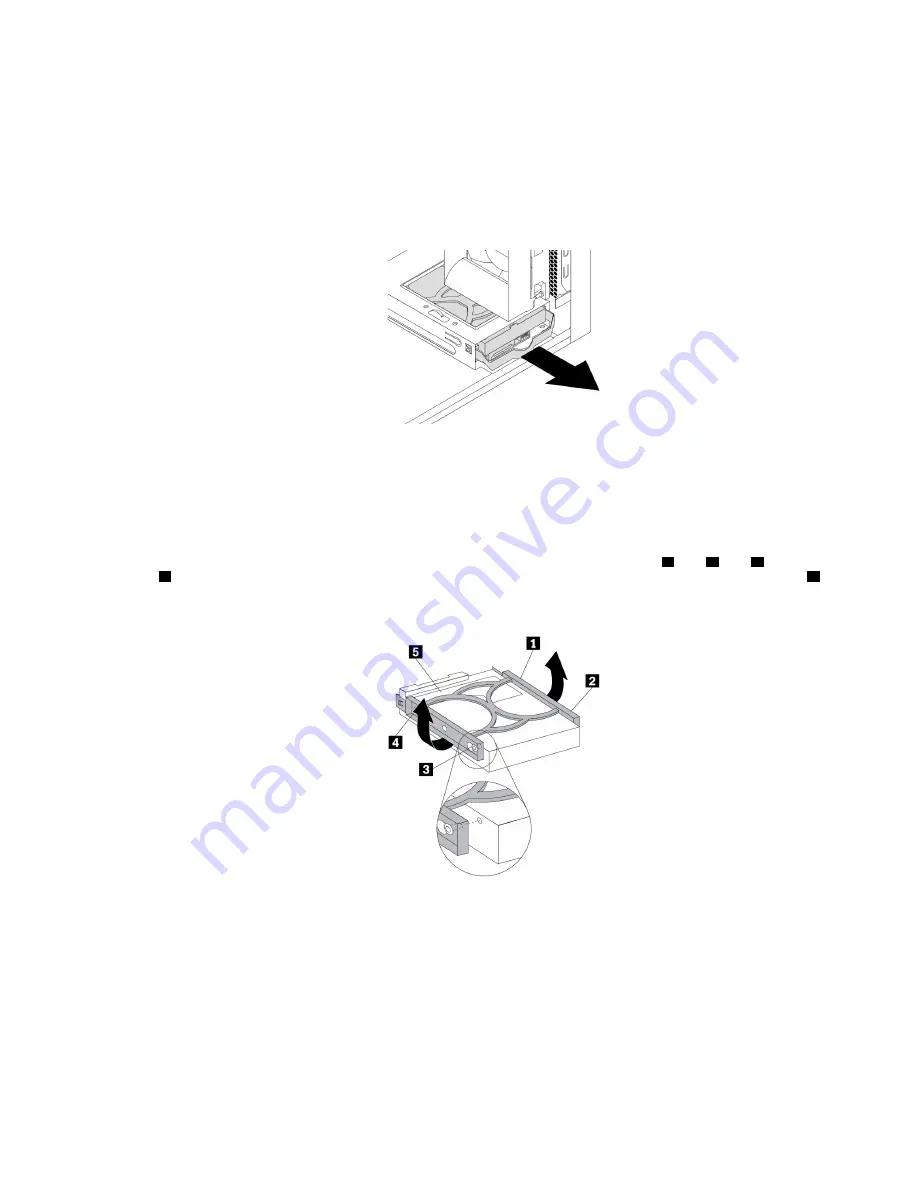
b. Pull the handle of the plastic 3.5-inch storage-drive bracket to remove the storage drive from the
storage drive bay.
Figure 81. Removing the secondary storage drive
c. Flex the sides of the bracket to remove the storage drive from the bracket.
4. To install the secondary storage drive, do the following:
a. Pull the handle of the plastic 3.5-inch storage-drive bracket to remove it from the storage drive bay.
b. To install a new storage drive into the bracket, flex the bracket and align pin
1
, pin
2
, pin
3
, and pin
4
on the bracket with the corresponding holes in the storage drive. Do not touch the circuit board
5
on the bottom of the storage drive.
Figure 82. Installing the storage drive into the bracket
Hardware removal and installation
101
Summary of Contents for 30BX
Page 1: ...P520c User Guide Machine Types 30BY 30BX and 30C0 ...
Page 5: ...Appendix H Trademarks 133 Copyright Lenovo 2017 iii ...
Page 6: ...iv P520c User Guide ...
Page 14: ...xii P520c User Guide ...
Page 30: ...16 P520c User Guide ...
Page 42: ...28 P520c User Guide ...
Page 48: ...34 P520c User Guide ...
Page 62: ...48 P520c User Guide ...
Page 124: ...110 P520c User Guide ...
Page 128: ...114 P520c User Guide ...
Page 130: ...116 P520c User Guide ...
Page 132: ...118 P520c User Guide ...
Page 140: ...126 P520c User Guide ...
Page 144: ...4 Follow the instructions on the screen 130 P520c User Guide ...
Page 146: ...132 P520c User Guide ...
Page 148: ...134 P520c User Guide ...
Page 149: ......
Page 150: ......


