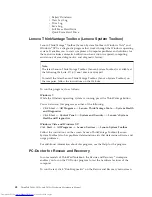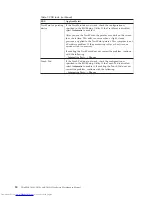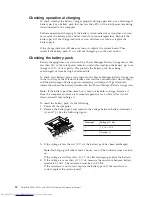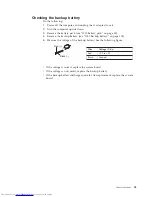
5.
Read the license. If you agree with the terms and conditions, select
I accept
these terms and conditions
and then click
Next
. If you do not agree with the
terms and conditions, follow the instructions on the screen.
6.
Click
Yes
in the displayed window to begin the operating system recovery
process.
7.
Insert the
Applications and Drivers Recovery Disc
when prompted and then click
OK
to begin the applications and drivers recovery process.
8.
If you have a
Supplemental Recovery Disc
, insert it when prompted and click
Yes
. If you do not have a
Supplemental Recovery Disc
, click
No
.
9.
When all of the data has been copied from the last disc in the set and has
been processed, remove the disc and restart the computer.
Note:
The rest of the recovery process is fully automated and no action is
required by you. The computer will restart into the Microsoft Windows
desktop several times and you might experience periods when no activity is
apparent on the screen for several minutes at a time. This is normal.
10.
When the recovery process is complete, the Set Up Windows screen is
displayed. Follow the instructions on the screen to complete the Windows
setup.
11.
After you have completed the Windows setup, you might want to restore the
original startup sequence. Start the Setup Utility program and then press F9 to
restore the default settings. Press F10 to save and exit the Setup Utility.
Note:
After restoring a drive to the factory default settings, you might need to
reinstall some device drivers.
Passwords
As many as three passwords may be needed for any ThinkPad Notebook: the
power-on password (POP), the hard-disk password (HDP), and the supervisor
password (SVP).
If any of these passwords has been set, a prompt for it appears on the screen
whenever the computer is turned on. The computer does not start until the
password is entered.
Exception:
If only an SVP is installed, the password prompt does not appear when
the operating system is booted.
Power-on password
A power-on password (POP) protects the system from being powered on by an
unauthorized person. The password must be entered before an operating system
can be booted. For how to remove the POP, see “How to remove the power-on
password” on page 58.
Hard-disk password
There are two hard-disk passwords (HDPs):
v
User HDP—for the user
v
Master HDP—for the system administrator, who can use it to get access to the
hard disk even if the user has changed the user HDP
Related service information
57
Summary of Contents for 2808C5U
Page 1: ...ThinkPad T400s T410s and T410si Hardware Maintenance Manual ...
Page 2: ......
Page 3: ...ThinkPad T400s T410s and T410si Hardware Maintenance Manual ...
Page 8: ...vi ThinkPad T400s T410s and T410si Hardware Maintenance Manual ...
Page 18: ...10 ThinkPad T400s T410s and T410si Hardware Maintenance Manual ...
Page 19: ...Safety information 11 ...
Page 26: ...18 ThinkPad T400s T410s and T410si Hardware Maintenance Manual ...
Page 27: ...Safety information 19 ...
Page 28: ...20 ThinkPad T400s T410s and T410si Hardware Maintenance Manual ...
Page 29: ...Safety information 21 ...
Page 30: ...22 ThinkPad T400s T410s and T410si Hardware Maintenance Manual ...
Page 31: ...Safety information 23 ...
Page 34: ...26 ThinkPad T400s T410s and T410si Hardware Maintenance Manual ...
Page 35: ...Safety information 27 ...
Page 37: ...Safety information 29 ...
Page 41: ...Safety information 33 ...
Page 42: ...34 ThinkPad T400s T410s and T410si Hardware Maintenance Manual ...
Page 43: ...Safety information 35 ...
Page 45: ...Safety information 37 ...
Page 46: ...38 ThinkPad T400s T410s and T410si Hardware Maintenance Manual ...
Page 62: ...54 ThinkPad T400s T410s and T410si Hardware Maintenance Manual ...
Page 78: ...70 ThinkPad T400s T410s and T410si Hardware Maintenance Manual ...
Page 82: ...74 ThinkPad T400s T410s and T410si Hardware Maintenance Manual ...
Page 86: ...78 ThinkPad T400s T410s and T410si Hardware Maintenance Manual ...
Page 90: ...82 ThinkPad T400s T410s and T410si Hardware Maintenance Manual ...
Page 127: ...Table 24 Removal steps of LCD unit continued 7 7 Removing and replacing a FRU 119 ...
Page 158: ...150 ThinkPad T400s T410s and T410si Hardware Maintenance Manual ...
Page 215: ......


